EN
 PL
 ES


Baseboards and Cornices in SketchUp in a Few Clicks
Anyone who has modeled baseboards or ceiling cornices in SketchUp knows this scenario. You draw the profile next to the model, rotate it, set it perpendicular to the path, click Follow Me and you get the molding flipped to the other side, gaps at the corners, or blue faces on the outside. With several rooms in the project, baseboards alone can take half a day.
Magic Molding FREE does it for you. You select edges, choose a profile, set the dimensions and how the molding should fit against the wall, and the plugin generates correctly oriented 3D geometry. You get a solid object that you can further edit, paint with materials, and render.
The FREE version is free, including for commercial projects. It has the same generation engine as the PRO version, live preview, and one profile from each category of moldings.
What You’ll Find in the Profile Library
In the FREE version you have one profile from each category and a set of basic shapes. You can scale each profile vertically and horizontally, rotate it, mirror it, and shift it relative to the path, so you can get many variants from a single design. You see profiles in the panel as thumbnails with section drawings.
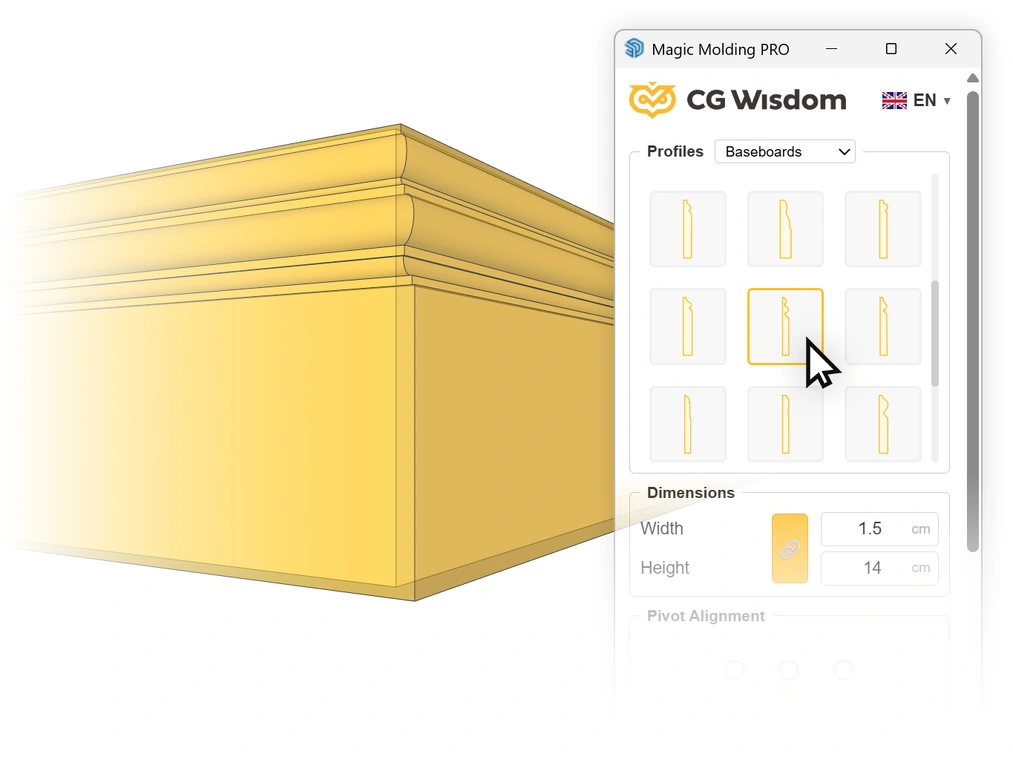
Baseboard
A baseboard is the most commonly used element in interior design. A single molding can change the character of a room, and the difference between modern and classic interiors is often just a matter of baseboard choice.
Ceiling Cornice
A cornice is the most difficult detail to model by hand. Recreating a profile with concave and convex curves takes several minutes of drawing, whereas in Magic Molding you select it with one click and immediately follow the wall–ceiling junction.
Wall Molding
It’s useful for wall frames, panel divisions, and trim around doors and windows. The plugin supports closed loops, so you just draw a rectangle on the wall to get a ready-made frame with mitered corners.
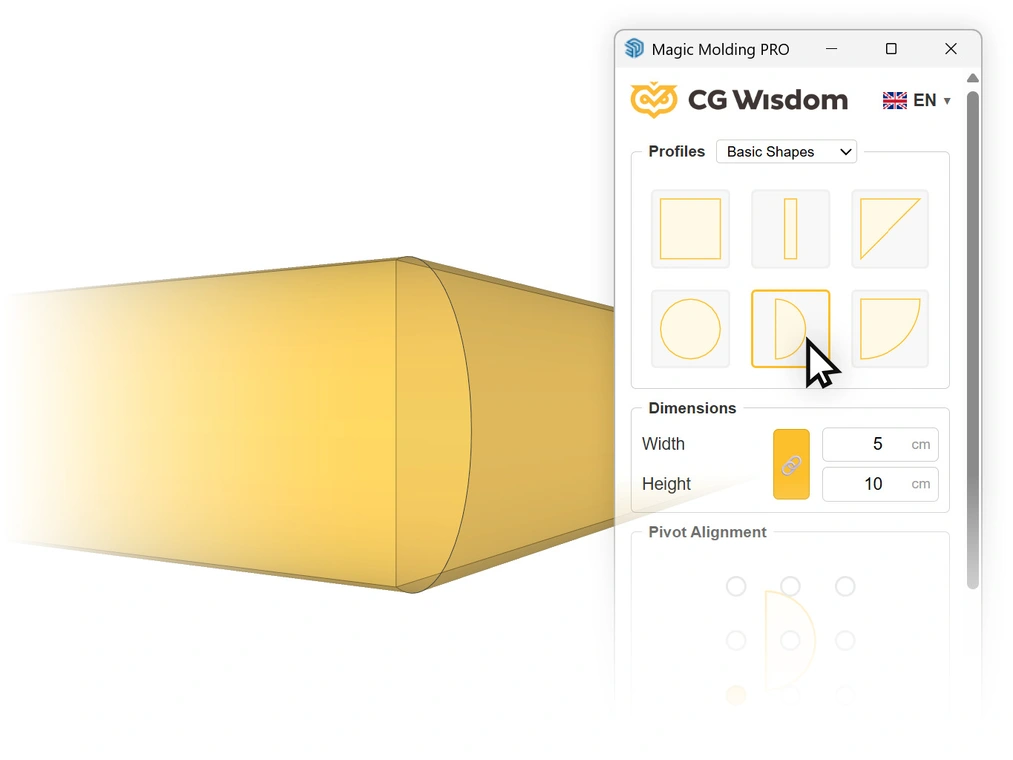
Basic Shapes
Square, rectangle, triangle, circle, and semicircle. A rectangle can serve as a cover molding or flat baseboard, a circle creates a round rod or pipe along any path, and a triangle works as chamfering or a threshold strip.
Anchor Point: How the Molding Sits on the Wall
Instead of guessing where the profile will land, you choose one of nine anchor points. This determines which part of the section attaches to the selected edge.
- Bottom-left is the classic baseboard: the section sits on the floor and abuts the wall.
- Top-right fits a cornice into the wall–ceiling corner.
- Center positions a decorative profile on the axis of the guiding line, e.g., for wall frames.
You immediately see the selected point on the section drawing in the plugin panel, so you know the path’s direction before generating anything.
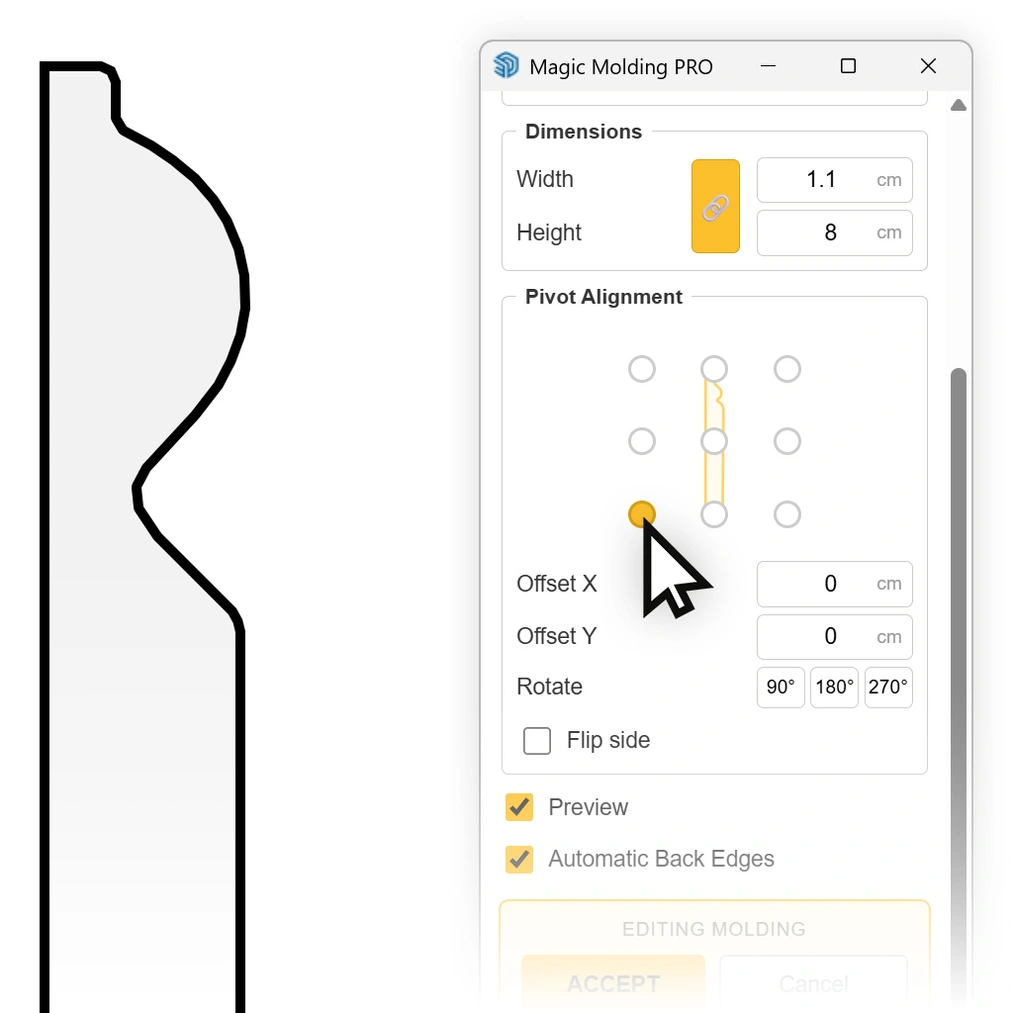
You also get precise adjustment:
- Vertical and horizontal offset by a specified value, e.g., plaster thickness or threshold height.
- Rotation by 90°, 180°, and 270°, allowing the same profile to serve as a baseboard one time and a cornice the next.
- Mirror flip, which with one click moves the profile to the other side of the path.
- Lock proportions: scale the profile proportionally or adjust height and width independently.
Live Preview Before Generation
After selecting edges, you see semi-transparent molding in the model that updates with every change to dimensions, anchor point, or rotation. You choose the baseboard height just as you would in reality by viewing the interior.
The preview doesn’t mix with your geometry, disappears when the window is closed, and leaves no traces in the undo history. When you’re satisfied, click GENERATE and you get a ready-made, named group.
Straight Walls, Arcs, and Entire Rooms at Once
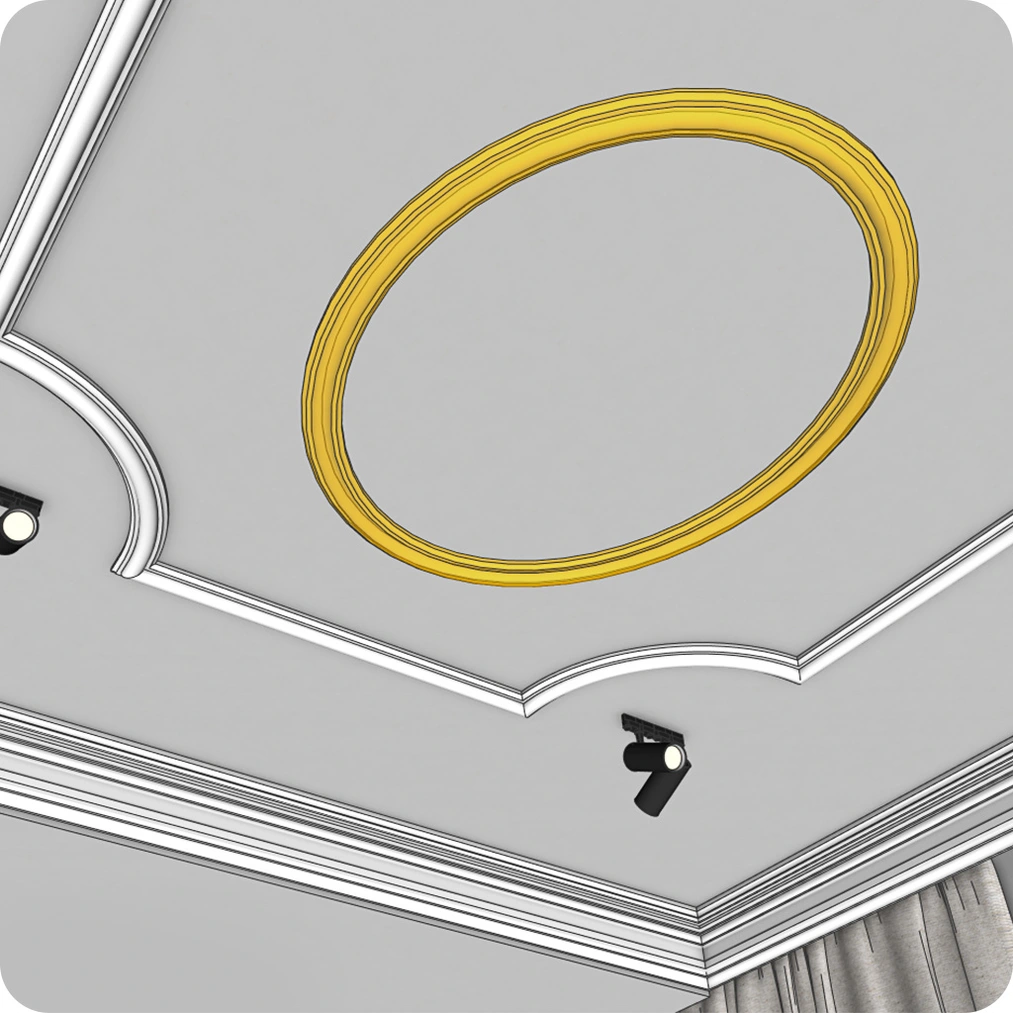
- Single walls and closed loops: select one edge or the entire room outline, and the plugin closes the loop and cuts the molding correctly at the junction.
- Arcs and curves: the plugin recognizes segments belonging to the same arc and smooths them automatically, leaving sharp edges where the curve transitions to a straight.
- Multiple paths at once: select edges in several rooms, and the plugin splits them into separate sequences and generates each as a separate group.
- Reverse path direction: if the profile is generated on the wrong side, right-click the edges and reverse the path direction.
The plugin itself ensures that white faces are on the outside, seals gaps that Follow Me leaves in corners, and positions the section perfectly perpendicular to the wall. You don’t have to clean that up manually anymore.
Hidden Edges at Hand
Edges under moldings are often invisible because they lie on the other side of the wall or are hidden by furniture. When the plugin window is open, holding Ctrl or Shift shows hidden edges and you can click them normally. Releasing the key returns the view to its normal state. You can disable this feature with one click if you prefer to work the old way.
Editing After Generation
The plugin remembers all settings and the path in the finished molding. Right-click the molding and choose Edit molding, and the panel opens with the parameters you used to create it. You can change the profile, height, anchor point, or even specify a new path. Cancel reverts to the previous version unchanged, which is very useful for client revisions that come weeks after the model is completed.
Tailored to Your Workflow
- Mm, cm, and inch units switchable in the menu, with automatic conversion of values entered in the panel. The plugin remembers your choice between sessions.
- Three languages: Polish, English, and Spanish. The plugin recognizes SketchUp’s language and you can switch manually with the flag in the corner of the window.
- Windows and macOS, panel as a SketchUp window which you can dock next to the model.
- Update notifications checked on each startup.
When You Need More: Magic Molding PRO
The FREE version is enough to add baseboards, cornices, and wall frames to your project. If you design a lot of classic interiors or work with specific manufacturer catalogs, the PRO version gives you:
- A complete profile library mirrored from real molding catalogs, from flat baseboards to elaborate palace cornices, plus quarter-round in basic shapes.
- Custom profiles: draw a section in SketchUp as a flat face, click “+” and it’s permanently in your library for every project.
- Save and load library so you can transfer your set of company profiles to another computer or share with your team.
- Texture mapping along moldings: wood grain follows the baseboard, runs through corners and smoothly handles curves.
- Priority technical support.
You can buy PRO on an annual or perpetual license. Details are available on the Magic Molding PRO page.
| FREE Version | PRO Version | |
|---|---|---|
| 3D Geometry Generation | ✓ | ✓ |
| Commercial License | ✓ | ✓ |
| Live Model Preview | ✓ | ✓ |
| Nine anchor points, offsets, rotation, and mirroring | ✓ | ✓ |
| Straight walls, closed loops, arcs, and multiple at once | ✓ | ✓ |
| Editing Generated Molding | ✓ | ✓ |
| Hidden Edges Preview via Key | ✓ | ✓ |
| Units mm / cm / in, 3 languages | ✓ | ✓ |
| Basic shapes (square, rectangle, triangle, circle, semicircle) | ✓ | ✓ + quarter-round |
| Profile library (baseboards, cornices, wall moldings) | Selected profiles (one from each category) |
Full library |
| Custom profiles (import section from model) | ✕ | ✓ |
| Save and load your profile library | ✕ | ✓ |
| Texture mapping along molding | ✕ | ✓ |
| Technical Support | Basic | Priority |
Download and Try on Your First Room
Architectural detail makes a huge difference in visualization. Baseboards, cornices, and wall frames immediately elevate the render, and with Magic Molding FREE you add them in the time it used to take to set up a section for Follow Me. Download the plugin, select the room outline and see how much time you save for actual designing.
Show Off Your Projects
We want to see how Magic Molding works in your projects. When you post visualizations on Instagram or Facebook, tag us: @cgwisdom.pl. We’ll share the most interesting works.