Publication date: 20-02-2025 | Update date: 20-02-2025 | Author: Adrian Szerszeń

-
Online courses
- All
 3ds Max
 AI - Artificial Intelligence
 Blender
 Corona renderer
 GstarCAD
 LayOut
 Photoshop
 Interior Design
 Revit
Revit Sketchup
 Stable Diffusion
 V-ray
V-ray
"Online courses" are comprehensive online training programs that will help you quickly master the software you are interested in.
- Plugins
- 3D Models
- Help
- Articles
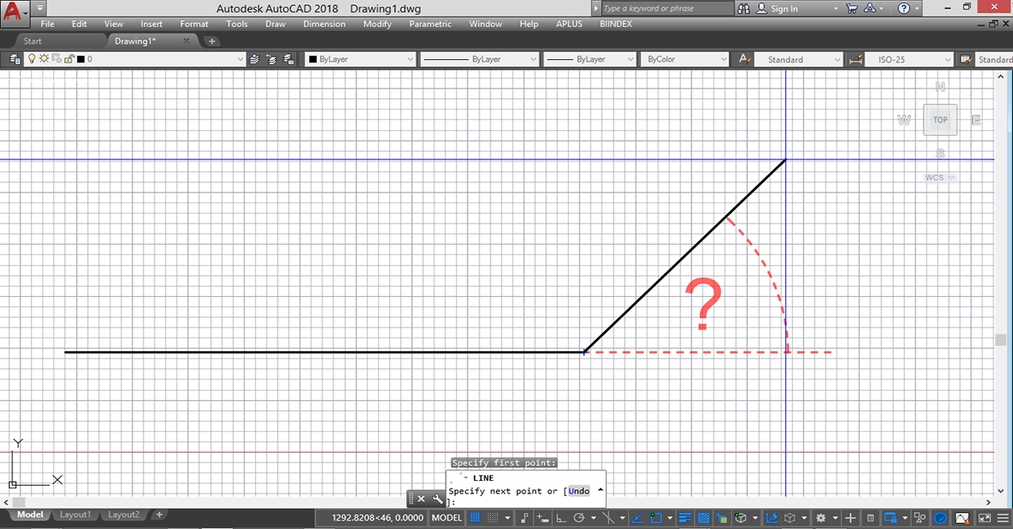
Autocad - How to Draw a Line at an Angle - Guide, Tutorial
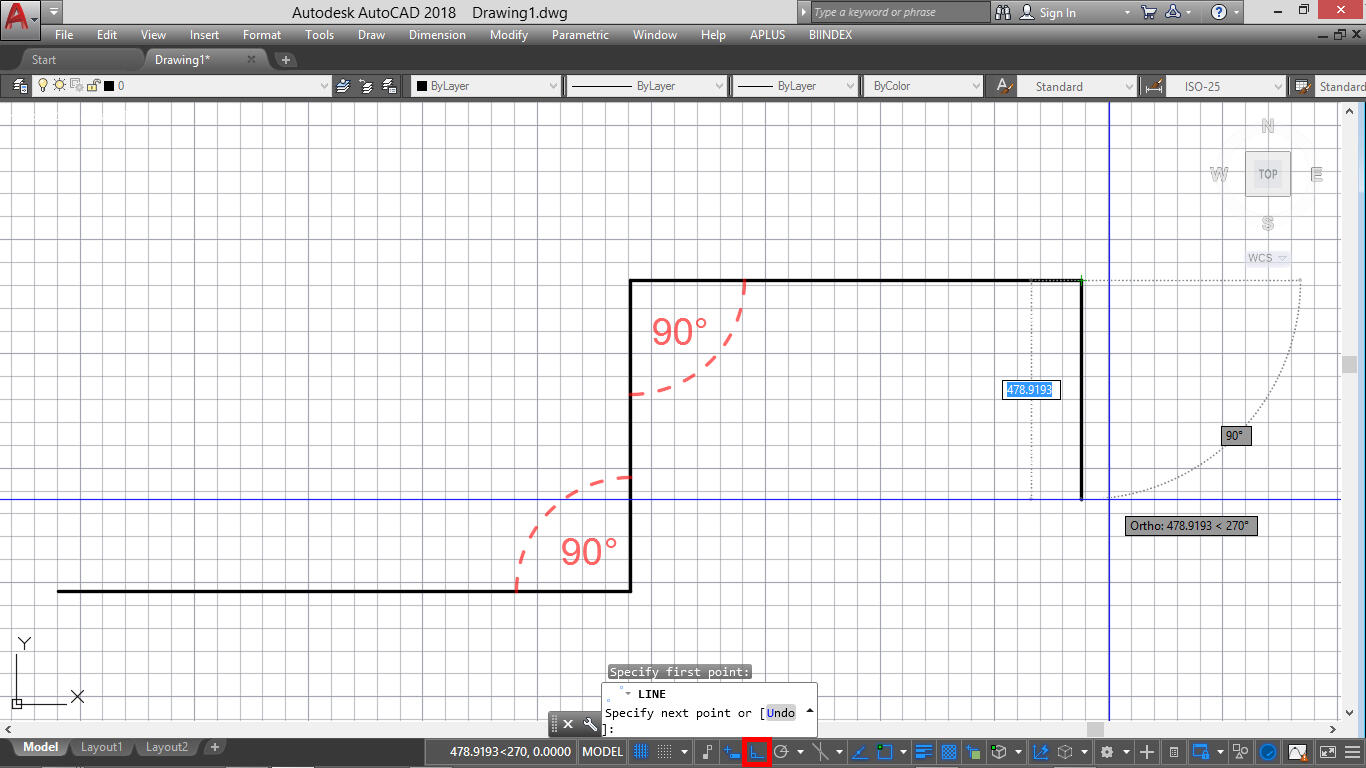
Line is a basic object in AutoCad, used to build most of the drawings. Depending on our needs, we can draw lines horizontally or vertically, as well as at a specified angle.
Drawing horizontal and vertical lines is enabled by the ortho mode, which can be activated using the keyboard shortcut F8 or by clicking on the corresponding icon on the drawing mode toolbar.
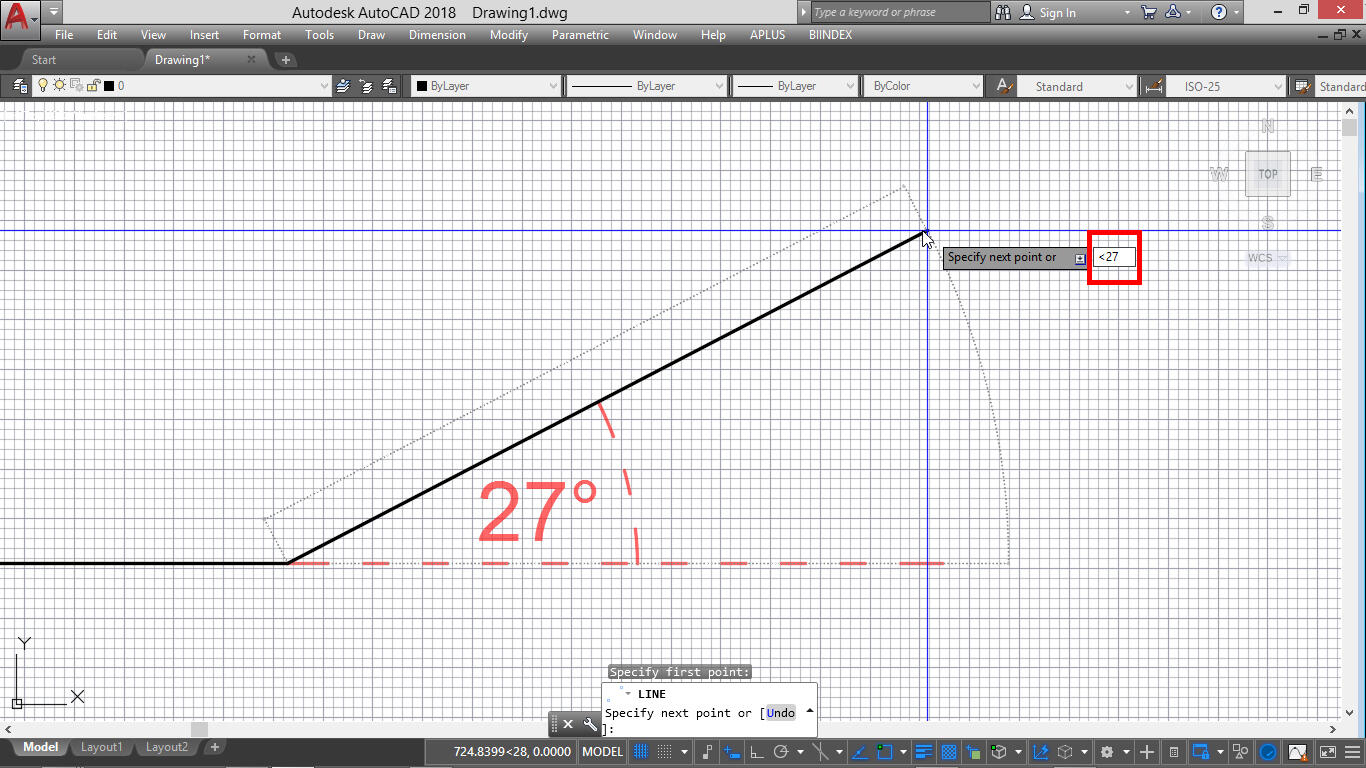
Autocad - Angle Bracket
When we need to draw lines at an angle, we have several options available. The first one is to use the angle bracket. After selecting the first point of the line, enter the value of the angle of interest, preceded by the left angle bracket. So, if I wanted to draw a line at an angle of 27°, I would enter the expression <27, then after pressing Enter or space, our movement will be limited only to the angle we provided.
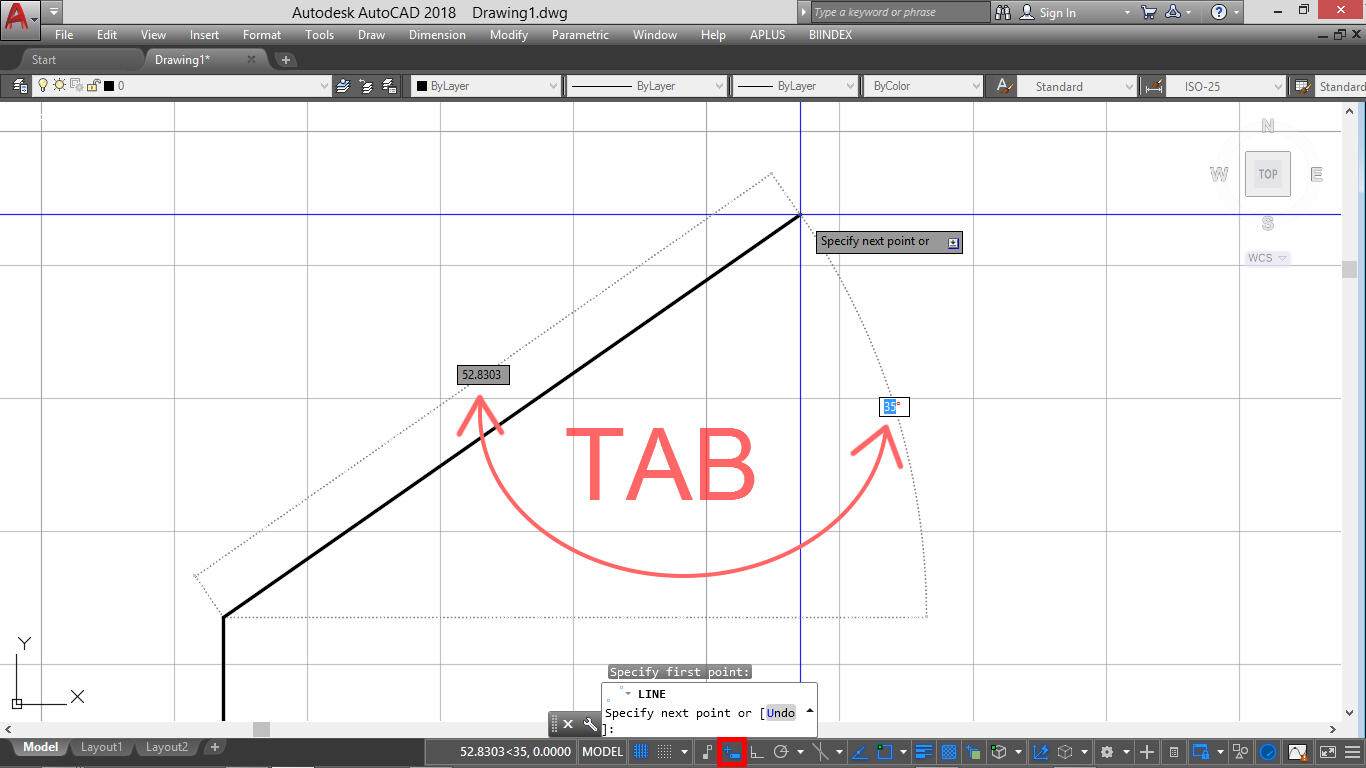
Autocad - Dynamic Input Mode
Another method is to use the dynamic input mode, which can be activated using the keyboard shortcut F12 or by clicking on the corresponding icon on the work mode toolbar. This mode allows us to switch during drawing from the length value of the line to the angle value at which it will be drawn. To switch to the angle value, after activating the line drawing function and specifying the first point or continuing it, press the TAB key, then we will move to the angle value input box. After entering the value of interest, we can also switch to the line length value input box if we have not done so earlier.
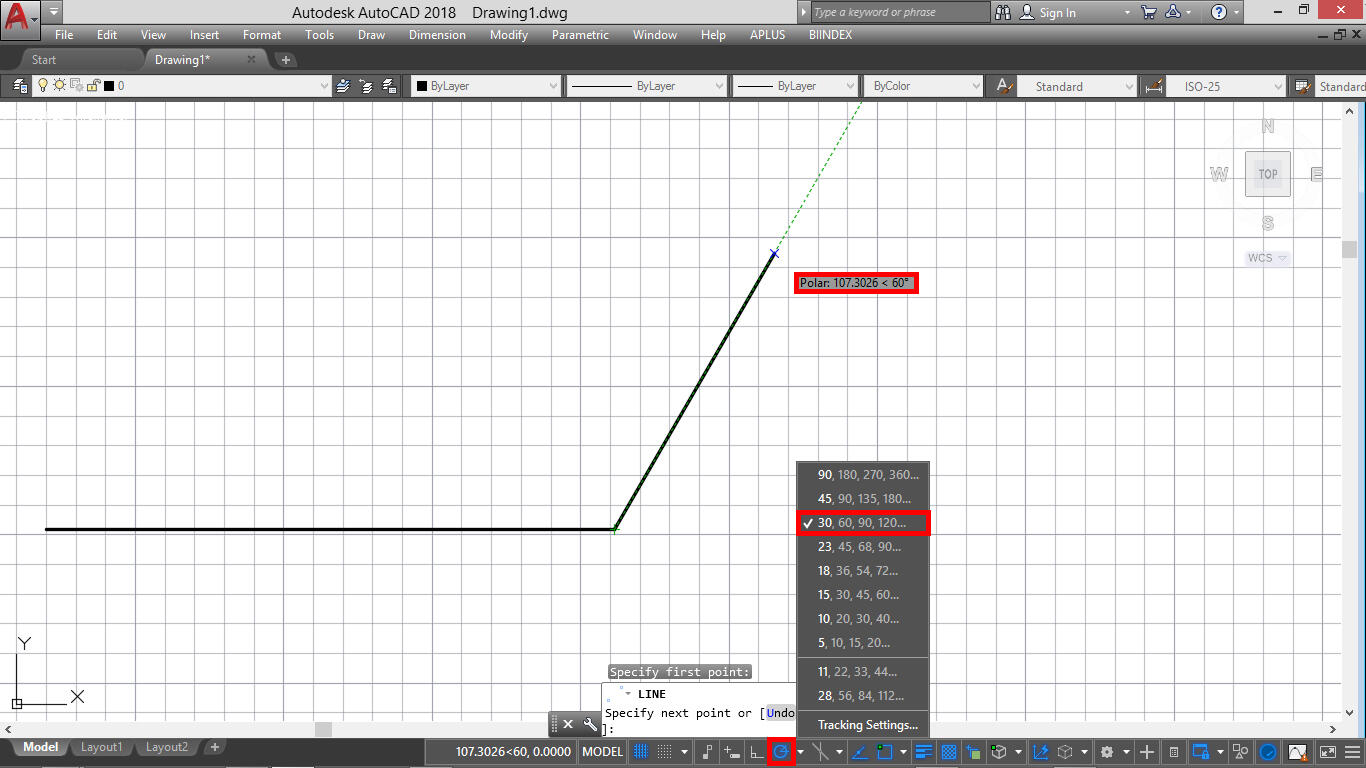
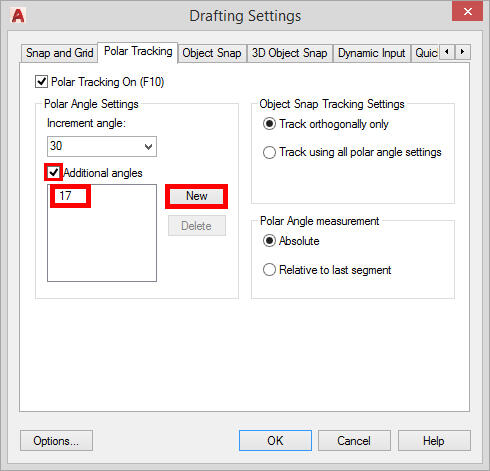
Autocad - Polar Tracking Mode
Drawing at an angle is also possible using the polar tracking mode, which can be activated using the keyboard shortcut F10 or by clicking on the corresponding icon on the drawing mode toolbar. This mode allows us to draw in chosen angle increments based on the angle increment we have set. So, if we set an increment of 30°, during drawing angles divisible by this value will be prompted, such as 30, 60, 90, and so on.
If we often use an angle that is not displayed on the selection list, we can add such an angle. To do this, go to the polar tracking mode settings by right-clicking on the corresponding icon. Then, by clicking on the "Tracking Settings" option, a window will appear where we need to find the "new" field. Clicking on the label will allow us to enter the angle of interest. For the angle we entered to work, the "additional angles" box must be checked. However, it will not work as an increment. So, if we add, for example, an angle of 17°, angles divisible by this value will not appear additionally.
In the polar tracking mode, we also have the option to draw at an angle relative to some object. To use this option, go to the mode settings and in the "Polar Angle Measurement" position, check the "Relative to last segment" box. In this case, when we draw a line segment at some angle and continue drawing, relative angles will be displayed, relative to the previous positioning of the line instead of the main coordinate axes.
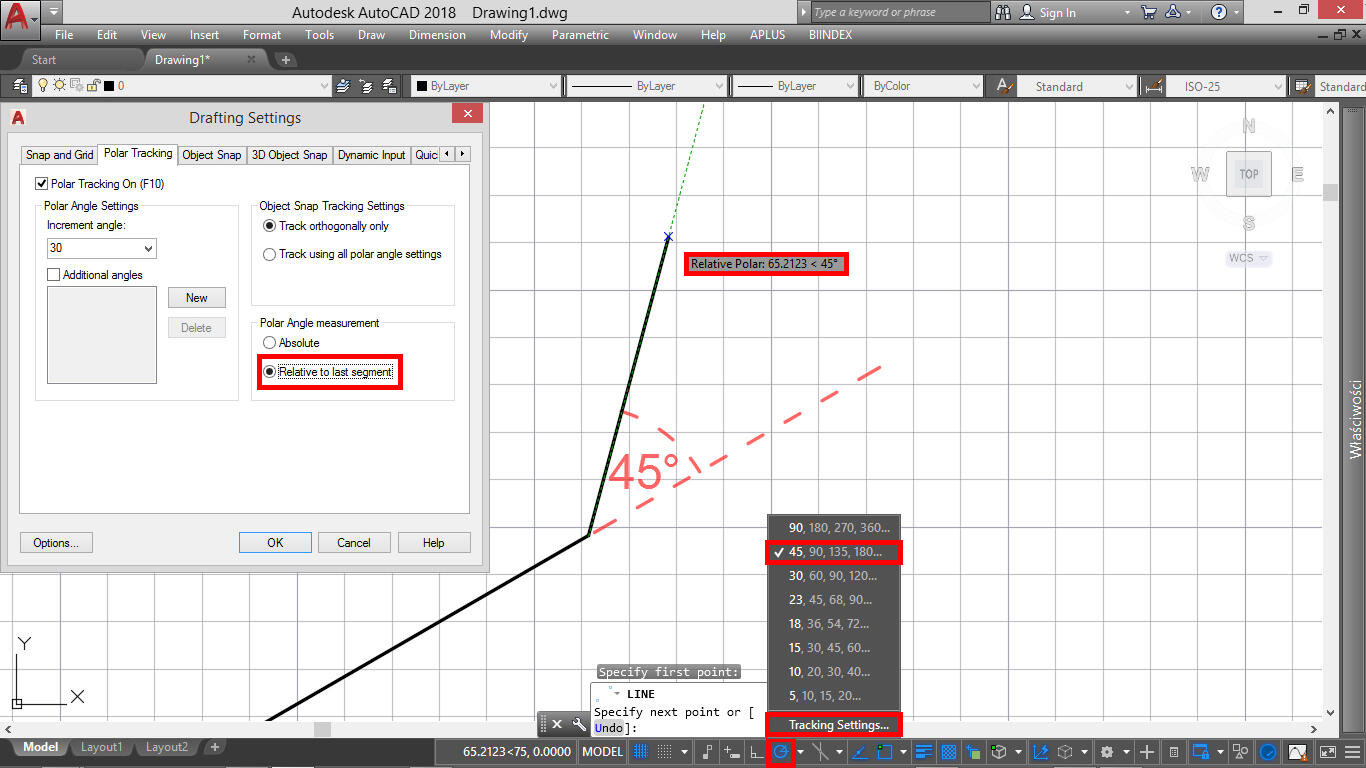
A good example of using this option is drawing a line perpendicular to the side of a triangle. Starting drawing from any point on a particular side, if we position the cursor correctly, the relative angle of 90° will appear. This means that the line will be perpendicular to the side of the triangle from which we started drawing.

It's important to note that all the options mentioned here for using angles are available for a wide variety of functions, not just for drawing lines. For example, we can move and copy objects at a specified angle, or set the angle of reflection axis inclination for the "Mirror" function, using the methods indicated here.
We hope that after familiarizing yourself with this guide, drawing lines at a specific angle will no longer be problematic for you :). If you have any suggestions for the next articles, be sure to let us know in the comments below.
Greetings! :)
Author

Read on our blog
-
![AI for furniture manufacturers - See how to create furniture packshots and catalog arrangements with raya.design]()
AI for furniture manufacturers - See how to create furniture packshots and catalog arrangements with raya.design
Packshots without time-consuming sessions? Discover Raya Design. Change upholstery and create arrangements with AI in moments. See how it works! -
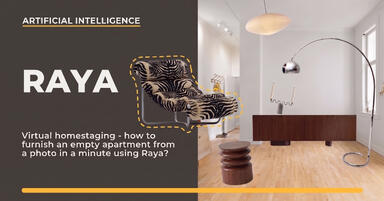
![Virtual AI home staging - how to furnish an empty apartment from a photo in one minute using Ray?]()
Virtual AI home staging - how to furnish an empty apartment from a photo in one minute using Ray?
Fast interior transformation without 3D modeling? Meet Ray Design. Furnish an empty apartment from a photo in one minute with AI. Come in and see how it works! -
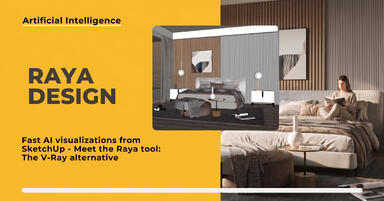
![Quick AI visualizations from SketchUp - Meet Raya: an alternative to V-Ray]()
Quick AI visualizations from SketchUp - Meet Raya: an alternative to V-Ray
Done with tedious V-Ray? Test Raya Design in SketchUp! Create photorealistic interior visualizations without prompts. Click to find out! -
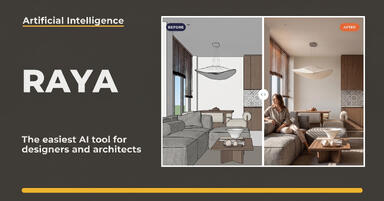
![Raya - The simplest AI tool for designers: zero prompts, maximum control!]()
Raya - The simplest AI tool for designers: zero prompts, maximum control!
Try raya.design for free! Get 20 credits to start and create photorealistic 3D visualizations without prompts. Click to check it out!