Publication date: 13-03-2025 | Update date: 13-03-2025 | Author: Piotr Kurpiewski

-
Online courses
- All
 3ds Max
 AI - Artificial Intelligence
 Blender
 Corona renderer
 GstarCAD
 LayOut
 Photoshop
 Interior Design
 Revit
Revit Sketchup
 Stable Diffusion
 V-ray
V-ray
"Online courses" are comprehensive online training programs that will help you quickly master the software you are interested in.
- Plugins
- 3D Models
- Help
- Articles
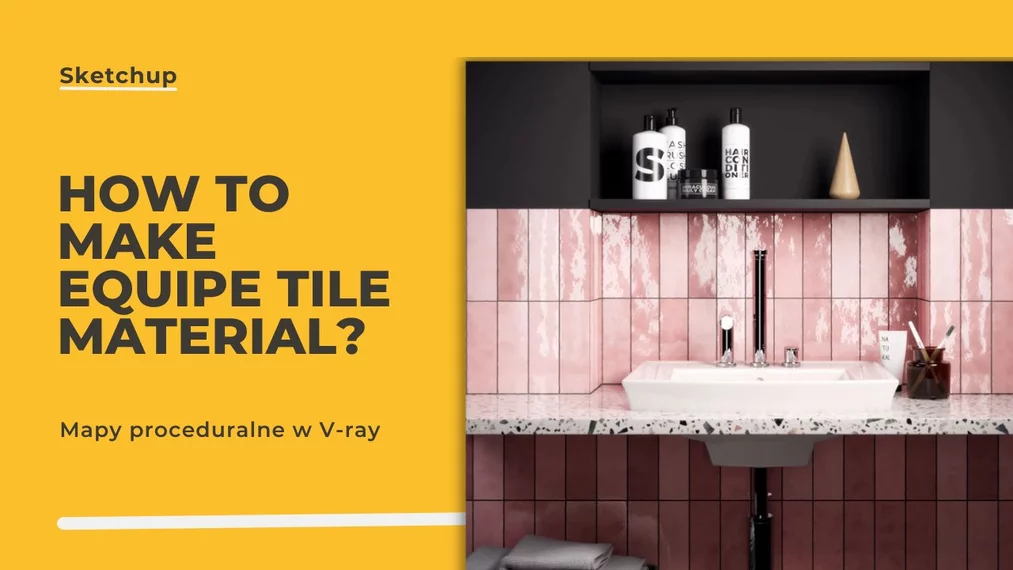
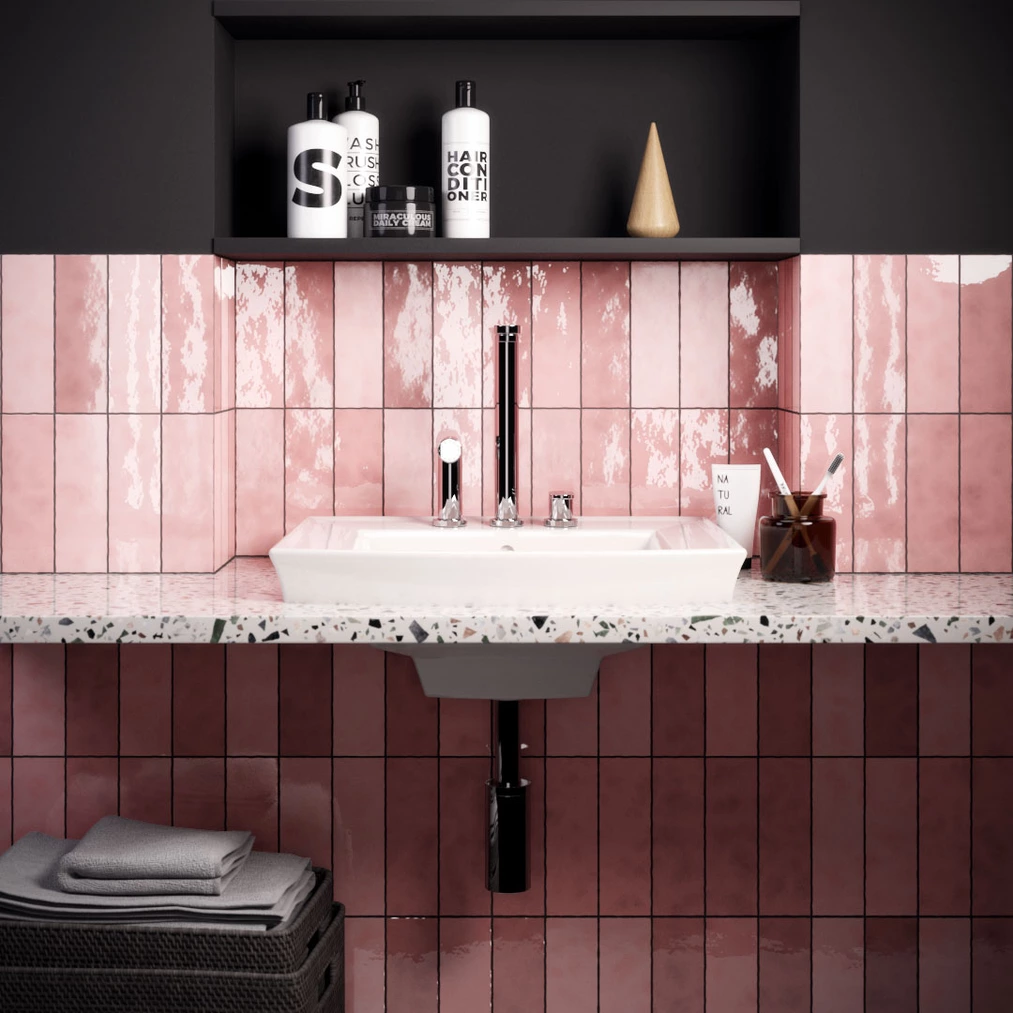
Sketchup - How to create Equipe tile material? Procedural maps in V-Ray.
Creating tiles from Artisan collection by Equipe in V-Ray is quite a complex task. To achieve the effect of a unique tile surface, procedural maps should be used. Read the article and learn step by step how to create a visualization. See how to configure the Noise texture to achieve an uneven tile surface. Remember about proper scene lighting and choosing the right frame, this will make your visualization look better. If you don't want to configure material settings on your own, at the end of the article you will find a .vrmat file. You can use it in your projects.
Index
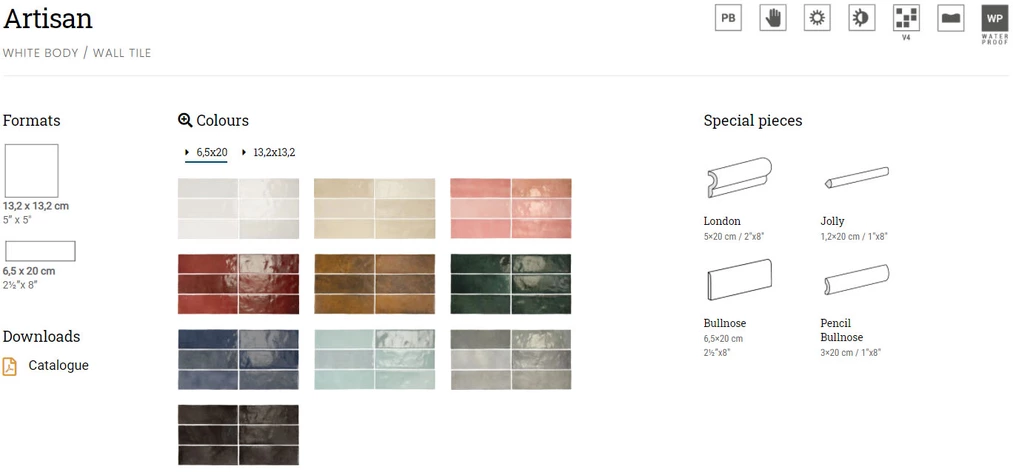
Equipe Ceramicas is a Spanish company with a long tradition specializing in rustic ceramic tiles. In Poland, the Artisan collection of glossy, irregular-edged, aged effect tiles is particularly popular. The production of these tiles utilizes a variable matrix technology, guaranteeing a unique effect.
Recreating this material in V-Ray is not easy, due to its irregularity. However, its features can be replicated using so-called procedural maps, which are explained in this article.
Diffuse Layer
First, you need to create a new Generic material. This is the default type of V-Ray Material, containing all the necessary layers for creating Equipe tiles. You can add the asset by selecting the Create asset / Material / Generic icon in the bottom left of the Asset Editor.
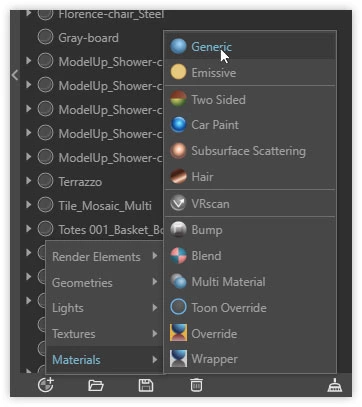
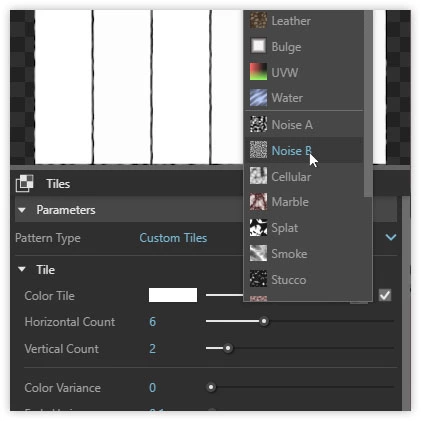
The standard Generic material has a gray color in the Diffuse layer. The first thing to do is to replace it with the Tiles procedural texture. You can add it by clicking with the left mouse button on the gray checkerboard directly next to the channel name.
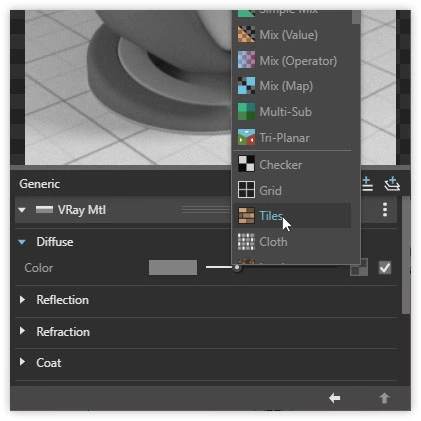
Tiles is one of the so-called 2D Textures, a set of maps that allow you to create various patterns, including checkers, textile weaves, leather, or, in this case, the tiles you are interested in. Depending on the chosen procedural map, there are different parameters and various surface editing options. In the case of Tiles, these are primarily:
- Pattern type - determining the type of bond (e.g. typical basket weave or Flemish bond);
- Tile - modifying the number of tiles, their color, and randomness;
- Mortar - describing the grout parameters.
The parameters selected here will affect the basic appearance of the material. I want to closely match the Equipe Rose Mallow tile. Therefore, in Tiles, I set the following values:
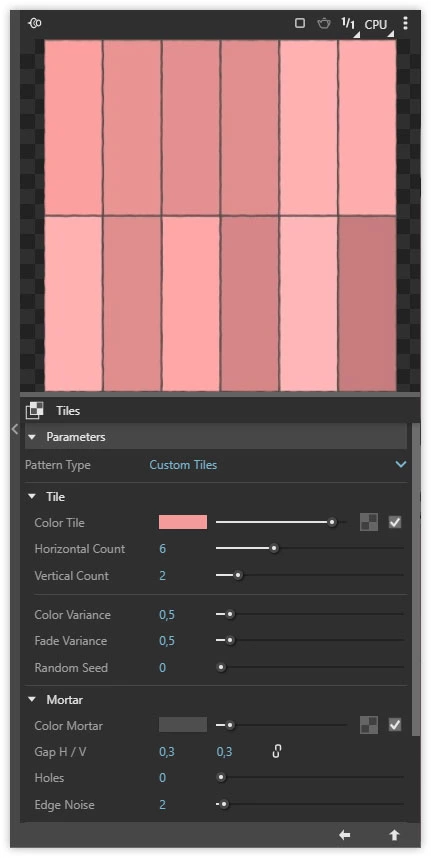
The material preview in the V-Ray Asset Editor closely resembles my reference. Take a closer look at the parameters I have set to better understand how I achieved this.
Notice that in addition to specifying the pink color, I also applied the Color Variance and Fade Variance parameters. This ensures a slightly different shade for each tile, just like in the Equipe collection I have chosen. Furthermore, I also enabled Edge Noise in Mortar, providing subtle irregularities in the grout line.

Binding
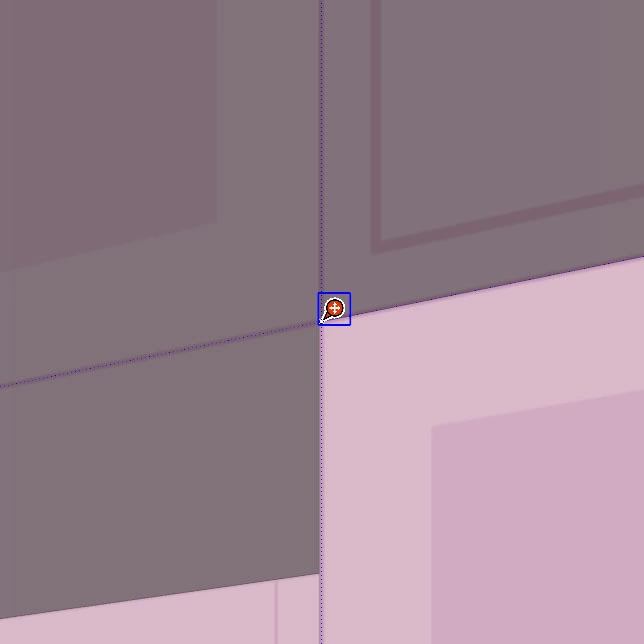
Despite the specified values, when filling the surface with color in SketchUp, only the placeholder texture is visible. Unfortunately, it is impossible to see the actual tile divisions in the SketchUp window. You will need to intuitively position the texture.
By default, it occupies an area of 254 mm x 254 mm. This means that the division I have chosen (6x2 according to the specified parameters) will be laid out in this area. You need to change it to 410 mm x 410 mm, as the Equipe tile measures 20 cm, and two tiles make up a length of 40 cm. Leaving a small margin for grout, the sum of the sections gives a result of approximately 41 cm.
During texture positioning, you can specify not only the occupied area but also the starting point of the transformation, for example, pointing at the corner of the wall.
Bump Layer
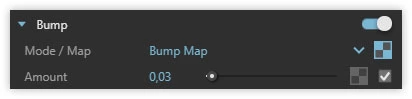
The material is beginning to resemble a real tile, but it lacks characteristics related to convexity and concavity. After all, the grout is in a slight depression, and the surface of the tile itself should be gently undulating to achieve the irregular aged effect. This result can be achieved using the Bump layer.
Start by copying the Tiles procedural texture from the Diffuse layer and pasting it (Paste As Copy) into the channel named Bump. It is important for both layers to have the same geometric parameters, i.e., the number of tiles, the thickness, and the shape of the grout. However, the fundamental difference will concern the colors. In the Bump layer, white signifies 100% convexity, while black signifies its opposite, representing 100% concavity. In simple terms, the grout needs to be black and the tiles white to achieve the correct effect.
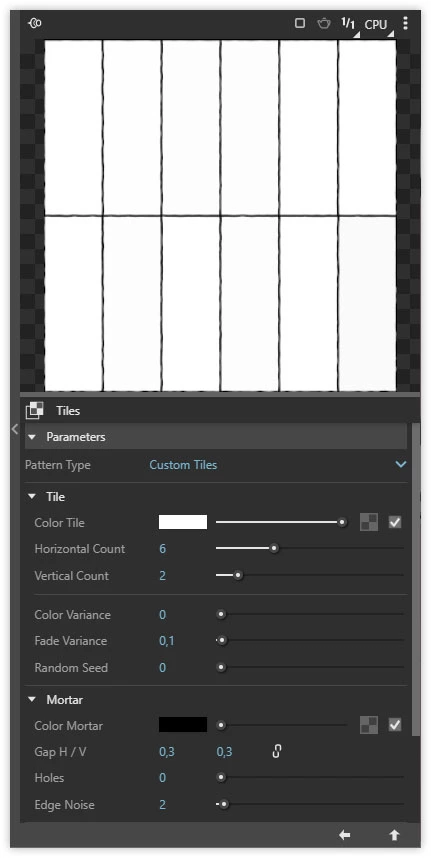
Naturally, in a real-world environment, we are not only dealing with values of 0 and 1. There is a whole spectrum of phenomena in between that guarantee a more convincing, photorealistic effect. Hence, a slight Color Variance is also recommended, helping to convey subtle differences in the thickness of individual tiles.
But what about the irregular surface of the tiles? This characteristic is slightly more complex. To achieve this effect, instead of a white color in the Color Tile, another procedural texture should be used: Noise.
3D Textures
Procedural textures in this category differ from 2D Textures in their uniqueness. They usually consist of randomly distributed, geometrically undefined patterns. This means that their texture size is not limiting, they are global, and, unlike traditional maps, they do not wrap in any direction.
One such texture is Noise, which generates irregular noise in any two colors. For my needs, these colors will be close to white. Their random mixing will ensure the appropriate surface structure of the tile. Apart from color, this is where you also need to specify the type and size of the new texture. Depending on the chosen texture (Noise A or Noise B), different parameters will be available, but their effect will be relatively similar. In the end, I decided on the following options:
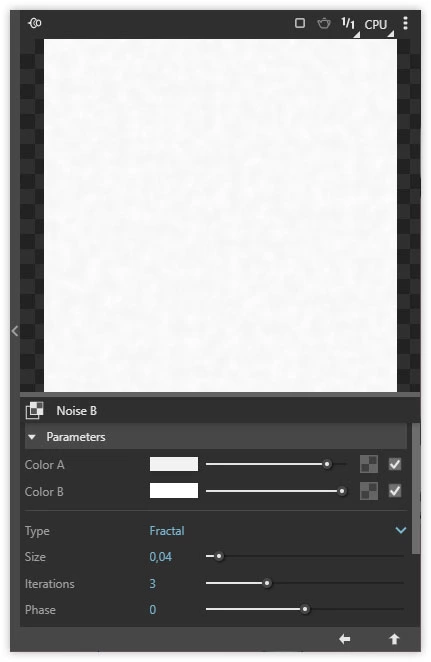
Notice at the same time that I added the Noise B map to the Color Tile parameter of the Tiles procedural map. This way, I activated another level of material hierarchy. Noise B functions only as the color of the Tiles map, which is predominant in this case. In advanced materials, this hierarchy can have even more levels, i.e., nested maps.
Finally, I still need to specify the strength of the Bump parameter, i.e., the so-called Bump Amount. It is difficult to guess the correct value right away, so I perform several test visualizations before settling on a value of 0.03.
Textures
After refining the Diffuse and Bump layers, the material already looks decent. However, it still lacks a very important parameter - glossiness. The Equipe tiles from the Artisan collection are intensely glossy, so a white color (100% intensity) in the Reflection Color and a high Reflection Glossiness value should be applied.
Reflection reveals the irregularity of the tile surface and emphasizes the grout, but at the same time, with my current settings, it makes the material uniformly glossy. To ensure that the tiles reflect the surroundings more than the grout, a procedural Tiles map should be used again. You can also add an additional level of detail by choosing one of the 3D Textures. This time, I chose Smoke with the following parameters:
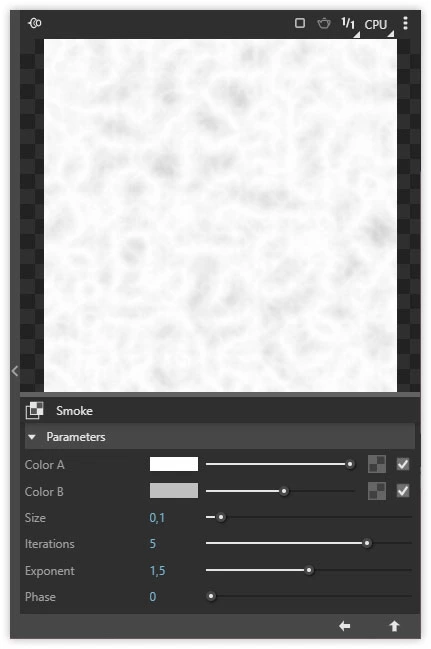
The smoke simulation helps me achieve the aged effect of the tile, making its surface reflect irregularly. It is these nuances that allow for the best, photorealistic effect.
Summary
Remember that the final result is greatly influenced by the chosen frame and lighting. Try to position the tiles perpendicular to the camera and ensure that there is a light source opposite them. This will help you achieve an effect similar to mine.
If you struggled to create this material, you can download a ready-to-use file in the .vrmat format here. Feel free to use it in your projects.
Regards!
Author

Read on our blog
-
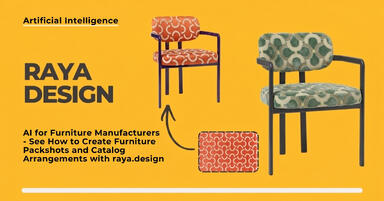
![AI for furniture manufacturers - See how to create furniture packshots and catalog arrangements with raya.design]()
AI for furniture manufacturers - See how to create furniture packshots and catalog arrangements with raya.design
Packshots without time-consuming sessions? Discover Raya Design. Change upholstery and create arrangements with AI in moments. See how it works! -
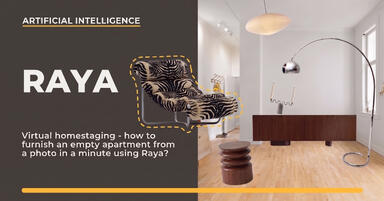
![Virtual AI home staging - how to furnish an empty apartment from a photo in one minute using Ray?]()
Virtual AI home staging - how to furnish an empty apartment from a photo in one minute using Ray?
Fast interior transformation without 3D modeling? Meet Ray Design. Furnish an empty apartment from a photo in one minute with AI. Come in and see how it works! -
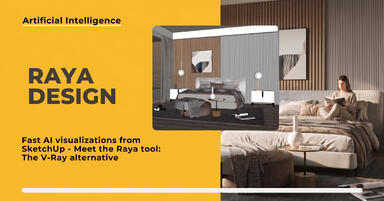
![Quick AI visualizations from SketchUp - Meet Raya: an alternative to V-Ray]()
Quick AI visualizations from SketchUp - Meet Raya: an alternative to V-Ray
Done with tedious V-Ray? Test Raya Design in SketchUp! Create photorealistic interior visualizations without prompts. Click to find out! -
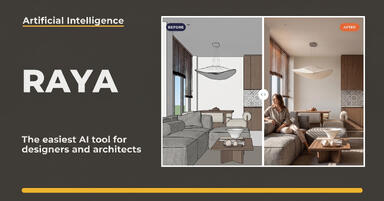
![Raya - The simplest AI tool for designers: zero prompts, maximum control!]()
Raya - The simplest AI tool for designers: zero prompts, maximum control!
Try raya.design for free! Get 20 credits to start and create photorealistic 3D visualizations without prompts. Click to check it out!
Want to learn Sketchup? Check out our free online course!