EN
EN PL
PL ES
ES


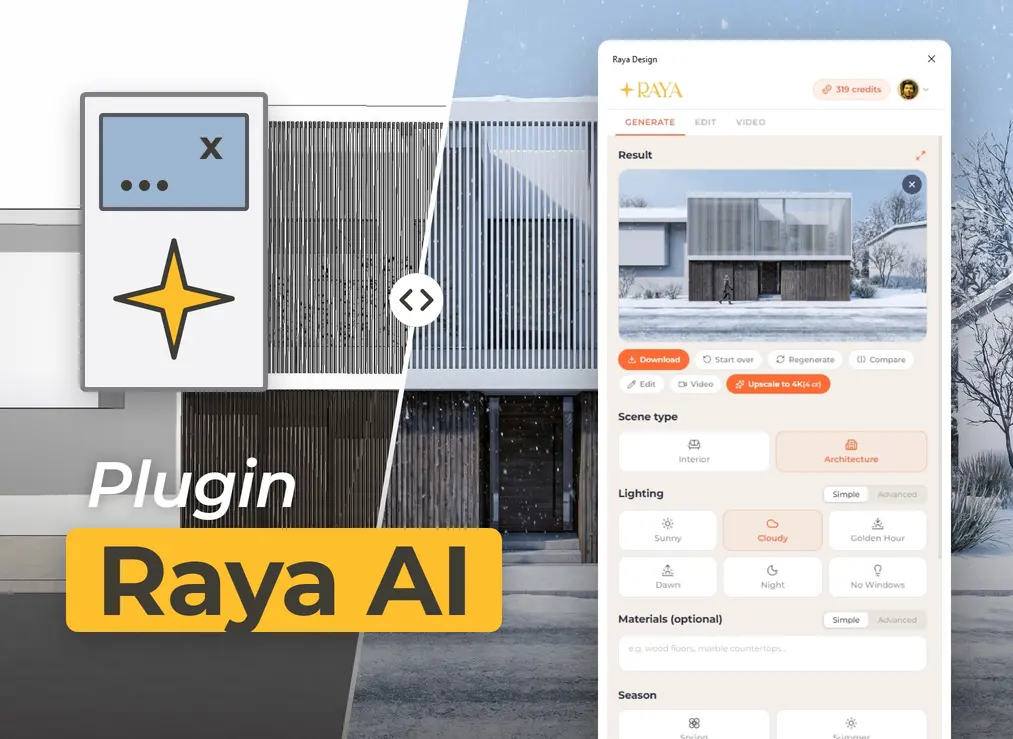
AI Visualization straight from the ArchiCAD 3D window
A photorealistic image from ArchiCAD usually means working in CineRender. You choose coverings, set the sun and light sources, adjust rendering parameters, and then wait for the image to calculate, which for a larger model takes several minutes or longer. When the client meeting is tomorrow morning, there is usually not enough time for a few shots and finish variations.
Raya is a free AI plugin for ArchiCAD that turns the active view into a photorealistic visualization in less than a minute. In the panel, you capture what you have in the window, choose the scene type and lighting, and AI fills in the materials, vegetation, sky, and lighting. The image is generated in the cloud, so your computer is free and you can continue working on the project.
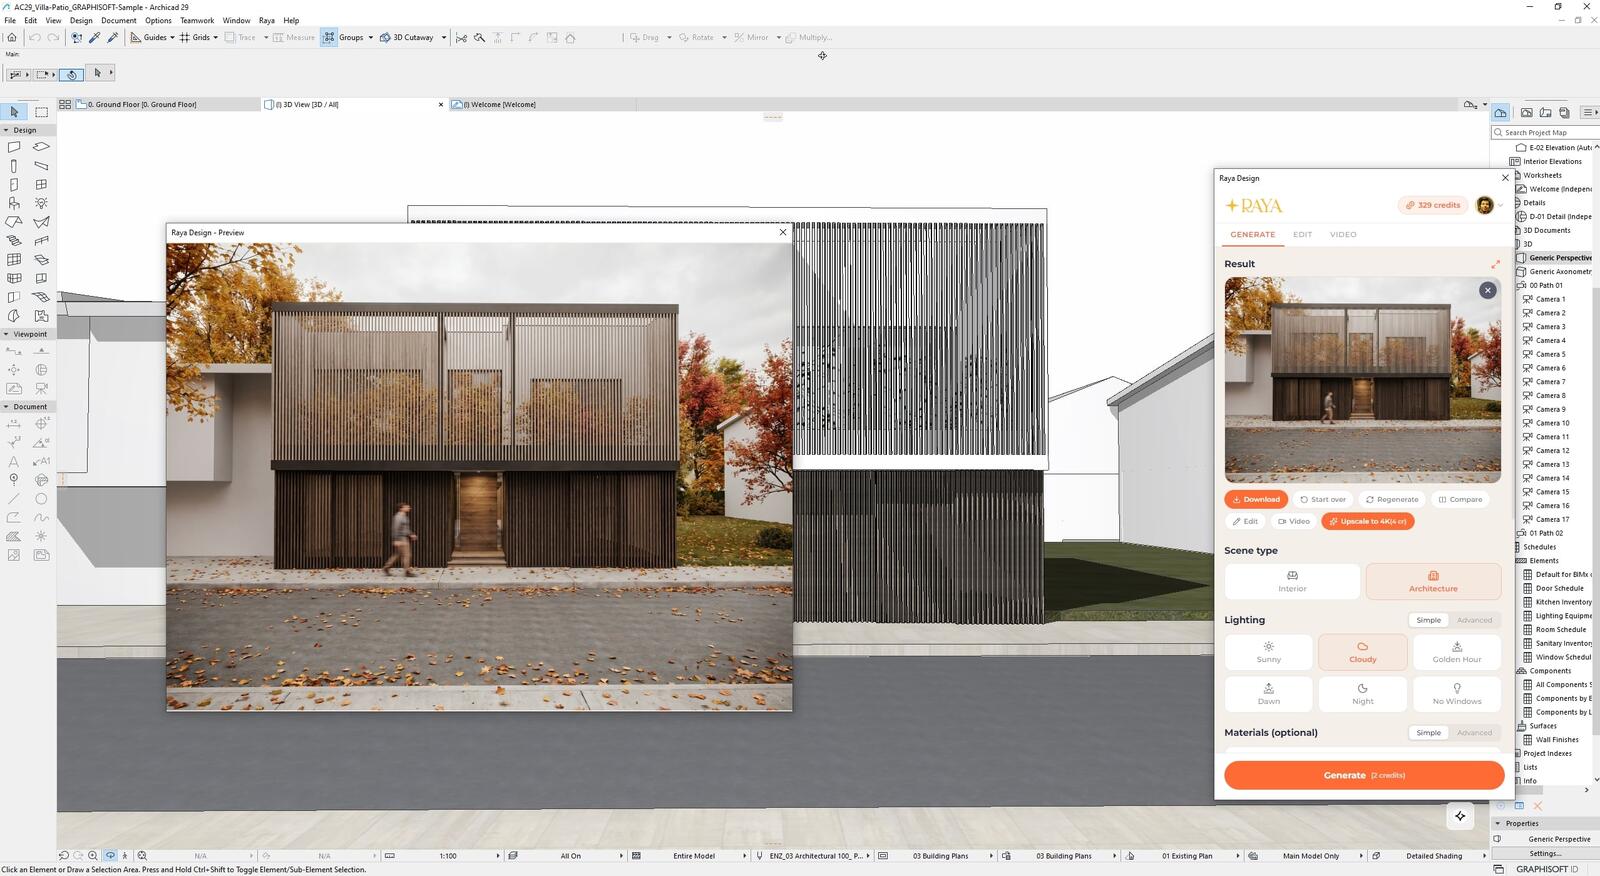
How to create an AI visualization in ArchiCAD?
You open the Raya panel from the ArchiCAD menu and work in it alongside the model:
- Open the view. It can be a 3D window, a saved camera from the Project Map, an elevation, or a section.
- Capture it. With one click, you transfer the image from the active window to the panel.
- Adjust the settings. You specify whether it's architecture or interior, plus lighting, season, materials, and resolution.
- Start the generation. The image returns to the panel after a few dozen seconds.
Elevations and sections as ready-made illustrations
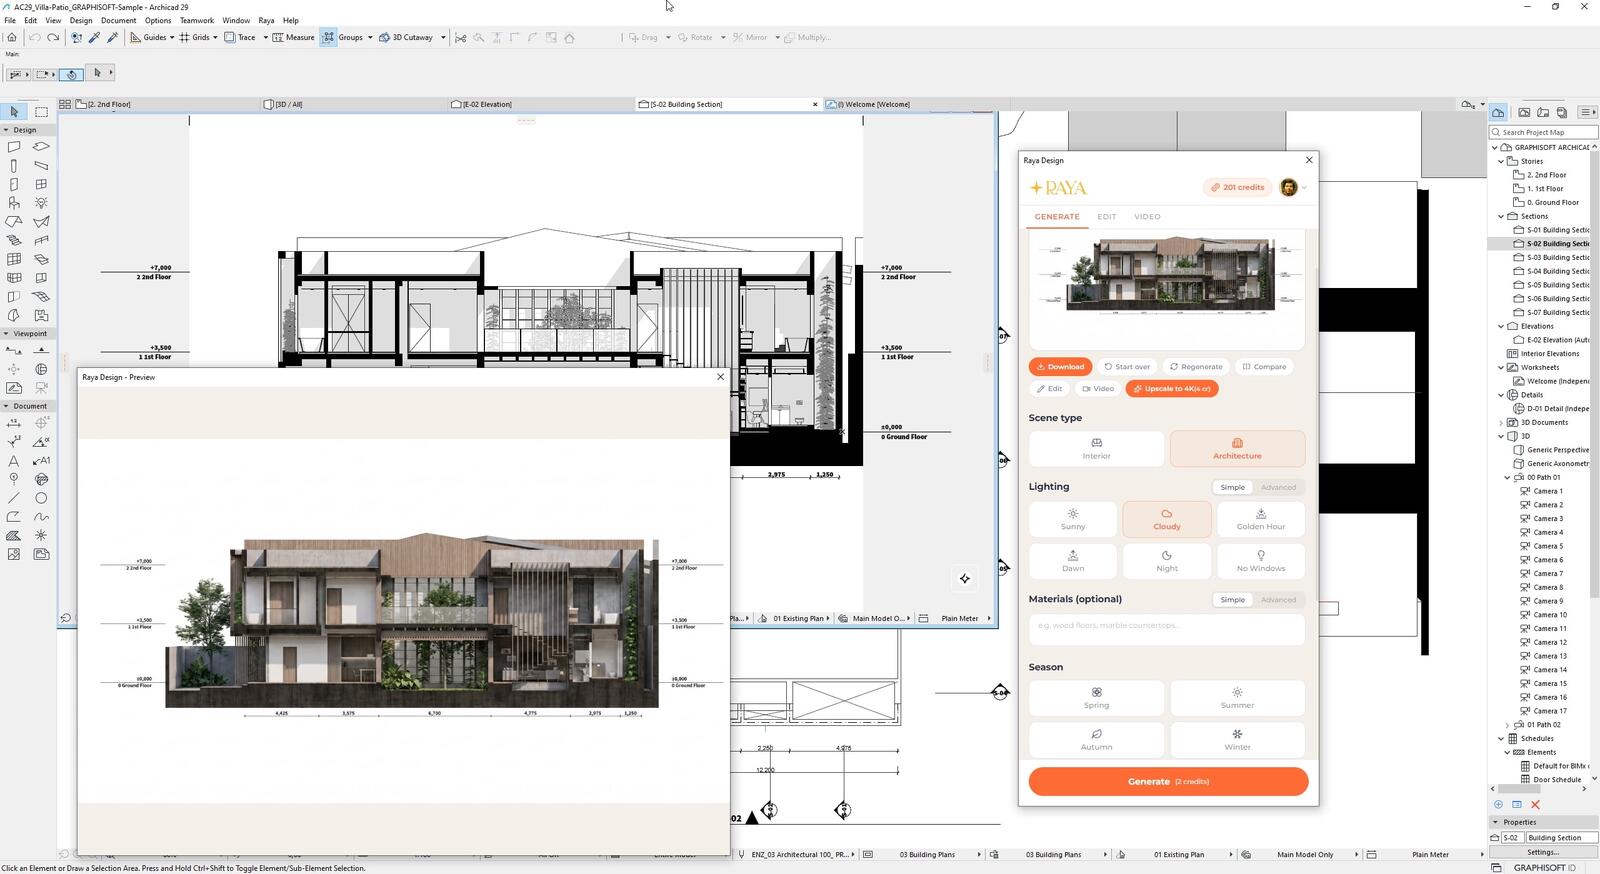
Raya works on the active window, so you can also turn an elevation or section drawing into an illustration. AI adds façade materials, interior visible in the section, greenery, and lighting. In the example below, the levels and dimension lines remain in place, so such an image can go straight onto a competition board or into a presentation for the client.
Multiple shots and seasons from a single model
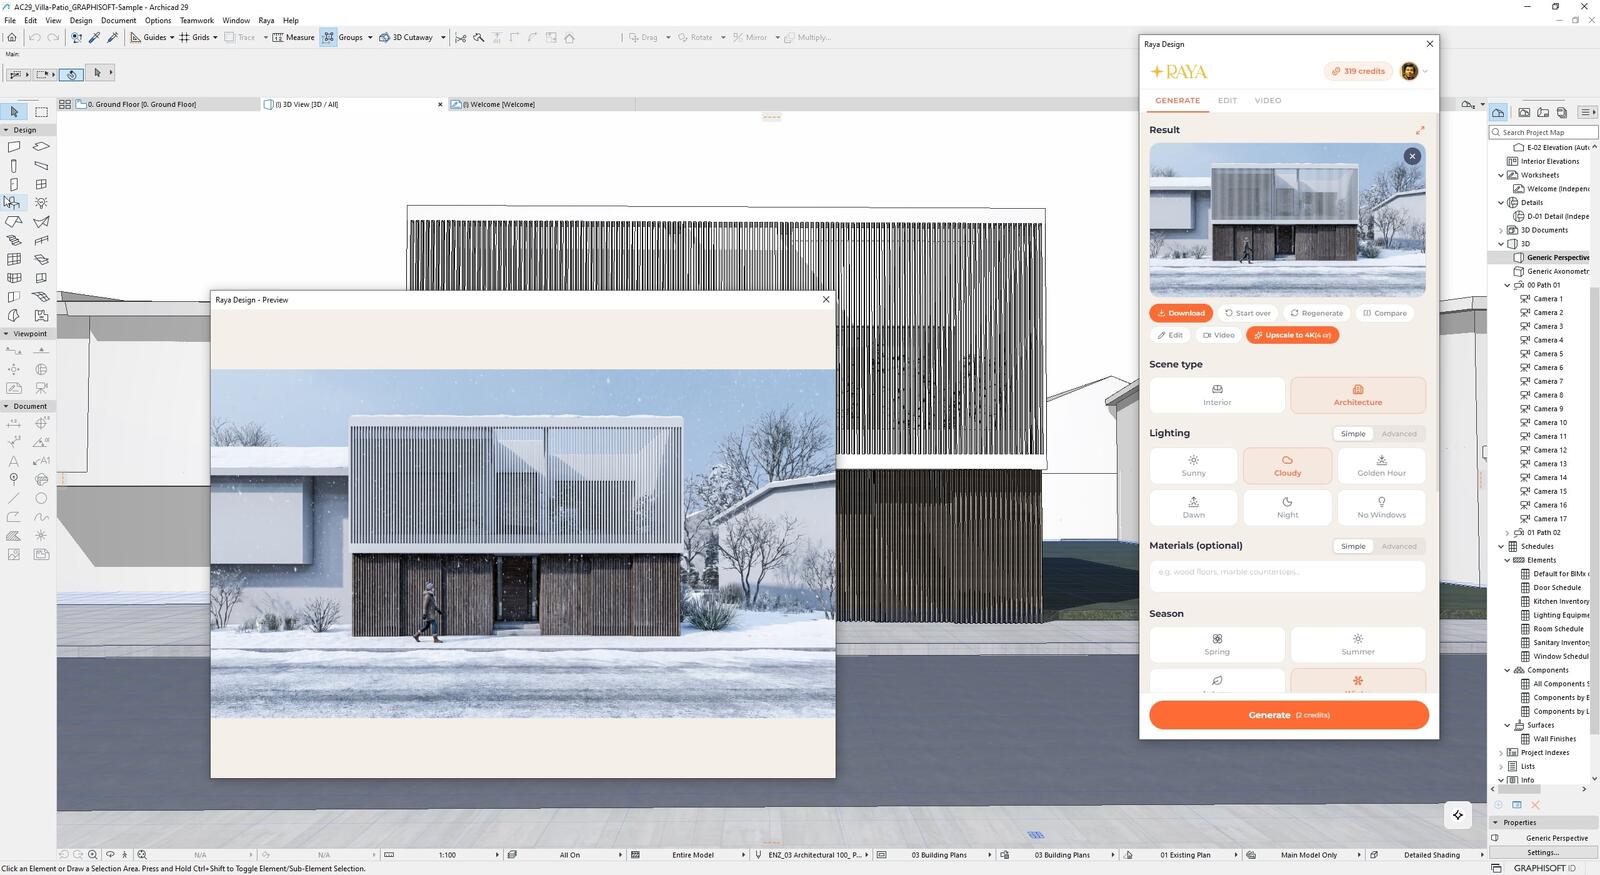
You sequentially capture the saved cameras from the Project Map, and in a few minutes you have a series of shots of the same building. You can show each one in sunlight, under an overcast sky, at golden hour, at dawn, or at night, and the season changes the scenery around the house from lush green trees in summer to snow in winter. The model and CineRender settings remain unchanged, so the scene prepared for the final renders is still ready.
The Match Style option transfers the lighting, materials, and atmosphere from a reference photo. You can use the first completed visualization as a reference for subsequent cameras, and the entire series will look consistent.
AI interiors from an ArchiCAD model
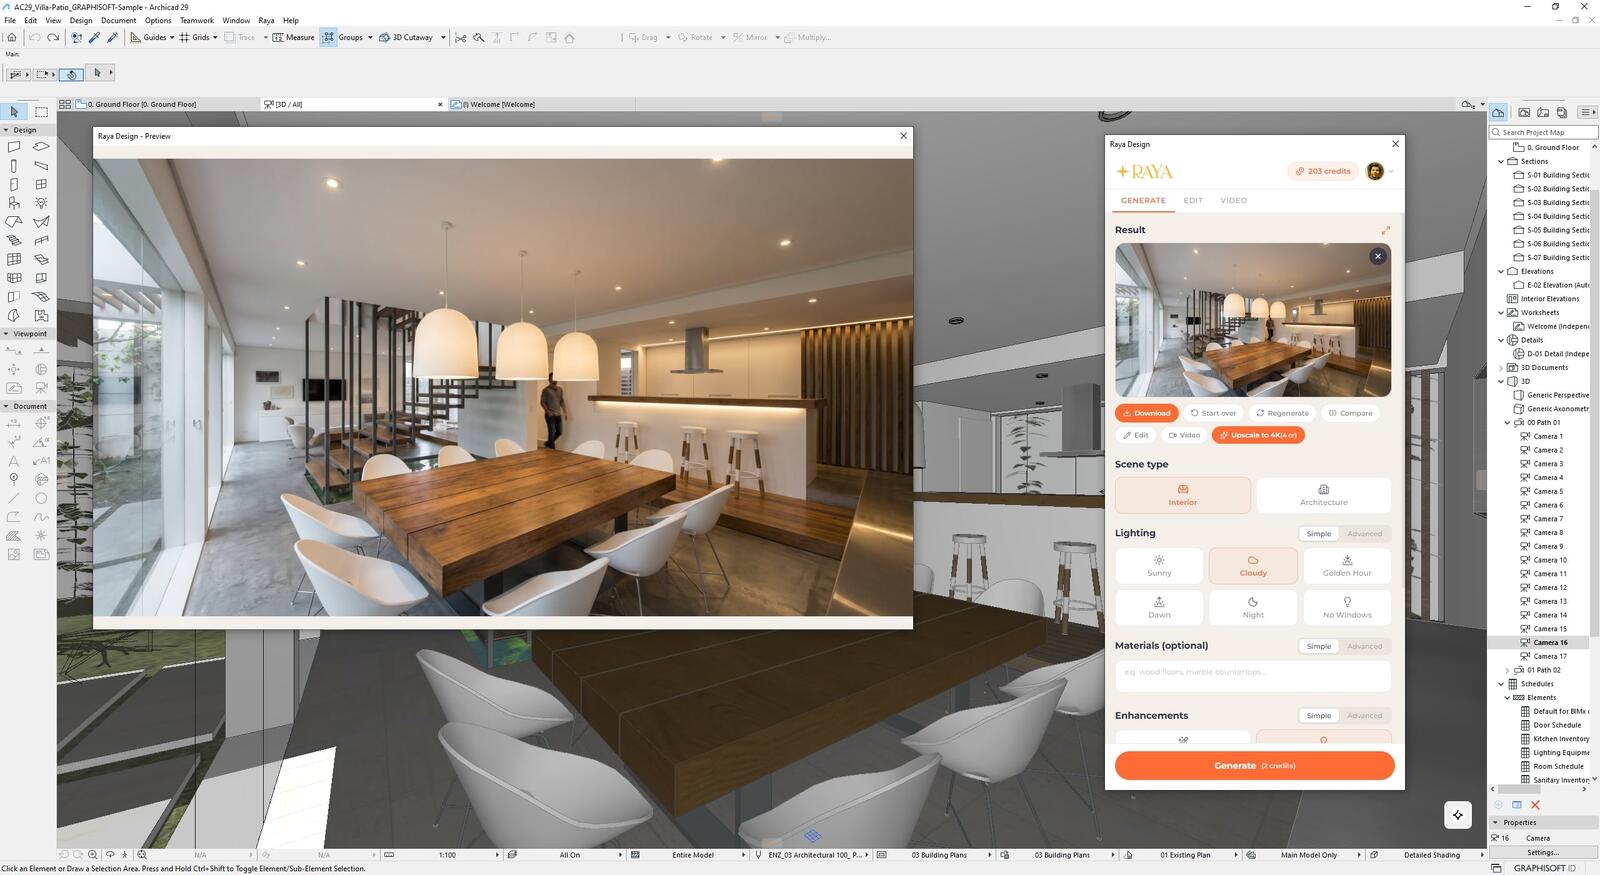
In the interior mode, an arrangement with fabrics, reflections, and light coming through the windows is created from a 3D room view. You set the details yourself:
- Materials. You assign them verbally to elements, for example, an oak countertop or an architectural concrete wall.
- Manufacturer’s furnishings. You upload a photo of a lamp, chair, or fabric from a catalog and indicate where it should be placed.
- Selected area. You draw around the wall, floor, or furniture in the image and describe what you want it to become.
- Decorations, lights, people, and animals. You can add small items on shelves, turn on lights, or introduce a person into the frame to show the scale of the interior.
Edits and AI video in the same panel
When a client wants a different façade or a lighter floor, you edit the completed visualization in the Edit tab. You write what to change, point to a spot on the image, or add an object from a photo. You can also view the building from a different angle, from a lower or higher point, in close-up or in a wider frame. For print, you can upscale the image to 6K.
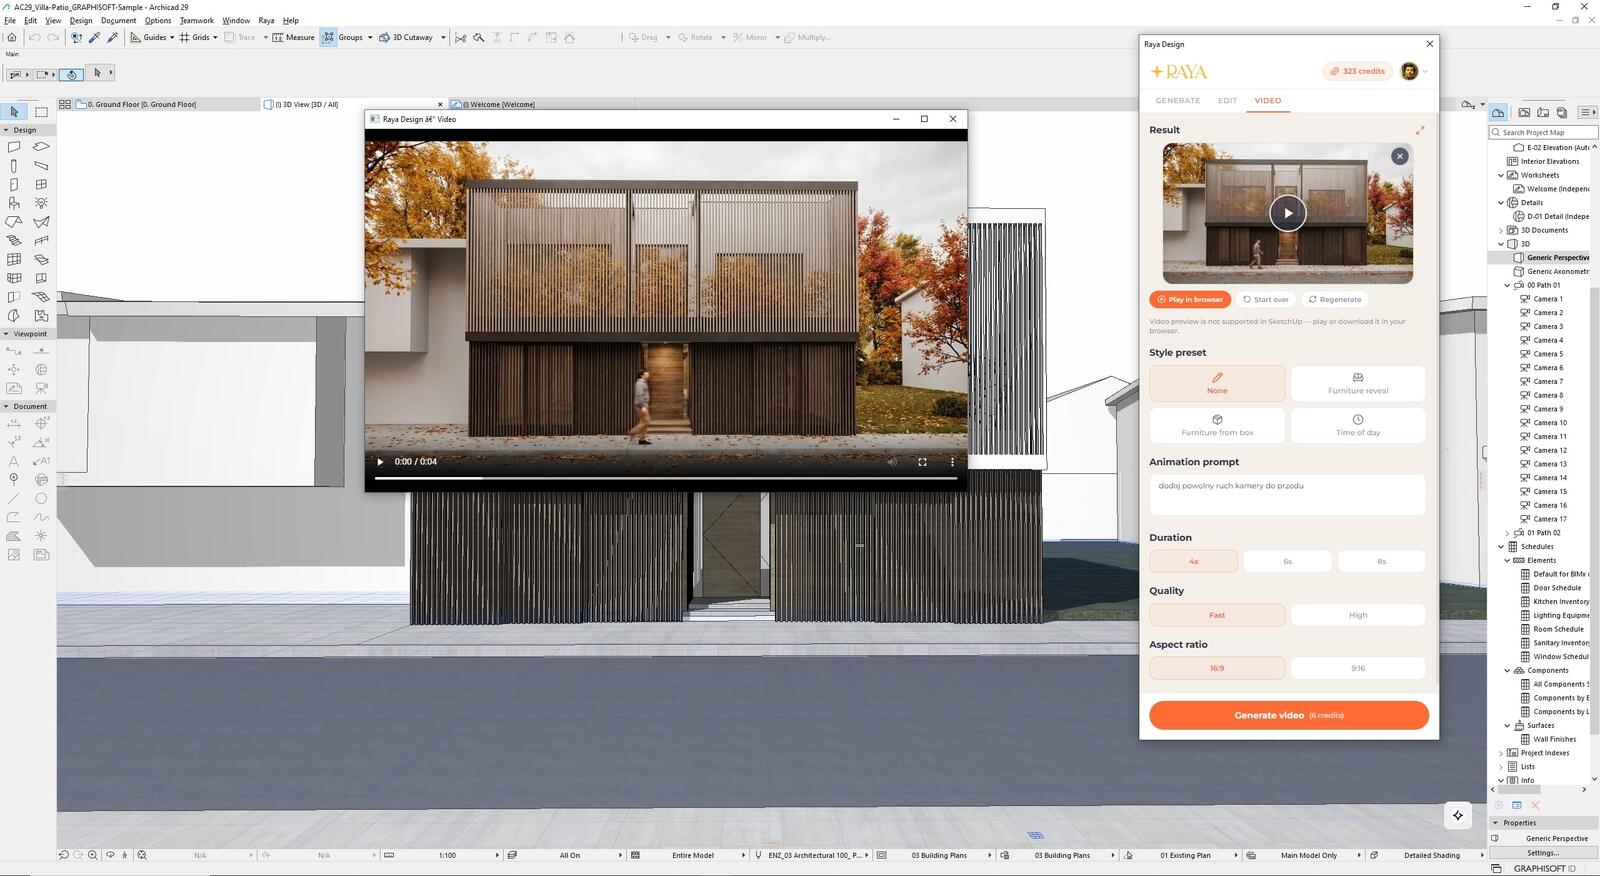
In the Video tab, the same visualization becomes a several-second film. You describe the movement in words or choose a preset shot, for example a shift in lighting from dawn to night. Such material is useful for a studio’s website and project presentations.
Is the AI plugin for ArchiCAD free?
Yes. The plugin itself and your Raya account are free, and you only pay for finished images with credits. After signing up, you get 20 credits for two weeks, which is enough for 10 2K visualizations. You can use the images from this pool commercially, for example on a competition board. Afterwards, you either purchase a credit pack or switch to a subscription according to the rates in the Raya pricing.
| Item | Cost in Raya |
|---|---|
| Plugin installer | free |
| Account registration | 0 PLN |
| Welcome credits | 20, valid for 14 days |
| 2K or 4K visualization | 2 or 4 credits |
| 2K or 4K edit | 2 or 4 credits |
| Image upscale to 4K or 6K | 4 or 5 credits |
| Visualization animation | from 5 credits |
You are not charged for an image that failed to generate due to a technical error, as the credits are automatically returned to your account.
Will Raya replace CineRender?
The answer depends on what you need the image for. A visualization from Raya is based on the view, so you have less control over individual details than in CineRender, and regenerating the same shot will look slightly different. In return, you get concepts, variants, and presentation images in just a few minutes, and many studios even deliver final visualizations with it. Save CineRender for shots that need to faithfully reproduce the model and be consistently repeatable.
The plugin uses only the image captured from the active window, so the model and project files remain unchanged.
One account in ArchiCAD, the browser, and other applications
- Five panel language versions: Polish, English, Spanish, Italian, and German.
- ArchiCAD 26–29 on Windows 10 and 11.
- Working on a Mac? Capture a view snapshot from ArchiCAD, upload it to the Raya web app, and generate the visualization in the same way.
- One Raya account also works in the web app and in plugins for SketchUp, Revit, 3ds Max, Rhino, and pCon.planner, all sharing the same credit pool.
- Image archive. Everything you generate stays in your account and can also be accessed in the browser.
An image for a client meeting before you finish the model
Raya was created so that visualization keeps up with the project. When an image is generated in under a minute, you can check the project direction with the client using images, and only spend time on details for the version they approve. Install the plugin and generate the first shots of your project using the welcome credits.
If you want to learn more about the program itself, check out the ArchiCAD courses, and for working with AI inside the program, see the course Get to know the AI assistant in ArchiCAD.
Show us your project
Did you succeed in creating a visualization with ArchiCAD and Raya? Publish it on Instagram or Facebook and tag @cgwisdom.pl, and we’ll share the most interesting projects.