EN
 PL
 ES



Photorealistic AI visualization straight from the BIM model
A Revit model may be perfected down to the last railing, yet the first visualization for a client still takes a lot of work. You have to turn to Enscape or Twinmotion, assign materials, set up cameras and lighting, and then wait anywhere from a few to dozens of minutes for each image. Some firms even send the model to an external visualizer and wait for a delivery date.
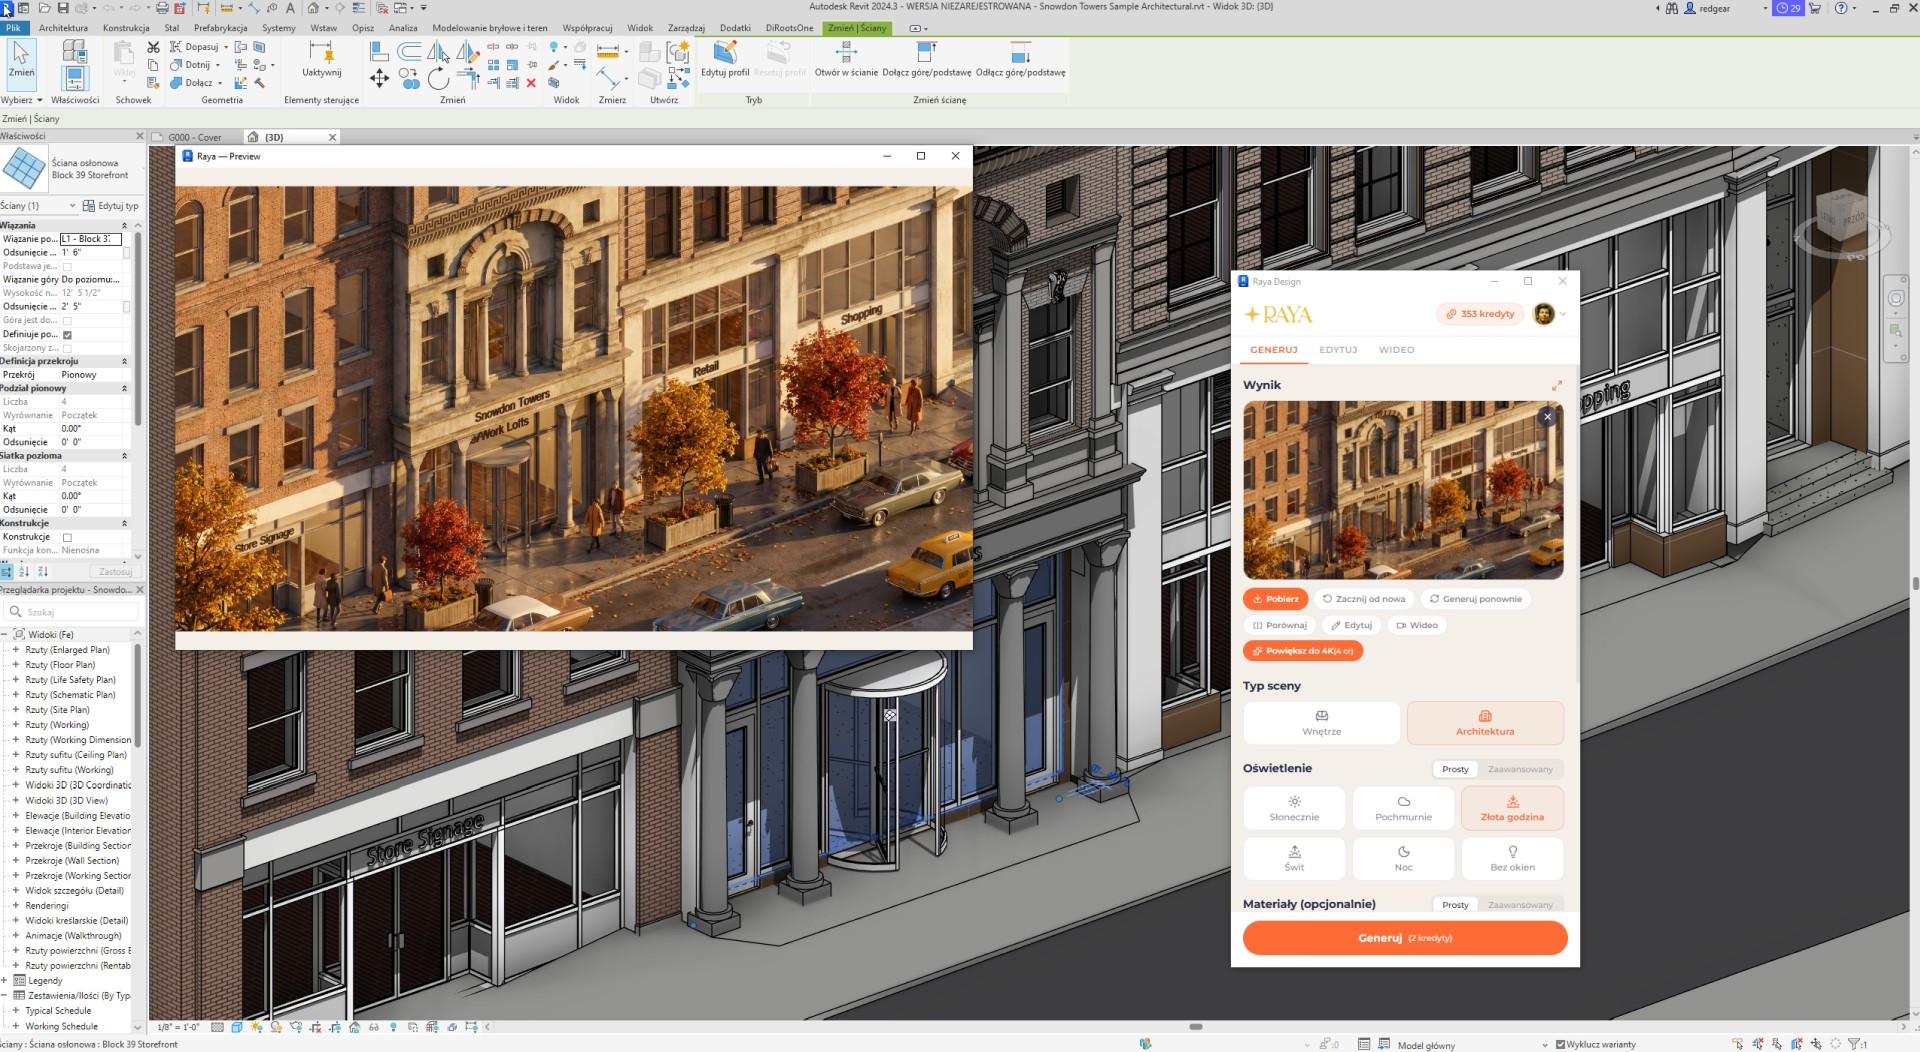
Raya is a free AI rendering plugin for Revit that turns an active 3D view into a photorealistic visualization in under a minute. AI preserves the geometry and perspective of the model and adds material textures and lighting; in street views it also adds greenery, cars, and pedestrians. Computations take place in the cloud, and the BIM model remains exactly as it was.
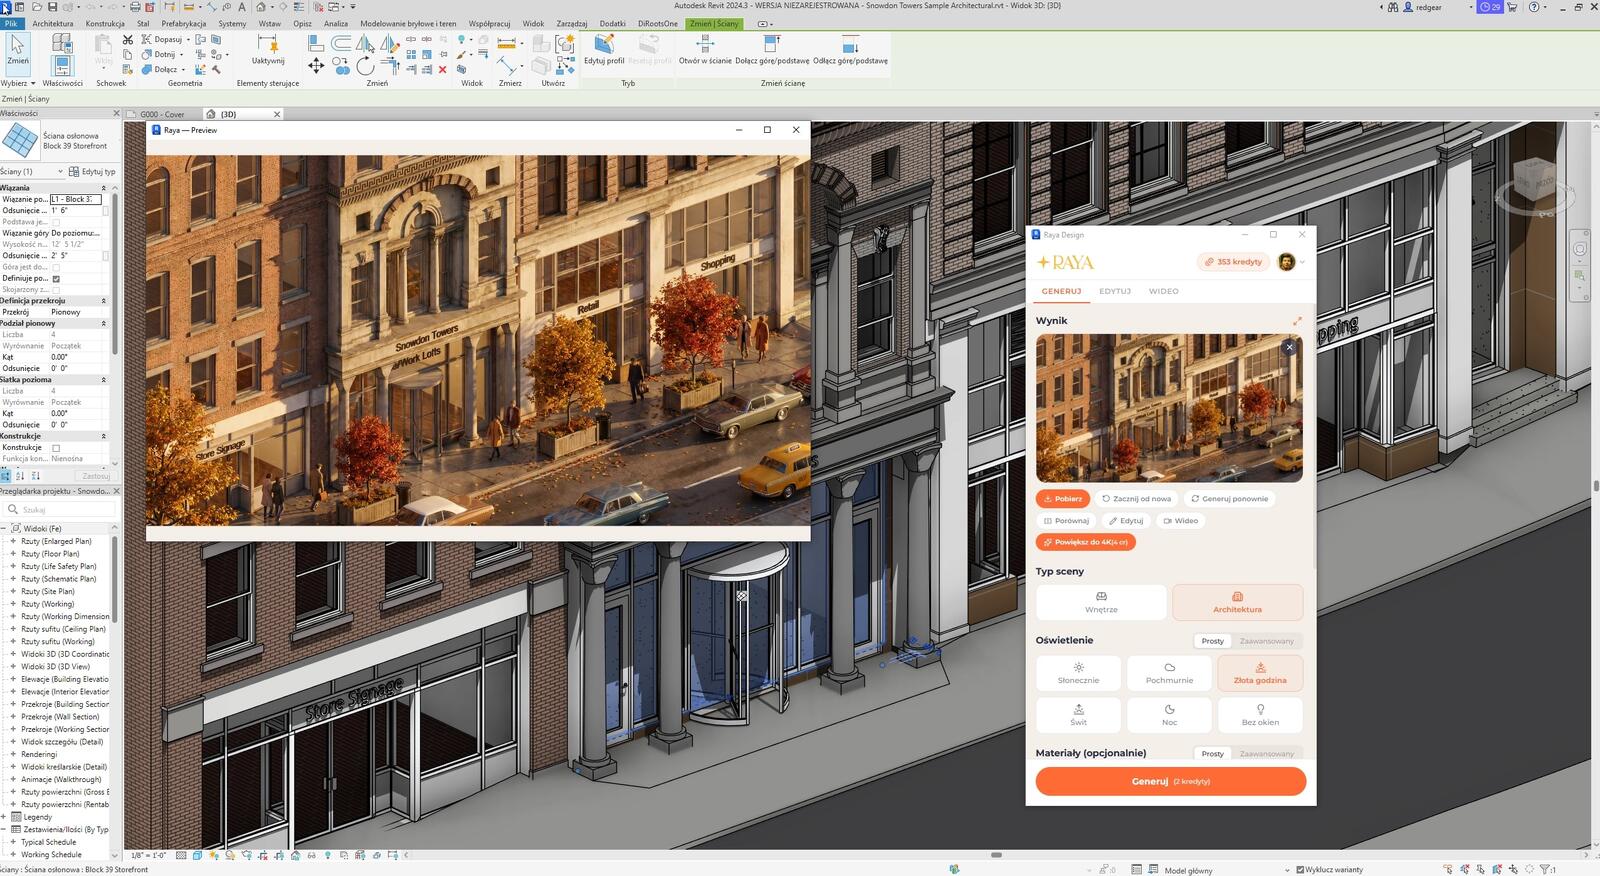
How to prepare an AI render in Revit?
- Choose a view. Open a 3D view, a camera from the Project Browser, or an elevation.
- Capture it in the panel. You can also set the aspect ratio: original, 16:9, 4:3, 1:1, or vertical 9:16 for social media.
- Select what to generate. Architecture or interior, lighting conditions, season, and, if you want, specific materials.
- Start generation. The finished visualization returns to the panel in under a minute.
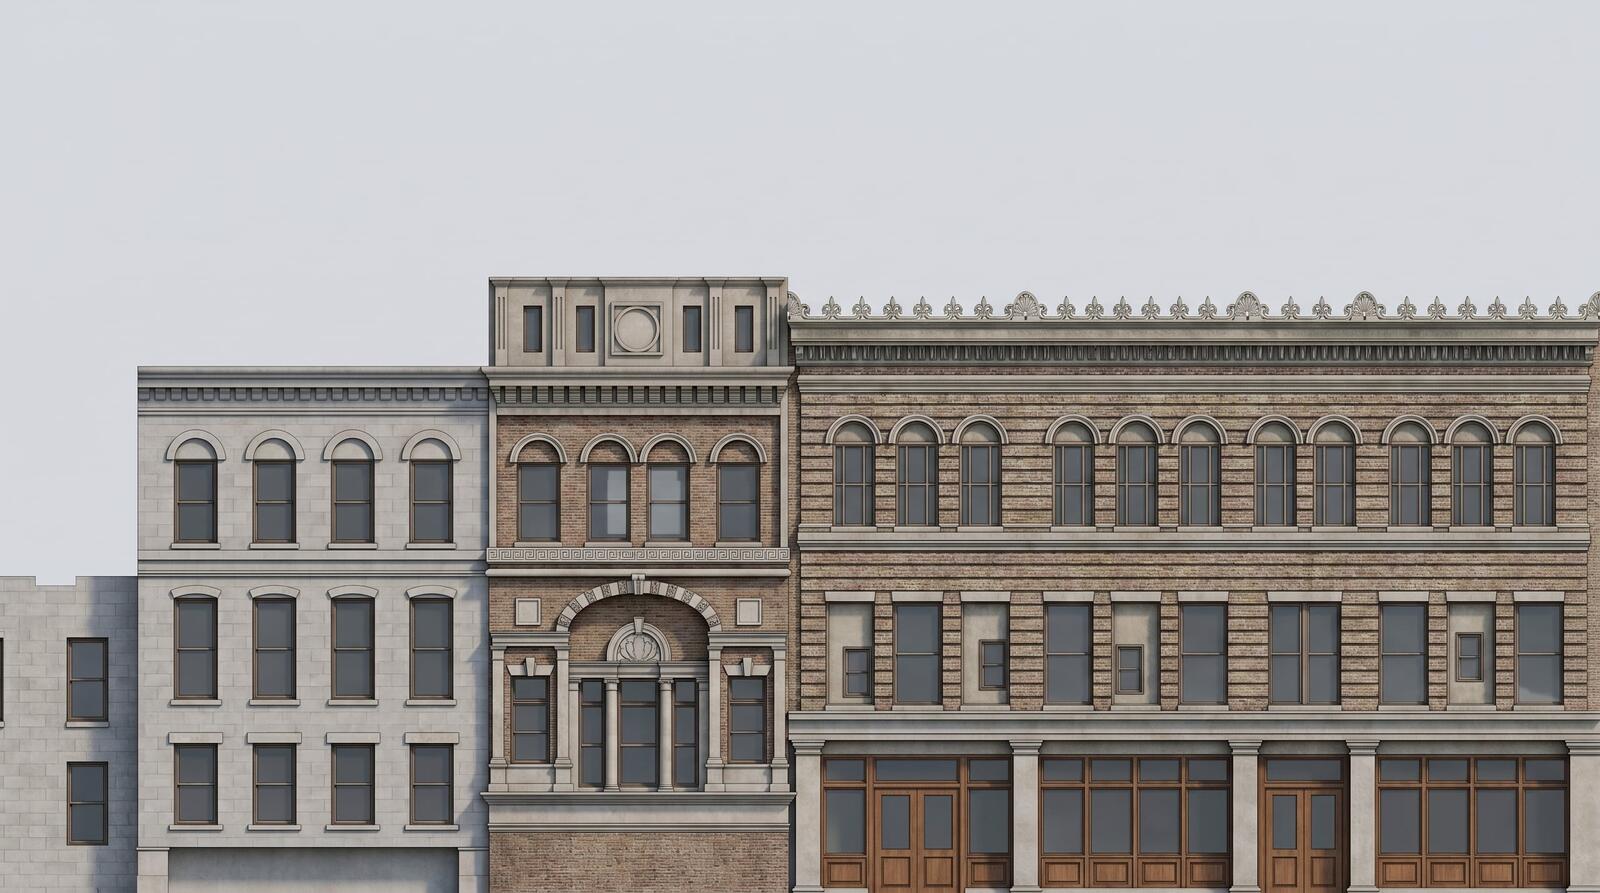
Revit elevation as a board illustration
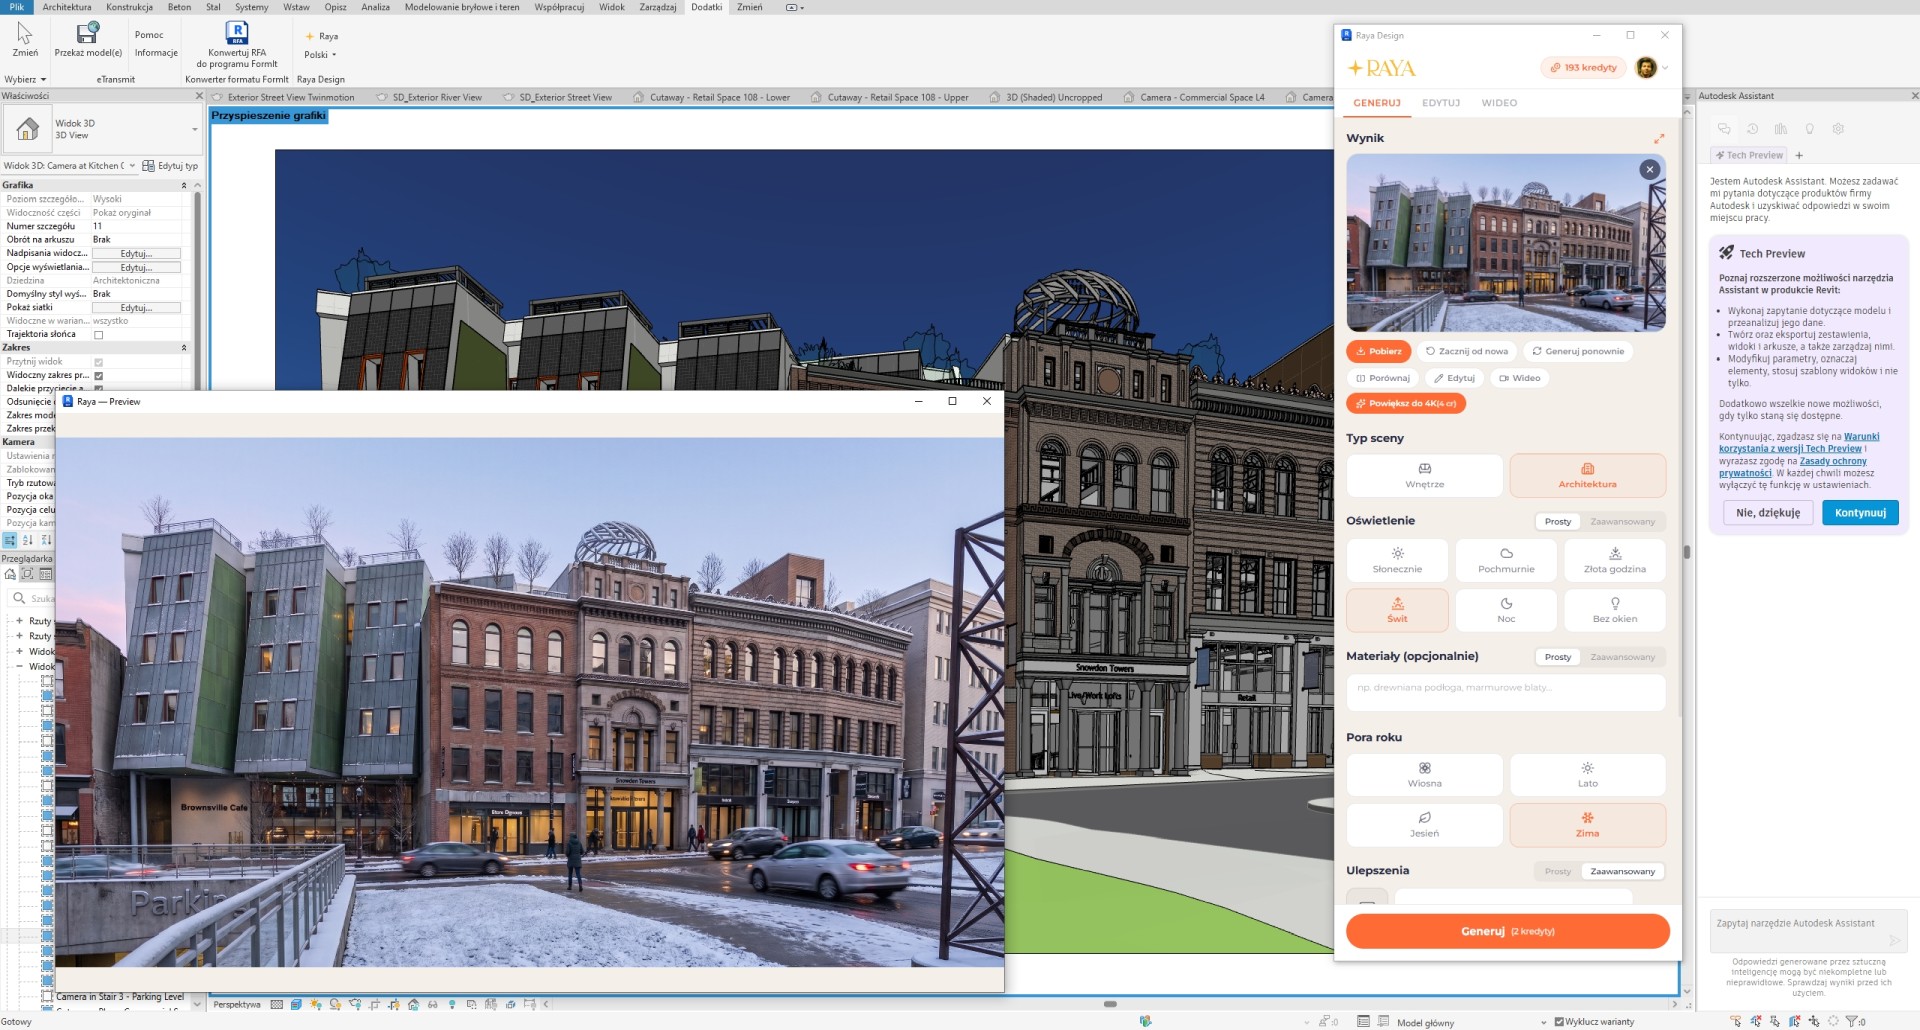
An elevation drawing also goes into the panel. From a line drawing of townhouses, Raya produced, in the example below, brick and stone façades with window frames, shop windows, and sky in the background. Such an image is useful for competition boards, project sheets, or investment portfolios where a street-level perspective doesn’t show the entire block.
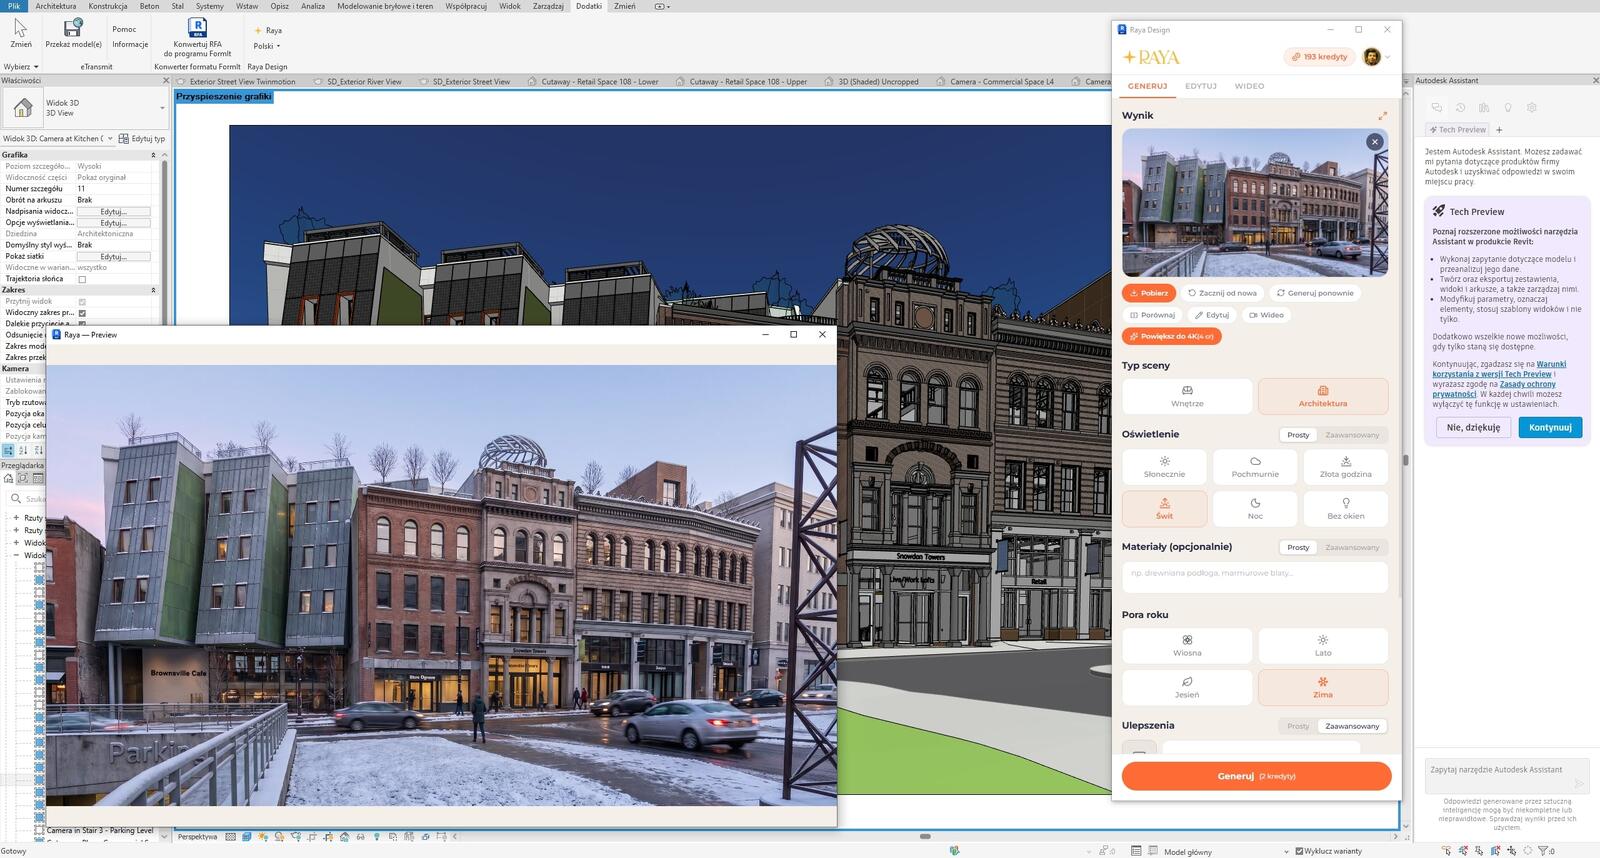
Building in context: greenery, traffic, and season
Models rarely include trees, cars, or people, yet these elements make a street look inhabited. In Architecture mode, AI adds them automatically at the correct scale, even in bird’s-eye views. You then choose the mood: full sun, overcast, golden hour, dawn, or night, and the season: spring, summer, autumn, or winter with snow on the sidewalks.
When preparing multiple cameras for one project, mark the first successful visualization as a reference using the Match Style option. Subsequent views will adopt its lighting, color palette, and atmosphere, ensuring a consistent style across the series.
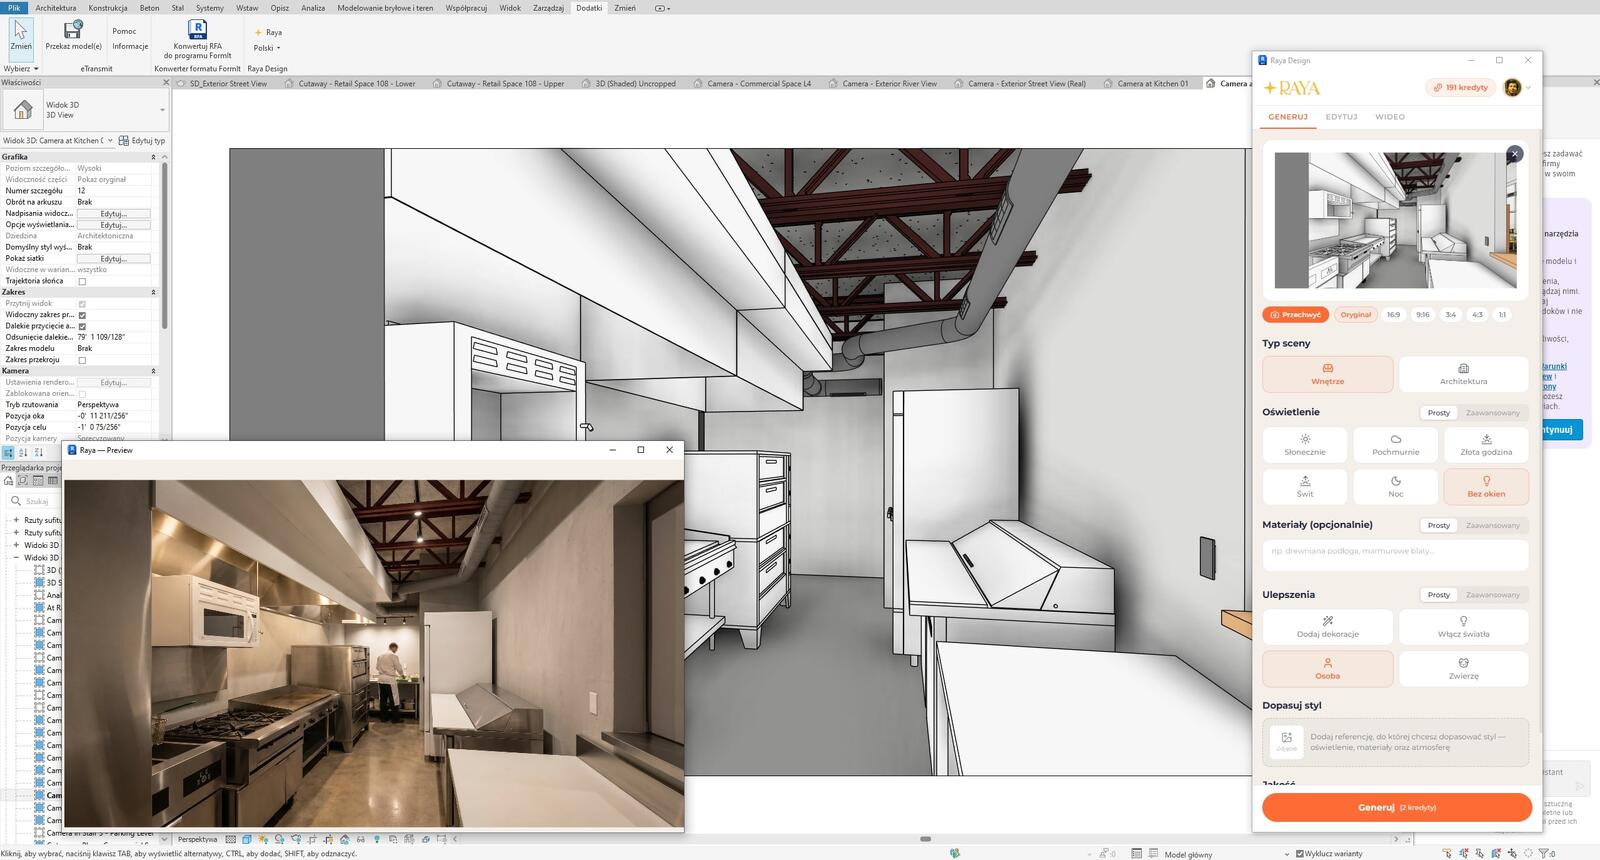
Commercial and residential interiors
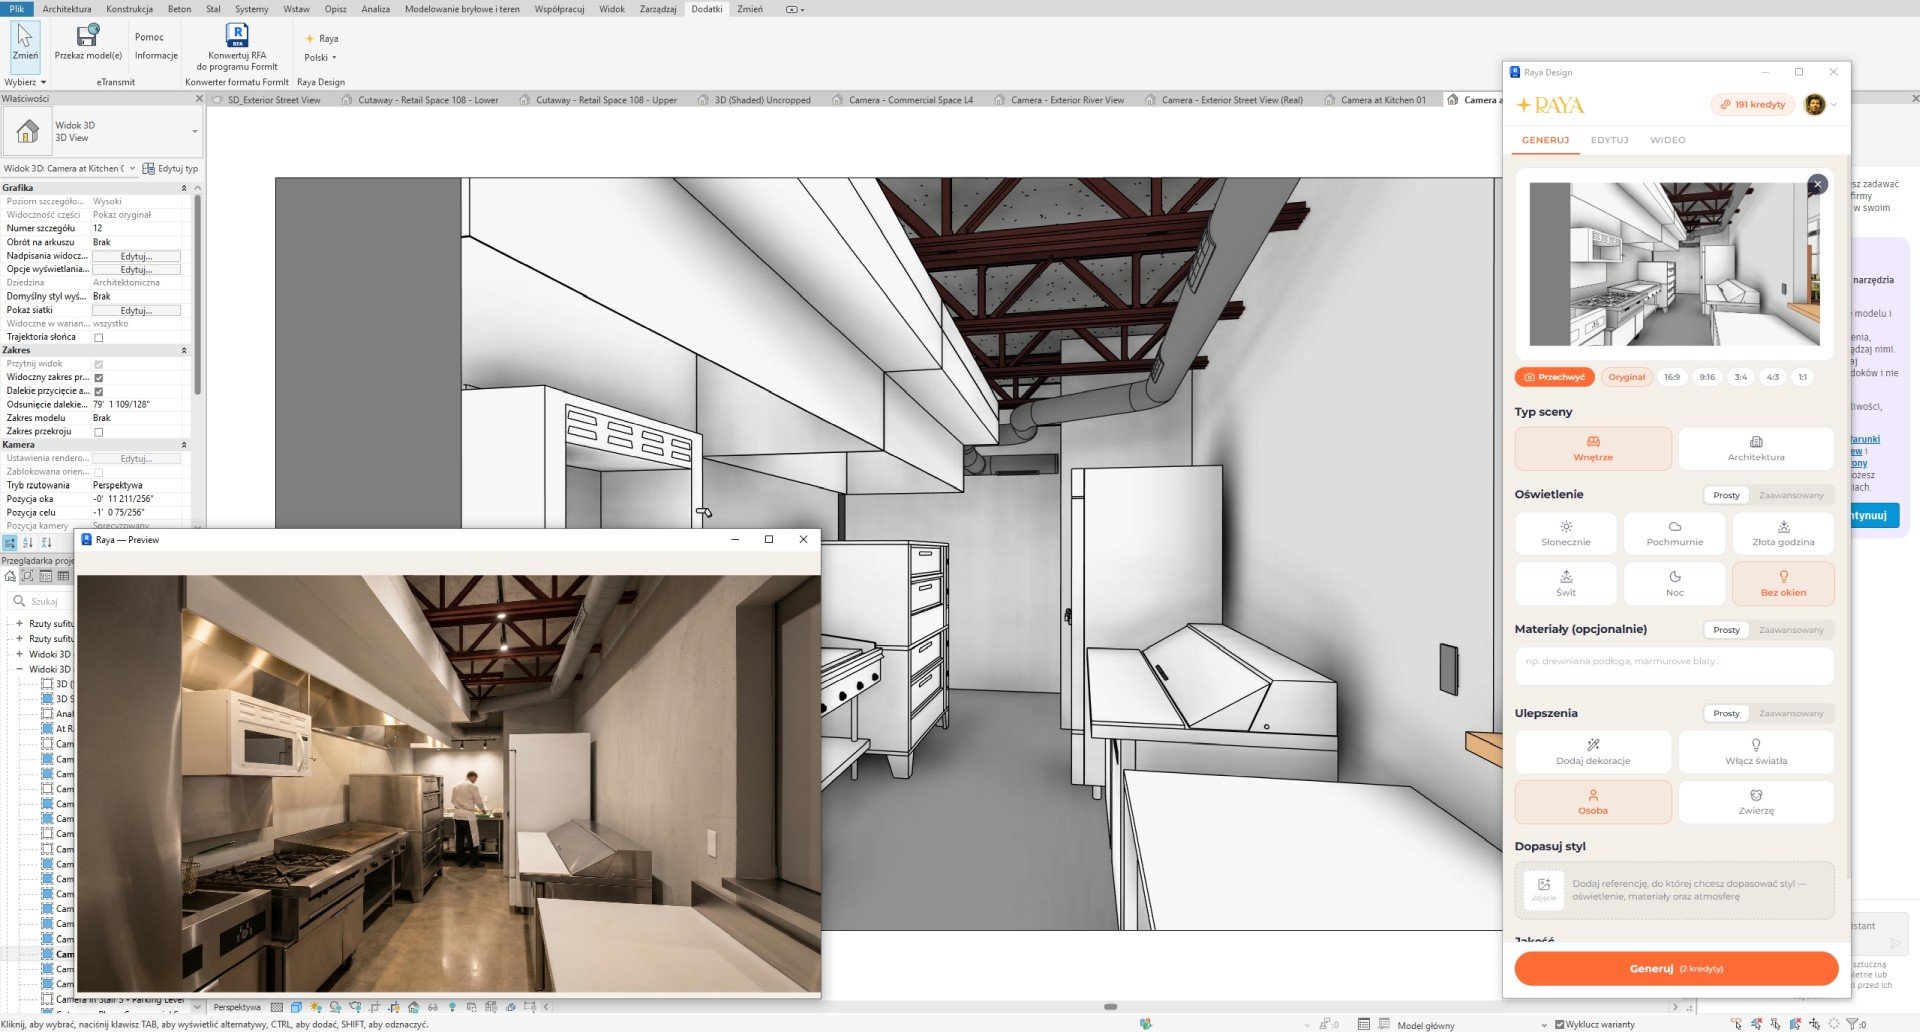
The same panel handles interiors: retail spaces, offices, apartments, or restaurant kitchens. You describe finishing materials in plain language, and for a specific fixture, chair, or cladding you upload a photo and specify where it should be placed. One toggle turns on light fixtures, another adds small furnishings or a person at work.
Edit tab: modifications on the generated image
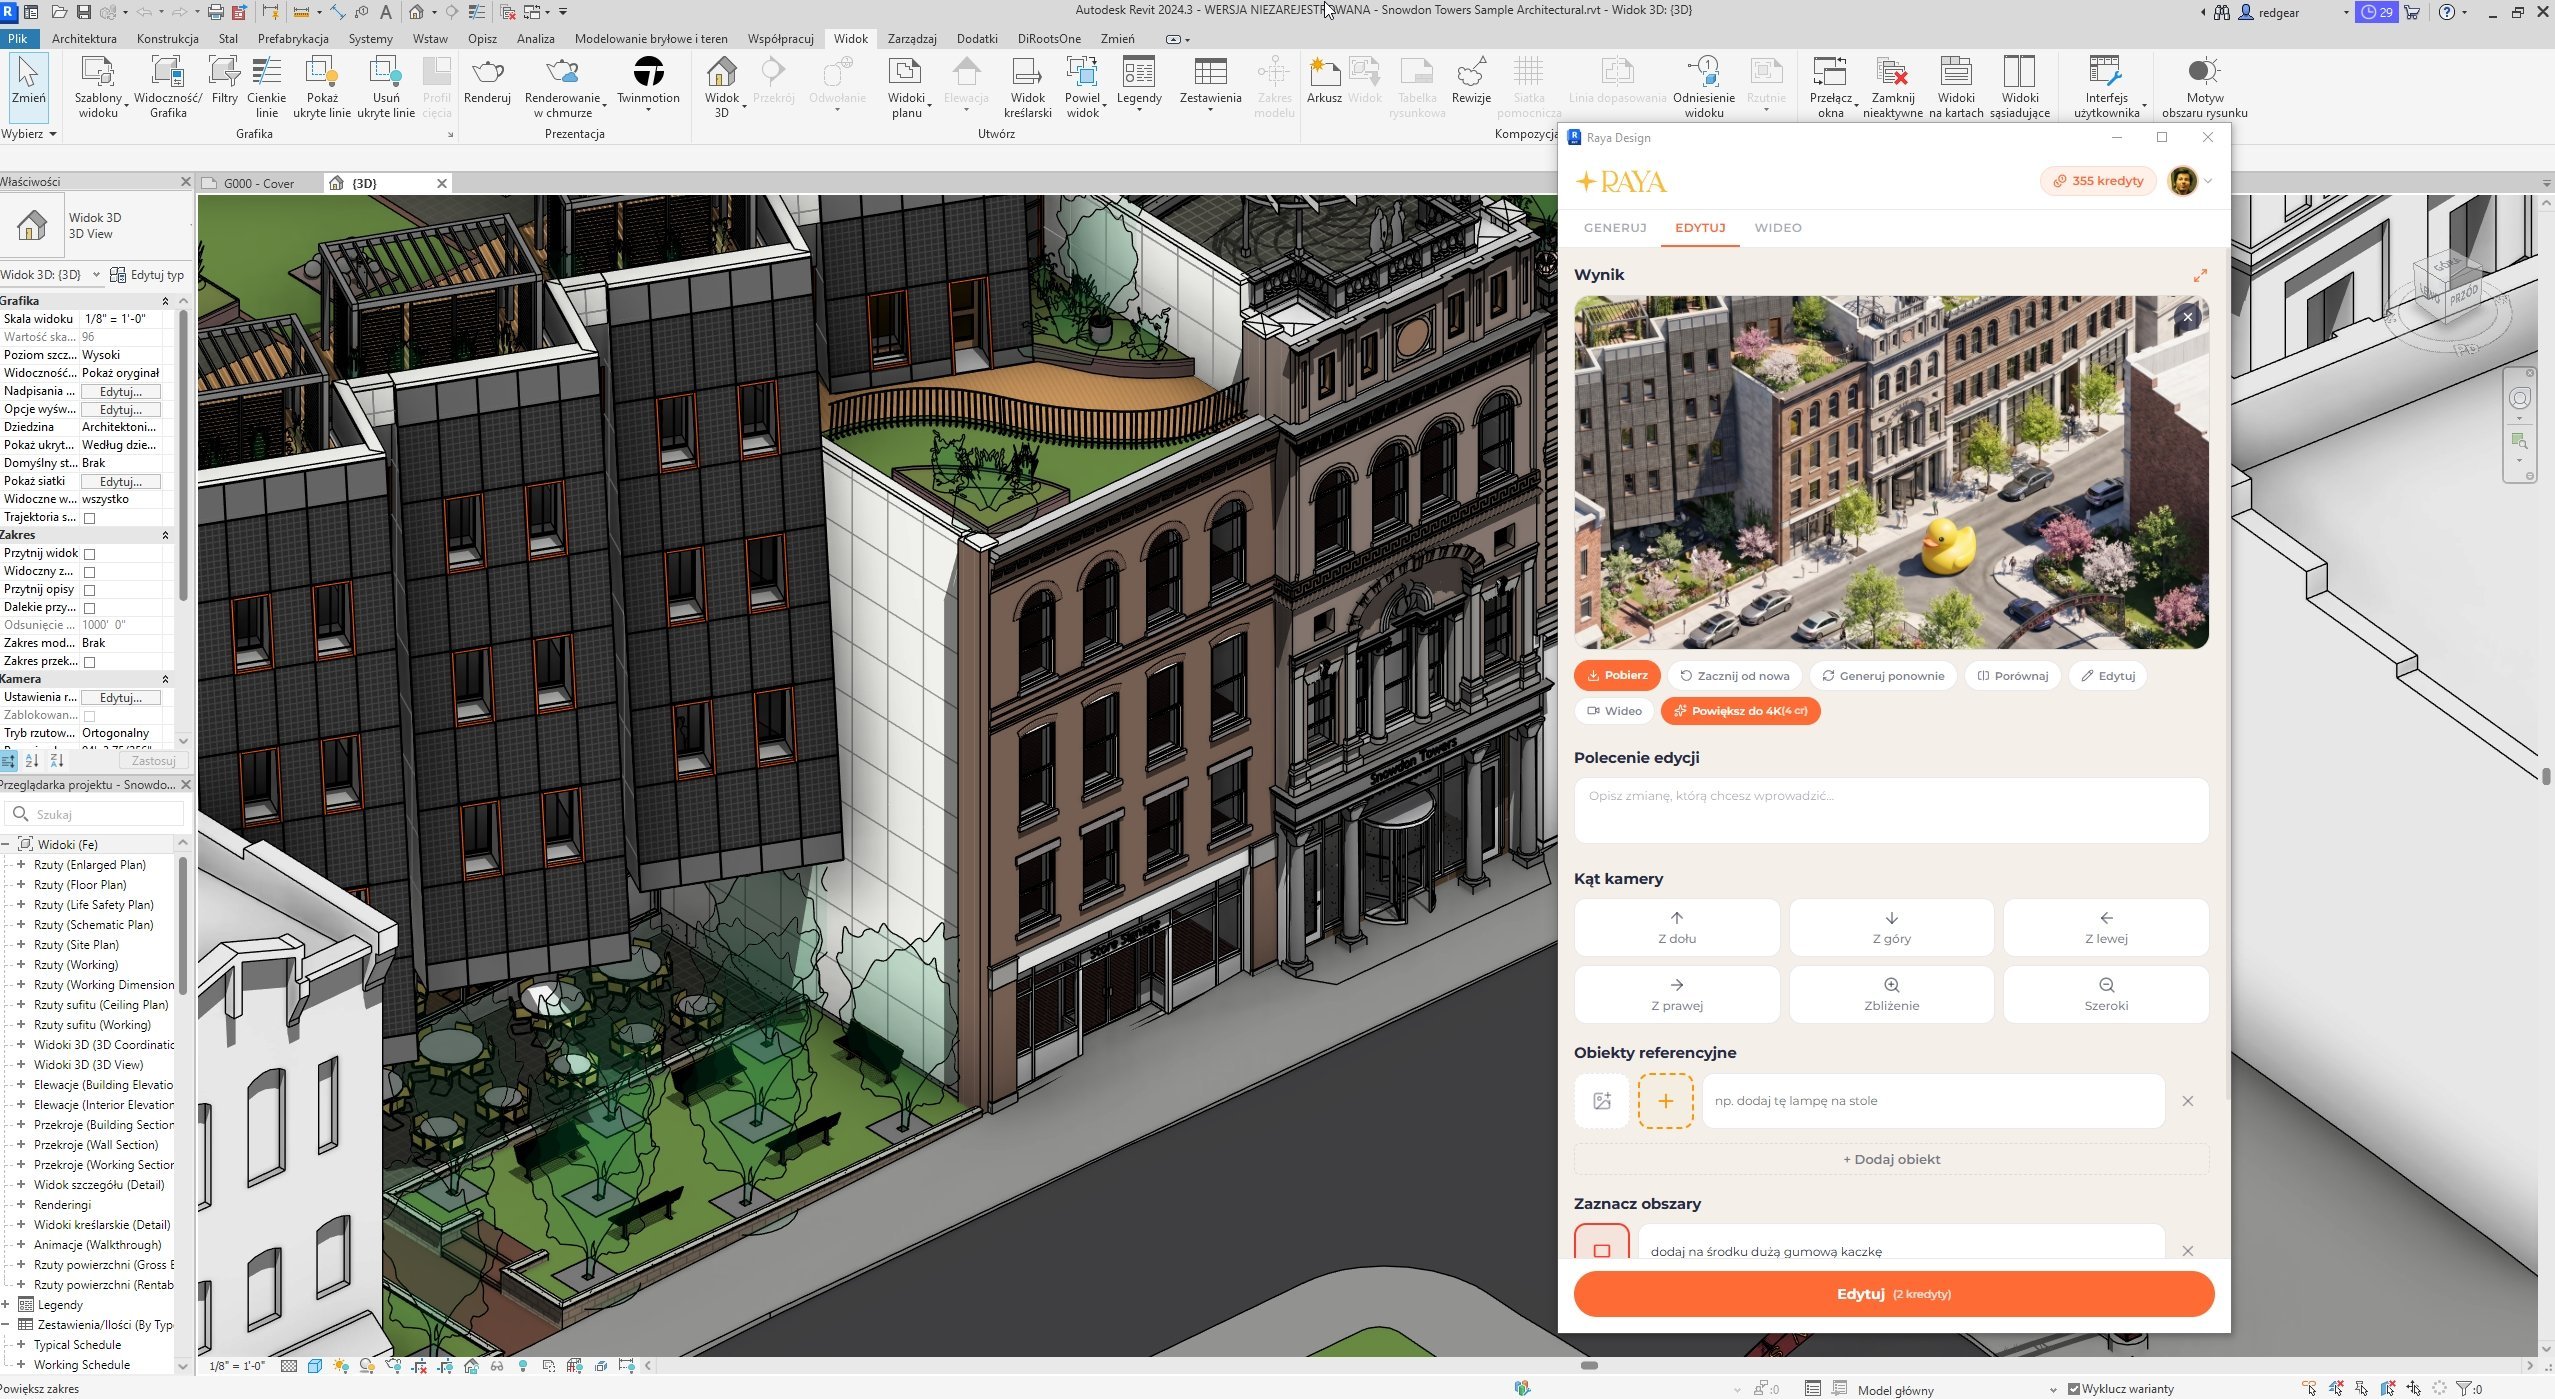
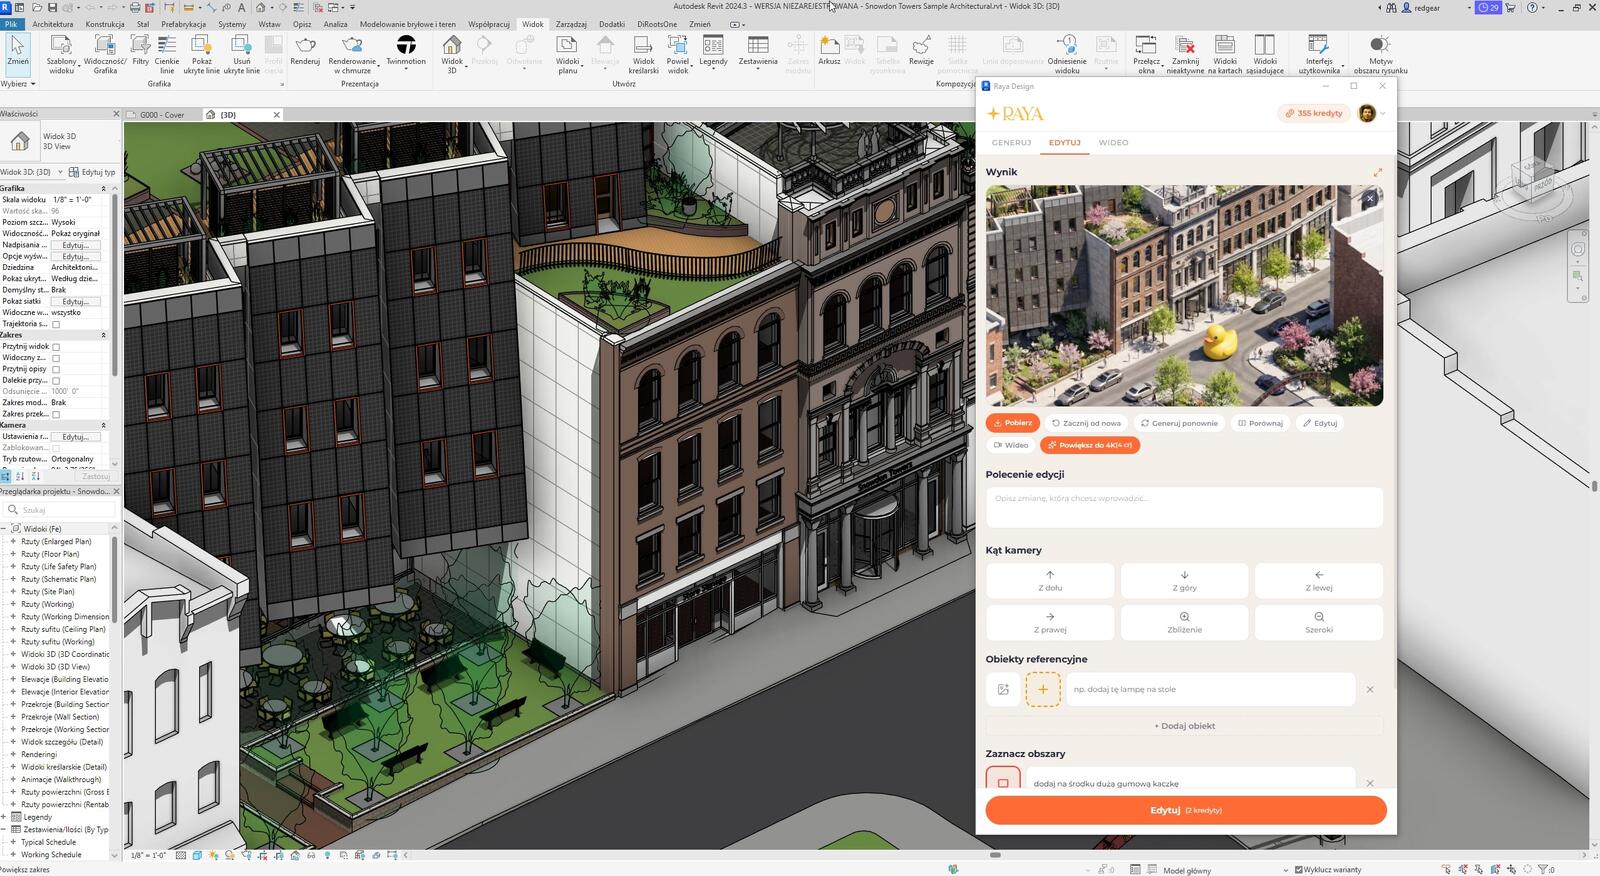
You apply another round of feedback directly on the finished image. On the visualization, you highlight an area and describe the change, add an object from a photo, or move the camera up, down, sideways, closer, or farther. In the example below, a single instruction placed a giant rubber duck on the street. It’s a joke, but it clearly shows how the added object integrates into the shot’s perspective.
Video playback directly in the panel
You can also create a short video from a visualization, for example, a slow camera drive along a façade or a day-to-night transition. You define the movement yourself or choose from preset shots. In Revit, you play the finished clip directly in the plugin panel without opening a browser.
Cost of using the Raya plugin for Revit
Downloading the plugin and creating an account are free, and credits are only spent on generated images and videos. Every new account receives 20 credits that must be used within 14 days. That’s enough to run ten cameras from your current project through Raya at 2K quality. You can use those visualizations commercially. Additional credits are purchased in packs or via subscription, and pricing can be found in the Raya pricing.
| Operation | Credits |
|---|---|
| Plugin and account | free |
| Starting bundle | +20 (for 14 days) |
| 2K render | 2 |
| 4K render | 4 |
| Editor modification (2K / 4K) | 2 / 4 |
| Upscale (4K / 6K) | 4 / 5 |
| Video clip | from 5 |
If generation is interrupted by a technical issue, your credits are not lost. The system automatically returns them to your account.
Raya alongside Enscape and Twinmotion
Raya generates images based on the view instead of physically calculating lighting, so small details may differ from the model and two runs of the same shot won’t produce identical results. When working with a client, this is usually an advantage: you get several mood proposals in the time it would take just to set up the scene in a real-time engine. Many firms use Raya for the final images as well, while they turn to Enscape or Twinmotion for views that must faithfully represent documented solutions.
The plugin works solely on the captured view image, so parameters, families, and project files remain unchanged.
Account, languages, and working on other computers
- Revit 2021 to 2027 on Windows 10 or 11.
- Plugin interface available in Polish, English, Spanish, Italian, and German.
- On Mac, you can save a view snapshot and generate a visualization from it in the Raya web app.
- The same credit pool supports the web app and plugins for SketchUp, ArchiCAD, 3ds Max, Rhino, and pCon.planner.
- Every render is saved in your account history, so you can open it later from any browser.
Visualization at every stage of the BIM project
Raya makes sense from the very first massing concept and at every meeting where you need to show updates. Instead of leaving images until the end of the project, you generate them whenever the conversation with your client calls for it. You can download the plugin for free and test it immediately on cameras from your current model.
Want to navigate Revit more confidently? Check out our Revit courses, or if you’re interested in automation and AI in BIM workflows, see the course Revit without Limits: Design, Automation & AI in Practice.
Your projects on our profile
Show us what came out of your model. Publish your Revit + Raya visualizations on Instagram or Facebook with the tag @cgwisdom.pl. We’ll share selected projects with the CG Wisdom community.