Publication date: 24-02-2026 | Update date: 24-02-2026 | Author: Piotr Kurpiewski

-
Online courses
- All
 3ds Max
 AI - Artificial Intelligence
 Blender
 Corona renderer
 GstarCAD
 LayOut
 Photoshop
 Interior Design
 Revit
Revit Sketchup
 Stable Diffusion
 V-ray
V-ray
"Online courses" are comprehensive online training programs that will help you quickly master the software you are interested in.
- Plugins
- 3D Models
- Help
- Articles
French and Classic Herringbone in SketchUp – how to do it quickly and error-free?
Manually laying French herringbone (chevron) and the classic pattern is a true nightmare for 3D interior designers, consuming valuable hours. In this text, we explain the specifics of these patterns and reveal how to automatically generate a photorealistic parquet floor with perfect wall cuts and a precise starting point using the Custom Ground Wizard plugin.
Index
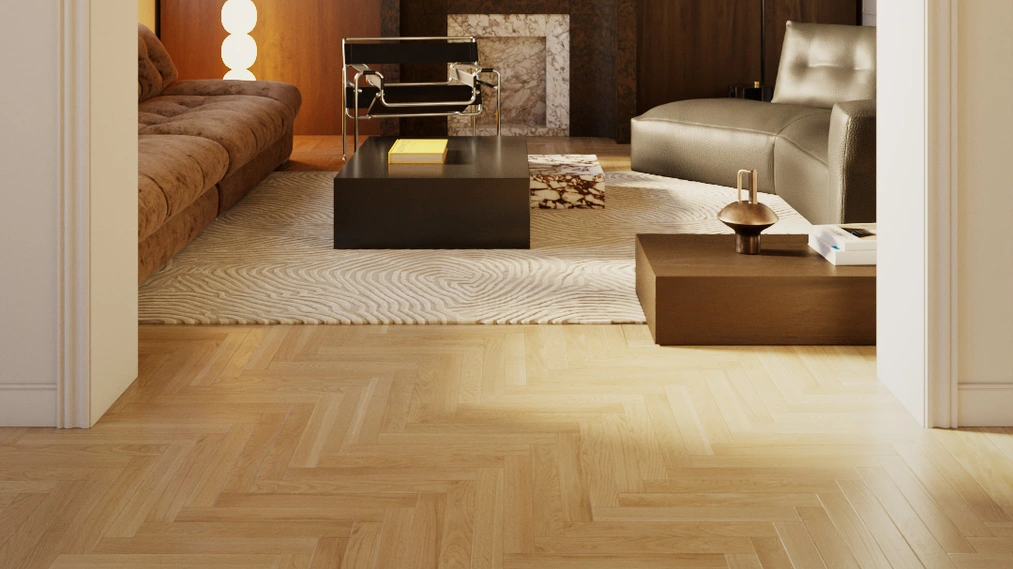
Wooden flooring is the absolute foundation of an elegant interior. From luxurious Parisian-style apartments to cozy, modern barns – interior designers love using parquet with striking patterns. Two of the most popular are undoubtedly classic herringbone (Herringbone) and French chevron (Chevron).
While clients and designers love them, for 3D artists and visualization specialists these patterns have always been a real nightmare.
If you’re wondering how to lay herringbone in SketchUp so that it looks photorealistic, has three-dimensional joints, and doesn’t eat up half your workday – this article is for you. I’ll break down the manual board-layout process into its components and show how modern tools let you automate it in just a few clicks.
The nightmare of manual 3D parquet modeling
To understand why we need automation, we first need to face the truth and recall what laying boards in SketchUp looks like with the "traditional" method.
Many beginner artists try to get by by applying a basic herringbone texture from the internet with the Paint bucket tool. The result? A flat, depthless floor that in the final render looks like wallpaper printed on a printer. Realism requires a physical 3D model with properly beveled edges that can catch light.
How does manual herringbone modeling look?
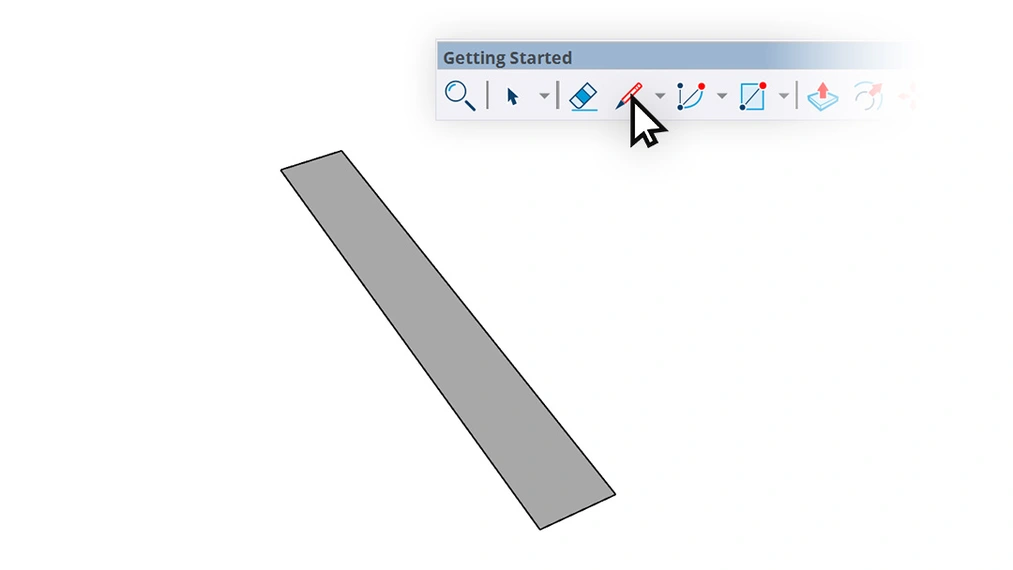
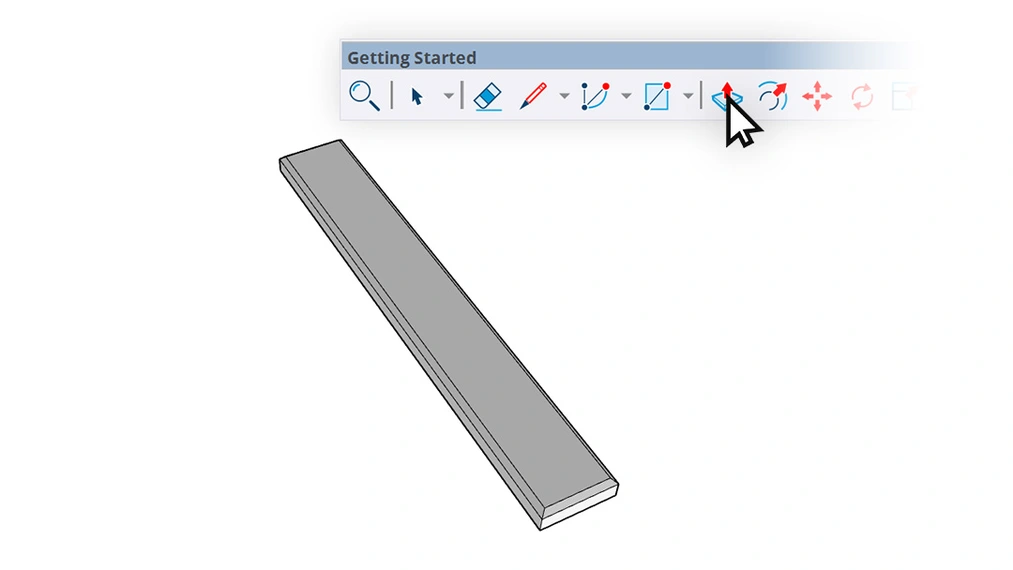
- First, you draw a single board with specific dimensions.
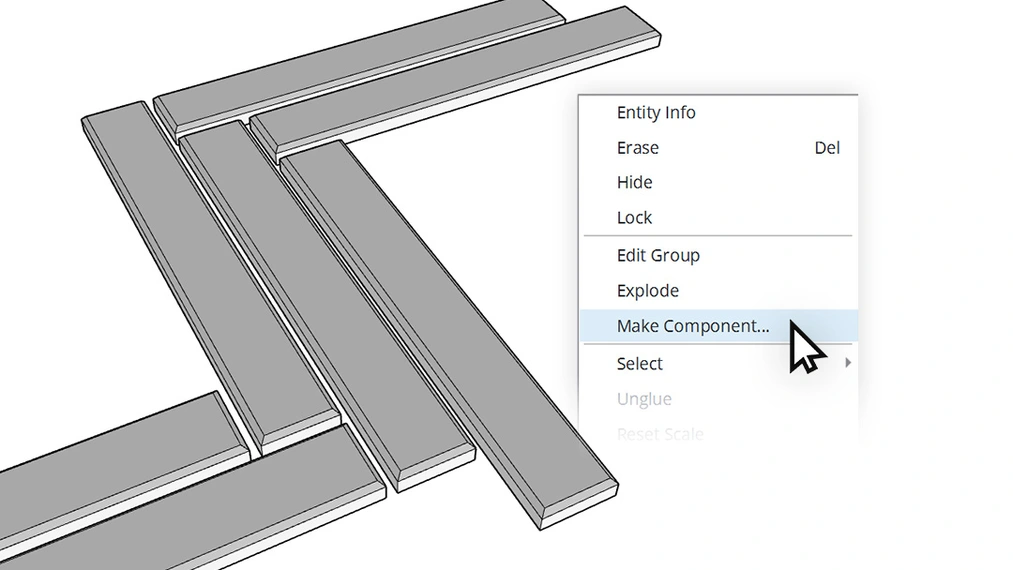
- You give it thickness, group it and convert it into a Component.
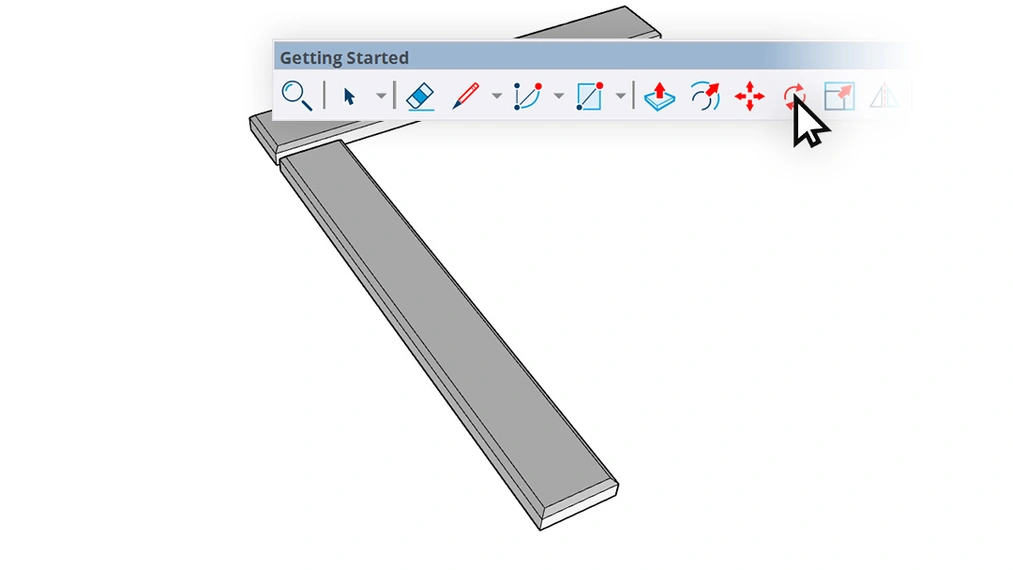
- You rotate it by 45 or 90 degrees (depending on the type of herringbone).
- You copy the board hundreds of times, trying to keep a perfect gap for the joint.
And then the worst comes... walls. The real drama begins when your precisely laid pattern reaches the room edges. In SketchUp you then have to use the Intersect faces tool to trim the protruding boards to the wall line. It’s a tedious process that requires creating unique components, generates tons of unnecessary lines (so-called junk geometry), burdens the file and relies on manually cleaning each board at the baseboard. And if the client asks to change the board dimension by 2 centimeters? You have to throw away all the work and start over.
Classic herringbone vs French chevron – what’s the difference in 3D?
Before we move on to solving this problem, let’s make sure we distinguish the two main styles clients most often request:
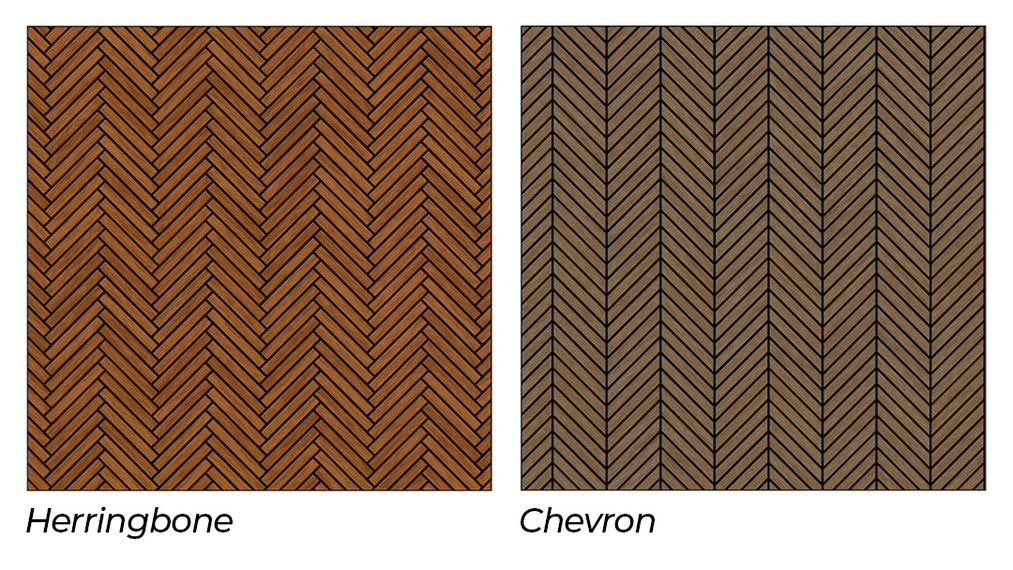
- Classic herringbone (Herringbone), also known as English herringbone. The boards are perfect rectangles laid so that the short side of one board meets the long side of another at a 90-degree angle, creating the characteristic "woven" pattern.
- French chevron (Chevron) is the symbol of luxury. Here the boards aren’t rectangles – their short ends are cut at an angle (usually 45 or 60 degrees). Joining two rows forms a perfect continuous V-shaped line (the so-called point). Manually modeling and trimming a French chevron in a 3D program is a task for people with nerves of steel.
Custom Ground Wizard: the intelligent special-purpose automation
Fortunately, you no longer have to waste time fighting geometry. The solution that has revolutionized this process is Custom Ground Wizard. This tool reduces laying the most complicated parquet to selecting options from a dropdown menu.
In the PRO version of this plugin, advanced algorithms do all the dirty work for you!
CHECK OUT CUSTOM GROUND WIZARD PRO – FLOOR GENERATOR FOR SKETCHUP
How does Custom Ground Wizard work in practice?
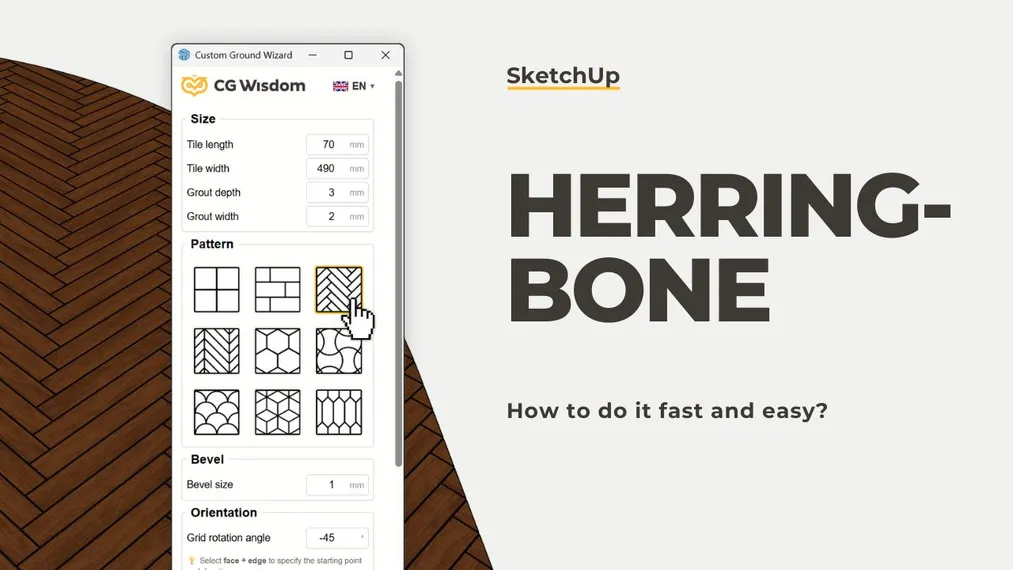
You select the floor in your project (whether the room is perfectly square or has curved walls and niches). You open the Custom Ground Wizard panel and choose Herringbone or Chevron from the pattern library. You enter the board dimensions (e.g. 60×15 cm), the joint width and… click "Generate".
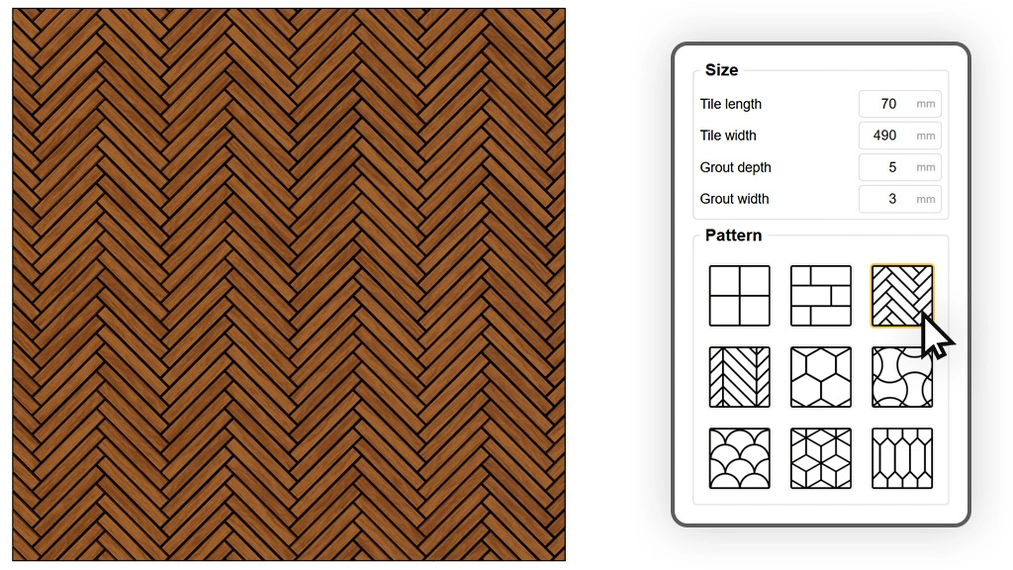
The plugin automatically fills the entire room with a physical 3D parquet model. Most importantly – the algorithm detects room boundaries and automatically trims all boards at the walls. No more Intersect faces tool and geometry cleanup!
Key to a perfect floor: a precise starting point
Imagine you’re standing at the threshold of a newly designed living room. You look at the beautiful floor, but something is off. Right by the door frame, the herringbone is cut in an unnatural way, leaving a narrow two-centimeter strip of wood. That’s often how weak generators finish their job, starting the pattern from a random point in the room.
For a professional interior designer, such a detail is unacceptable. That’s why Custom Ground Wizard is equipped with a starting point selection feature.
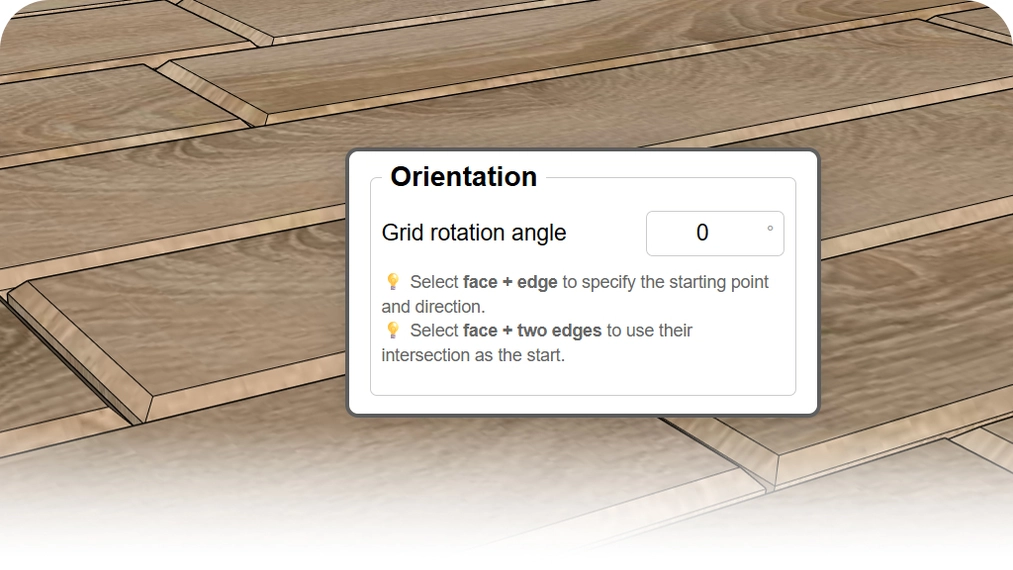
Before generating the floor, just select two edges (e.g. the corner by the room entrance). The plugin treats this spot as the ideal "zero" point and lays a full, uncut board right from the threshold. This gives you complete control over the final parquet layout, just like a true on-site professional.
Say goodbye to the "stamp effect" – intelligent texturing
Perfect geometry is only half the success. The other equally important element of a photorealistic visualization is the material itself. Even a perfectly laid French chevron loses its charm if every one of the hundreds of boards shows the same repeating wood grain pattern. In 3D graphics, we call this the "stamp effect" (tiling).
Manually adjusting the UV mapping (Texture positioning) on each generated component is a process that can drive you crazy. The Custom Ground Wizard plugin in its PRO version solves this problem completely automatically.
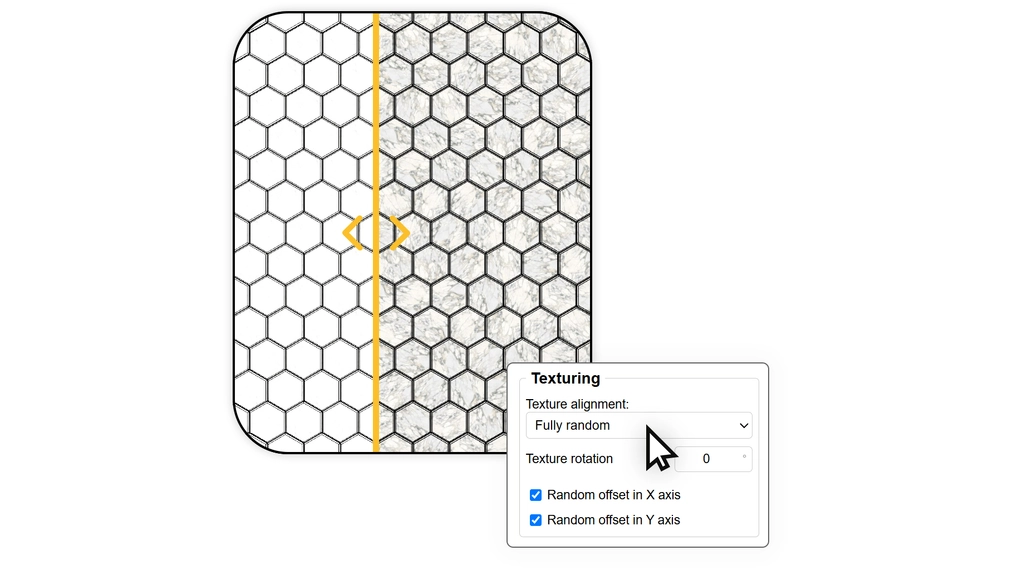
Using the built-in random texture offset feature (on the X and Y axes) and its transverse or longitudinal alignment, the algorithm ensures each generated plank looks unique. You only need one basic seamless texture sample to cover a huge floor area with parquet that perfectly mimics natural, varied wood structure. This is the final step to full photorealism.
DOWNLOAD CUSTOM GROUND WIZARD FREE – FLOOR GENERATOR FOR SKETCHUP
Stop wasting time, start designing
The time you spend manually duplicating and trimming rectangles in SketchUp could be spent refining materials, setting up better lighting, or simply – resting.
If herringbone in SketchUp or other advanced geometric patterns regularly appear in your projects, automating this process is the best investment in your workflow.
Where to download Custom Ground Wizard?
Unlock the full potential of your visualizations. The PRO version of the plugin gives you immediate access to classic herringbone, French chevron (Chevron), hexagons and advanced random texture-mapping features. Purchase the Custom Ground Wizard PRO extension – the best floor generator for SketchUp.
Wondering if the plugin engine will handle your computer? You can check it at no cost! Download the free version of the Custom Ground Wizard extension – test grid and brick pattern generation on your own projects. The free version is fully legal for commercial use!
Author

Przeczytaj o programie Sketchup na naszym blogu
-
![Unusual Shapes and Tiles in SketchUp – Gores, Hexagons, and Fans]()
Unusual Shapes and Tiles in SketchUp – Gores, Hexagons, and Fans
Hexagons and gores in SketchUp in 5 seconds? Discover how to model the most challenging tile shapes. Read now! -
![3 ways to create a floor in SketchUp – from texture to a 3D model]()
3 ways to create a floor in SketchUp – from texture to a 3D model
From a flat texture to advanced 3D. Discover 3 methods for creating a floor in SketchUp and uncover our reliable "gamechanger". Read on! -
![Floor Generator for SketchUp not working? Discover the best alternative in 2026!]()
Floor Generator for SketchUp not working? Discover the best alternative in 2026!
Tired of Floor Generator errors? Discover the reliable Custom Ground Wizard plugin and create 3D floors stress-free. Read the article! -
![SketchUp, V-Ray - Frame Buffer Window Not Responding - Tutorial Guide]()
SketchUp, V-Ray - Frame Buffer Window Not Responding - Tutorial Guide
Can't preview the progress of your visualization? You click on the taskbar, but the Frame Buffer doesn't respond? Don't worry, there's a simple solution.

Want to learn Sketchup? Check out our free online course!