Publication date: 17-12-2025 | Update date: 17-12-2025 | Author: Piotr Kurpiewski

-
Online courses
- All
 3ds Max
 AI - Artificial Intelligence
 Blender
 Corona renderer
 GstarCAD
 LayOut
 Photoshop
 Interior Design
 Revit
Revit Sketchup
 Stable Diffusion
 V-ray
V-ray
"Online courses" are comprehensive online training programs that will help you quickly master the software you are interested in.
- Plugins
- 3D Models
- Help
- Articles
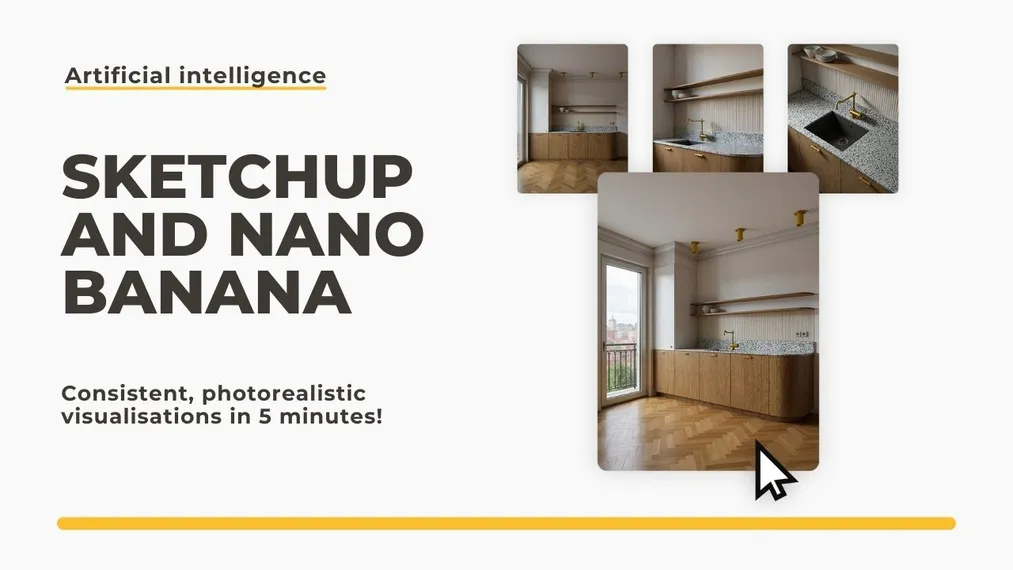
SketchUp and Nano Banana Pro: photorealistic visualizations in 5 minutes! Is this the end of V-Ray?
Is a photorealistic visualization in 5 minutes possible? In this article, we present the complete workflow for working with Nano Banana Pro and SketchUp (although the same principles apply to any software). You'll learn why it's worth abandoning the clay render in favor of textures, how to use the new Ambient Occlusion and how to create simple prompts that deliver spectacular results. See how artificial intelligence is changing the game in interior design and find out whether it can already replace V-Ray.
Index
How many hours a year do you think you lose setting up lights, tweaking material parameters and waiting for a test render? Traditional rendering engines like V-Ray or Corona are powerful but require time and specialized knowledge. But what if you could turn a raw SketchUp view into an astonishing, photorealistic visualization in less time than it takes to brew a coffee? With tools like Nano Banana Pro, this vision becomes reality!
In this article I will show you the complete workflow: from preparing the model in SketchUp (using the new features introduced in the 2025 version), through simple prompting, to the final result that will sell your idea to the client. See how to handle interiors, architecture, or even how to rescue old, flat visualizations.
Why does traditional rendering lose its relevance at the concept stage?
Many interior designers and architects still believe that the only path to photorealism is painstakingly configuring a rendering engine. In the meantime, artificial intelligence has made a giant leap in recent months. Nano Banana Pro doesn't work like a simple filter on Instagram. It's an advanced model that analyzes the geometry, perspective and context of your project. It maintains consistency and guarantees full control over the result.
For small design studios, freelancers, or real estate agents, time is money. If you can show a client 5 bathroom variants in 15 minutes instead of waiting all night to render one version, you gain a competitive advantage.
How to create a bedroom visualization using artificial intelligence?
Let's start with a classic example: a bedroom. In traditional 3D software, getting realistic-looking bedding, velvet on the headboard or a soft rug requires advanced maps (Displacement, Falloff), the skill to handle complex settings and substantial computing resources.

But look at this example of a simple bedroom model. The SketchUp view is schematic. After passing it through Nano Banana Pro, the AI flawlessly interprets the materials: gray velvet, herringbone wooden flooring and golden lamp bases. Notice also how naturally the light falls on the bed and how "soft" the image feels. This is the ideal solution for interiors where a cozy atmosphere is key rather than engineering-level precision of fiber weaving.
AI COURSES - ARTIFICIAL INTELLIGENCE IN DESIGN
How to prepare your SketchUp model to create the perfect AI visualization?
This is the most important part of this guide. The quality of what comes out of the AI model depends directly on the quality of what you put into it. While it might be tempting to use a white model (so-called clay render), you will achieve much better results by preparing a view with colors.
Colors and textures: Your semantic map
Use a view with applied textures. They don’t have to be high-quality! It’s enough for SketchUp to display a "wood-like" blotch on the floor, and the AI will understand: "aha, this is oak flooring" and generate it in photorealistic quality. Thanks to the colors, the AI model knows where the wall ends and the furniture begins, which helps avoid misinterpretation of the geometry.
Edges: how to avoid black blotches?
Edges in SketchUp can be tricky. A too-dense mesh of lines (e.g. on plants or decorations) creates a black blotch that AI may misinterpret. It’s often worth turning them off. However, for moldings or kitchen furniture, edges are essential to show divisions.

Pro Tip: in the style settings of SketchUp, choose the "Color by Material" option for edges. That way, lines on light-colored moldings won’t be black but subtly gray (matching the molding’s color). See how this trick saved the details in a living room with a kitchen project. The cornices are visible but don’t dominate the image.
The secret ingredient: Ambient Occlusion
The feature introduced in SketchUp 2025 is an absolute game changer for AI work. Ambient Occlusion adds shading in corners and junctions of surfaces that meet at steep angles. Why is this so important? Nano Banana Pro “reads” image depth based on contrast. With AO enabled, the model immediately understands spatial relationships – it knows a cabinet stands on the floor, not floating 5 cm above it. This drastically reduces errors and “hallucinations” by the model.
Export and settings – how to transfer your project to Nano Banana Pro?
Once you have your view ready, ensure proper resolution. The default screenshot can be too small. Export the 2D image from SketchUp with its shorter edge set to at least 1440 pixels. Nano Banana Pro can generate images in very high resolutions (even above 4000 px), but it needs a clear "input."

In the Nano Banana tool itself (in the Gemini interface), you simply paste the image. The model first analyzes it – "thinks" and recognizes objects. This is the key difference compared to older generators that worked blindly.
The secret to the perfect prompt: how to talk to artificial intelligence?
Forget about complicated .json files or magic formulas sold by "experts" on Instagram. A good prompt in Nano Banana Pro is simple and logical. Since the AI sees your image (it sees the sofa, the table and the window), you don't need to waste time describing every piece of furniture.
Focus on lighting, style and mood. Use phrases associated with quality:
- "Interior design photography"
- "Soft natural lighting from the window"
- "Cozy atmosphere, cinematic quality"
- "8k, high detailed textures, photorealistic, PBR materials"
Clearly indicate what the model should leave unchanged and what its goal is. An example prompt could look like this:
Convert this SketchUp view of a loft living room into a photorealistic visualization. There is a soft sunlight coming from the windows. Keep the materials, framing and perspective as it is. Add photorealistic characteristics to the image with PBR materials and global illumination. It should look like a photo of a modern interior.
AI visualizations of complex interiors and changing the time of day
Look at this spacious loft. We have great depth here, brick walls, slanted ceilings. This is an unusual interior, so complex you might think Nano Banana couldn't handle interpreting it. But notice how well the model tackled the task!

Note how much time you can save this way. What's more – in traditional rendering, changing lighting from daytime to evening would require rebuilding the scene, adding artificial lights, and re-rendering.
In Nano Banana Pro, you only need to change the prompt. Instead of "soft sunlight," type "evening mood, cinematic artificial lighting, warm tones." The AI recognizes lamps hanging in the project and turns them on, generating atmospheric shadows and reflections on the floor. This is a powerful tool for instantly showing a client different versions of the same space.
Corrections and details – what to do when the AI makes a mistake?
The first result isn't always perfect. The nature of generative AI is probabilistic. If the AI misinterprets a part, don't ask it endlessly to improve the photorealism. It's best to click "Rerun" to regenerate or open a new chat, thus resetting the history and clearing the model's memory of the incorrect assumptions.
You can also swap elements precisely. If the client doesn't like the bedside lamp, you can paste into the chat a photo of the specific product (e.g. packshot from a website) and ask for a replacement. Nano Banana Pro handles such tasks excellently, which we cover in more detail in the article: Homestaging with AI: How to change interior decor in an existing photo?
AI limitations: mirrors and complex geometry
Let's be honest – AI has its limits. The most challenging elements are mirrors, because in a flat SketchUp view, you can’t see the reflection. Let's see this in a bathroom example.

Nano Banana Pro usually assumes that the opposite wall should be reflected in the mirror. However, for a complex layout (e.g., a shower opposite the mirror), it's worth specifying this in the prompt: "bathroom mirror reflecting the glass shower cabin opposite to it".
If a verbal description alone isn't enough, Nano Banana Pro has an ace up its sleeve. You can add a second reference image to the chat, e.g. a view from another camera or a photo showing what's opposite the mirror. The model will combine this information, understanding exactly what it should insert in the reflection. This greatly reduces the risk of "hallucinations", i.e. the appearance of elements that are not in the design.
Can artificial intelligence create a visualization based on a clay render?
Many people starting out with artificial intelligence instinctively reach for the so-called clay render, that is, a white model without textures. It looks clean and aesthetic, but for a generative model it's a major challenge. Take, for example, a modern building mass.
If we input only the white mass of the building into Nano Banana Pro, we deprive the model of a "map" of materials. The AI then has to guess: is that wall white plaster, concrete, or maybe light stone? Is that surface glass or metal? Even if we describe the image very precisely, or add annotations to the drawing, it often ends up with random materials that have nothing to do with the design.

Conclusion: the more "meat" you give the model at the input, i.e., specific textures and colors (even the ugly SketchUp ones), the better and more vision-accurate result you'll get at the output. Let's leave clay renders for mass analysis and the stage of sourcing finishing materials, not as input for AI visualizations.
Improving ready-made AI visualizations – a second life for your renders
Now that you know it's best to work with "raw" textured views, it's worth mentioning another use. Nano Banana Pro excels as a post-production tool. You can upload a finished but "flat" visualization or a V-Ray test render that came out too dark.
An ideal example is a project by my student, Tatsiana, done at the start of her interior architecture studies. The original image was geometrically correct but lacked a photorealistic touch. After processing by artificial intelligence, the scene gained beautiful, directional lighting, the materials became more expressive (note the concrete texture), and the resolution was enhanced. However, remember that with a final render, the model has less interpretative freedom than with a raw view from SketchUp (or any other software). Sometimes it's better to give it more "leeway" by uploading the view directly from the 3D software viewport.

If you want to bring such scenes to life even more, you can add people to them, which you can read about in the article: People in visualizations: how to add realistic figures in Nano Banana Pro?
Will Nano Banana Pro replace V-Ray? Verdict for the architect!
For conceptual projects, quick client approvals, mood boards, or real estate marketing, Nano Banana Pro already wins on speed and ease of use. You don't have to be a rendering expert to create beautiful images.
However, for production visualizations, where every element has to be a specific 3D model built to the correct scale, and the lighting matches down to the lumen: V-Ray and Corona are still the standard. But think how much time you’ll save by using AI early in the workflow. Or maybe your work doesn’t require that level of detail and you can already skip the render engine?
Do you want to take AI use to the next level?
What I’ve shown above is just the tip of the iceberg. If you want to learn how to create video animations from your projects, work with advanced FLUX models in a customized Comfy interface, and also implement AI in your firm permanently, check out our AI visualization and video course – Nano Banana, FLUX Kontext, Veo, etc. in architecture and design.
Author

Przeczytaj o programie AI - Artificial Intelligence na naszym blogu
-
![AI for furniture manufacturers - See how to create furniture packshots and catalog arrangements with raya.design]()
AI for furniture manufacturers - See how to create furniture packshots and catalog arrangements with raya.design
Packshots without time-consuming sessions? Discover Raya Design. Change upholstery and create arrangements with AI in moments. See how it works! -
![Virtual AI home staging - how to furnish an empty apartment from a photo in one minute using Ray?]()
Virtual AI home staging - how to furnish an empty apartment from a photo in one minute using Ray?
Fast interior transformation without 3D modeling? Meet Ray Design. Furnish an empty apartment from a photo in one minute with AI. Come in and see how it works! -
![Quick AI visualizations from SketchUp - Meet Raya: an alternative to V-Ray]()
Quick AI visualizations from SketchUp - Meet Raya: an alternative to V-Ray
Done with tedious V-Ray? Test Raya Design in SketchUp! Create photorealistic interior visualizations without prompts. Click to find out! -
![Raya - The simplest AI tool for designers: zero prompts, maximum control!]()
Raya - The simplest AI tool for designers: zero prompts, maximum control!
Try raya.design for free! Get 20 credits to start and create photorealistic 3D visualizations without prompts. Click to check it out!