Publication date: 07-05-2025 | Update date: 09-05-2025 | Author: Piotr Kurpiewski

-
Online courses
- All
 3ds Max
 AI - Artificial Intelligence
 Blender
 Corona renderer
 GstarCAD
 LayOut
 Photoshop
 Interior Design
 Revit
Revit Sketchup
 Stable Diffusion
 V-ray
V-ray
"Online courses" are comprehensive online training programs that will help you quickly master the software you are interested in.
- Plugins
- 3D Models
- Help
- Articles
SketchUp - Perfect curtain material - Guide, tutorial
To prepare a curtain material in SketchUp + V-Ray, use Diffuse, Roughness, Displacement, and Normal maps. You can legally find free files online. Besides the PBR map settings, remember the Sheen property - it will make the material brighter on the edges. Also be sure to take care of transparency and set up a Two Sided material. You can find the steps for creating a Two Sided material later in the article. Among other things, you will learn how to control light transmission.

Index
Curtain, drape, and blind materials for windows present significant challenges for beginners in SketchUp and V-Ray. Beyond their traditional properties, these fabrics are also semi-transparent, and this parameter tends to be the most troublesome. However, let's start from the beginning.
Where to Download Curtain Material?
The foundation of the fabric, as with other materials, lies in the Diffuse, Roughness, Displacement, and Normal maps. Their combination ensures genuine photorealism, capturing subtle characteristics like texture, reflections, and transparency.
You can download such files, for example, from the AmbientCG portal. There you will find excellent bitmaps available completely free, including for commercial use. Simply choose the material you want and download the archive, preferably in 4K resolution.

Where to Add PBR Maps?
After extracting the archive, you can freely use the downloaded files. If you're not sure where to put them, take a look at the basic overview and graphic below:
- Diffuse – the color map, which you add to the Bitmap slot of the Diffuse tab;
- Roughness – the map that controls the strength of reflections on the material's surface, which you add to the Reflection Roughness slot in the Reflection tab, after switching the mode from Glossiness to Roughness;
- Normal – the map that represents the material's surface structure (surface bumps and dents), which you add to the Normal Map slot in the Bump tab after changing the mode from Bump Map to Normal Map.
A material created this way is called PBR – Physically Based Rendering, meaning a material that physically accurately describes the visual characteristics of its surface and delivers results close to reality regardless of the lighting used.

Sheen as a Feature of Textile Materials
The perfect curtain doesn't stop at PBR maps. In addition, it's worth using the special Sheen property. This makes the material appear brighter along the edges. It's a feature particularly noticeable in velvet, but every fabric uses it to some degree. I chose a pure white Sheen Color and a low Sheen Roughness value of 0.1.
If you can't find the Sheen tab in your material, you're most likely in the basic settings mode. Just below the preview in the V-Ray window, you'll find the Switch to advanced settings icon, which will switch you to advanced mode where you can easily find Sheen.

How to Achieve Curtain Semi-Transparency?
If you've set everything as described in the previous sections, the effect of your adjustments should look like the image below:

Did you notice that the fabric lacks its most essential property – transparency? Unless you're dealing with a blackout curtain that blocks light entirely, any fabric you hang in a window lets a certain amount of sunlight into the interior. It absorbs and at the same time transmits light. To replicate this effect in V-Ray, you need to create a new material. This time, instead of a typical Generic material, use the special Two Sided material. You can find it in the Asset Editor by clicking the Add Asset icon, then Material, and finally selecting Two Sided.

The Two Sided material is based on another, base material. It transfers its properties from the left to the right side, helping to carry the sunlight that hits the curtain on the sunny side to the shaded side. The Translucency parameter determines which side should be more visible by blending them together. In this context, it's important that the model you're using has the Two Sided material applied to both sides of its faces.


Notice that the curtain isn't transparent in the straightforward sense of the word. Instead, it becomes illuminated in areas where the sun is directly behind it. Where the curtain folds, it appears noticeably darker. It's exactly like in real life!
How to Control the Curtain's Transparency?
Fabrics differ from each other in thickness, weave, and texture. These parameters affect how much light they transmit. Naturally, tulle will let through more light, cotton or linen less, and flannel or tweed almost none. In a Generic material, transparency is traditionally controlled by the Refraction tab, which you might associate with glass.
To activate refraction, change the Refraction Color of the base material from black to white. It will then behave just like glass, but don't worry – after reducing the refractive index (Refraction IOR) value to 1.0, everything returns to normal. White means the material is 100% transparent, black means 0% transparency. It's reasonable to use a value between these extremes. Ideally, this would be driven by a dedicated grayscale map. The Displacement map is perfect for this.

By placing the Displacement map in the Refraction Color slot, the curtain's surface is no longer uniformly transparent. Some areas let through more light, while others remain almost opaque. This is a highly desirable effect that gives the material a photorealistic appearance. Using this workflow, I was able to create the fabric shown below. Doesn't it look incredibly realistic?

Conclusion
Don't worry if you got lost in the V-Ray nomenclature and weren't able to replicate my settings. You can download the ready-made semi-transparent curtain material by clicking this link.
As you can see, creating advanced V-Ray materials requires a solid understanding of the V-Ray software and a thorough grasp of the parameters that control material appearance—not only basic ones like Diffuse and Bump, but also advanced ones like Refraction and Translucency. If you'd like to learn them all, check out my Online Sketchup Courses!
Author

Przeczytaj o programie Sketchup na naszym blogu
-
![Unusual Shapes and Tiles in SketchUp – Gores, Hexagons, and Fans]()
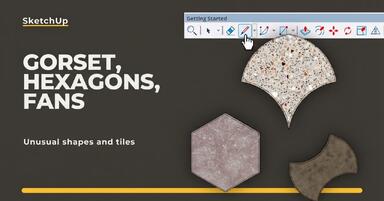
Unusual Shapes and Tiles in SketchUp – Gores, Hexagons, and Fans
Hexagons and gores in SketchUp in 5 seconds? Discover how to model the most challenging tile shapes. Read now! -
![3 ways to create a floor in SketchUp – from texture to a 3D model]()
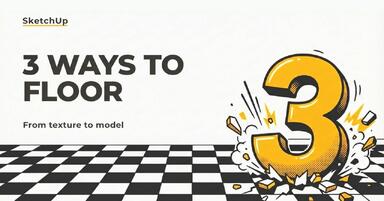
3 ways to create a floor in SketchUp – from texture to a 3D model
From a flat texture to advanced 3D. Discover 3 methods for creating a floor in SketchUp and uncover our reliable "gamechanger". Read on! -
![French and Classic Herringbone in SketchUp – how to do it quickly and error-free?]()
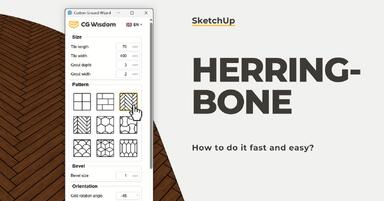
French and Classic Herringbone in SketchUp – how to do it quickly and error-free?
Manual herringbone installation is a nightmare! See how to automate this process in SketchUp and save hours of work. Click to find out! -
![Floor Generator for SketchUp not working? Discover the best alternative in 2026!]()
Floor Generator for SketchUp not working? Discover the best alternative in 2026!
Tired of Floor Generator errors? Discover the reliable Custom Ground Wizard plugin and create 3D floors stress-free. Read the article!
Want to learn Sketchup? Check out our free online course!