Publication date: 26-05-2025 | Update date: 26-05-2025 | Author: Piotr Kurpiewski

-
Online courses
- All
 3ds Max
 AI - Artificial Intelligence
 Blender
 Corona renderer
 GstarCAD
 LayOut
 Photoshop
 Interior Design
 Revit
Revit Sketchup
 Stable Diffusion
 V-ray
V-ray
"Online courses" are comprehensive online training programs that will help you quickly master the software you are interested in.
- Plugins
- 3D Models
- Help
- Articles
SketchUp + V-Ray - What to Watch For When Rendering on GPU? Guide
During GPU rendering, i.e., when using a graphics card, you need to pay attention to several key issues.Make sure you are using the latest version of V-Ray, which is optimized for GPU rendering.Check that your graphics card is active and properly configured in the V-Ray settings. An inactive card can lead to rendering issues.Remember the limitations of GPU rendering, such as lack of support for certain features or differences in material appearance compared to CPU rendering.Adjust material settings to the specifics of GPU rendering, noting that the GPU does not support the Roughness layer.Check that your graphics card has enough memory to process the scene without issues. Read the article to learn more.

Index
GPU Rendering means the process of computing visualizations using the graphics card. Recently it has become increasingly popular among SketchUp users as well, replacing the traditional CPU rendering method. This solution offers significant time savings, higher performance, and easier hardware upgrades in the future. You can read about all the advantages and disadvantages of GPU rendering in the article "SketchUp + V-Ray + Enscape – Why You Should Be Interested in GPU Rendering?". Before you start using the graphics card for rendering, pay attention to the following issues.
V-Ray Version
In V-Ray 5 for SketchUp the GPU engine has been completely rebuilt and is much more stable than in previous versions. All the information provided in this text is valid for this generation. Older versions are not as well suited for GPU rendering, so if you are serious about leveraging your graphics card for rendering, you should use this software.
Active Card
To render on GPU, you need to switch to CUDA or RTX (depending on the standard supported by your card) in the V-Ray settings. At this point, you should also make sure that the software “sees” the card and that it is active. You can check this by clicking the three vertical dots on the right.

If you don’t do this, the render will be completely black and it will be hard to identify the cause at first glance. Unfortunately, the program tends to reset these settings every time it restarts, so keep this in mind.
Be Aware of the Limitations
The list of features supported by the GPU is constantly growing. One might assume that Chaos Group will strive to minimize differences between the engines. Already now, you can freely switch between GPU and CPU. However, there are still things that simply cannot be done on the GPU. Among the most important, I list:
- No support for Irradiance Map – only Brute Force can be used for Primary Rays;
- Restrictions in Mesh Clipper – cross-sections can only be made using simple Section Planes;
- Ambient Occlusion is inactive – this feature can be replaced by Dirt as an Extra Texture in an additional Render Element;
- You can find the full list of unsupported features here.
V-Ray Materials and GPU
Some V-Ray materials on the GPU may look different than on the CPU. This especially applies to those using the Bump parameter. Regardless of whether you’re using Bump or Normal maps, their texture will appear more pronounced on the GPU. The same goes for procedural maps, so if you’re using, for example, Noise, fine-tune its parameters accordingly. See how this looks on the example of a tissue box (model available for free here) that has a Normal map and an additional Bump from a Noise map. On the left is the CPU rendering, and on the right is the GPU one:


GPU does not support the Roughness layer, which is especially popular for PBR materials. You can download Roughness maps from most texture websites. If you want to make use of its potential, invert its colors and apply it as the inverse of Roughness in the Reflection layer.
CHECK OUT – ONLINE SKETCHUP COURSES FROM THE BASICS
The biggest differences between CPU and GPU can be seen in exterior visualizations with a large number of plants. Such scenes often use the Two-Sided material and the Translucency parameter. When using ready-made tree models from Laubwerk, this material is the default for leaves. Unfortunately, advanced transparency properties are currently unsupported by the GPU and are difficult to replicate. In this case, you can only wait for a software update. On the left is the CPU rendering, and on the right is the GPU one.


V-Ray Lights and GPU
In most cases, switching to the GPU will not require any changes to lighting settings. This engine handles the most popular lights—Dome Light and SunLight—95% the same as the CPU. Therefore, there will be virtually no difference under natural light.
Artificial lighting, however, will create some issues. I have noticed that Rectangle Lights on the GPU are more diffused: they don’t cast the same sharp, directional shadows as on the CPU. For this reason, product visualizations in a studio environment or advanced interior scenes without sunlight will require a bit more time than usual to achieve the desired effect.


On the left is the CPU render, on the right the GPU.
Graphics Card RAM
When rendering on the GPU, you use VRAM (Video RAM, i.e. the graphics card’s RAM) instead of traditional system RAM. The capacity of your graphics card’s memory is very important, especially for large scenes. The more geometry and large textures you have, the more RAM you need to process such a scene. For interior visualizations, 8GB is generally sufficient, but exterior views containing many plants and trees can “eat up” as much as 32GB.

Summary
If you pay attention to the issues mentioned in this article, you can count on smooth and uninterrupted GPU rendering. Remember its limitations and make the most of its full potential!
And if you want to learn more about the capabilities of these programs, check out our online SketchUp + V-Ray courses
Best regards!
Author

Przeczytaj o programie Sketchup na naszym blogu
-
![Unusual Shapes and Tiles in SketchUp – Gores, Hexagons, and Fans]()
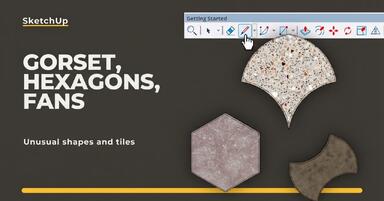
Unusual Shapes and Tiles in SketchUp – Gores, Hexagons, and Fans
Hexagons and gores in SketchUp in 5 seconds? Discover how to model the most challenging tile shapes. Read now! -
![3 ways to create a floor in SketchUp – from texture to a 3D model]()
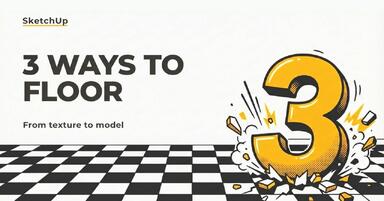
3 ways to create a floor in SketchUp – from texture to a 3D model
From a flat texture to advanced 3D. Discover 3 methods for creating a floor in SketchUp and uncover our reliable "gamechanger". Read on! -
![French and Classic Herringbone in SketchUp – how to do it quickly and error-free?]()
French and Classic Herringbone in SketchUp – how to do it quickly and error-free?
Manual herringbone installation is a nightmare! See how to automate this process in SketchUp and save hours of work. Click to find out! -
![Floor Generator for SketchUp not working? Discover the best alternative in 2026!]()
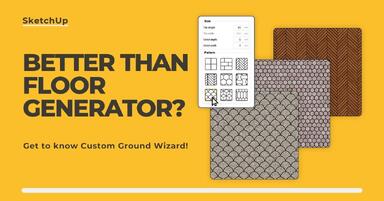
Floor Generator for SketchUp not working? Discover the best alternative in 2026!
Tired of Floor Generator errors? Discover the reliable Custom Ground Wizard plugin and create 3D floors stress-free. Read the article!

Want to learn Sketchup? Check out our free online course!