EN
EN PL
PL ES
ES


Publication date: 31-08-2026 | Update date: 16-09-2026 | Author: Mateusz Ciećwierz

-
Online courses
- All
 3ds Max
 AI - Artificial Intelligence
 Blender
 Corona renderer
 GstarCAD
 LayOut
 Photoshop
 Interior Design
 Revit
Revit Sketchup
 Stable Diffusion
 V-ray
V-ray
"Online courses" are comprehensive online training programs that will help you quickly master the software you are interested in.
- Plugins
- 3D Models
- Help
- Articles
Magic Molding - stucco, moldings, and cornices in SketchUp in seconds
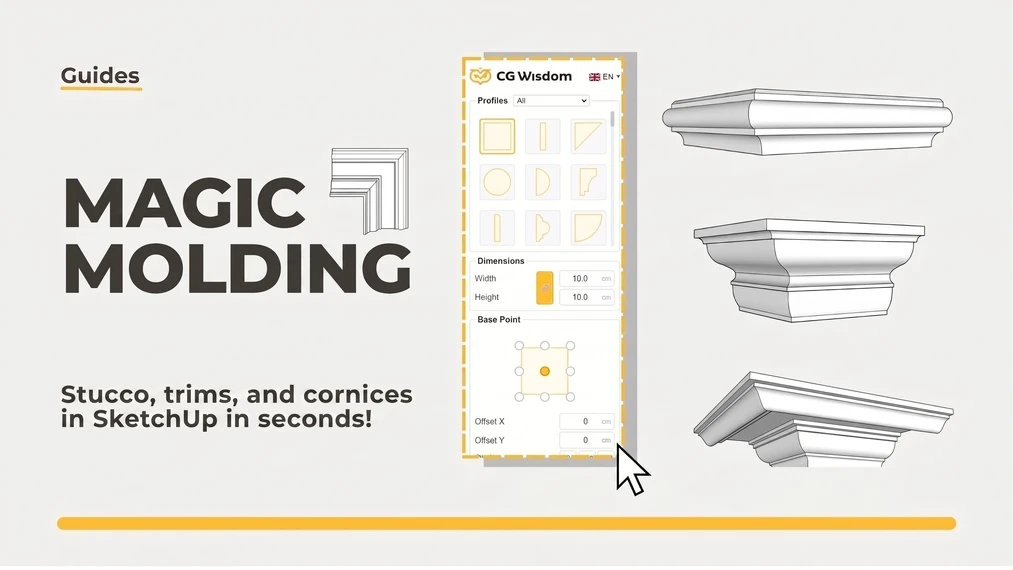
Magic Molding is a plugin for SketchUp that makes it easy to create stucco, baseboards, and ceiling cornices. All you need to do is select the edges, choose a profile from the library, and click GENERATE, and the plugin will build the 3D geometry for you, even on curves and closed loops. You no longer have to draw the profile, set it perpendicular to the path, or fix reversed faces. You don't have to deal with "Follow Me" at all. In this article, I show how it all works in practice and what distinguishes the FREE version of this plugin from the PRO version.
Index
Why does creating moldings in SketchUp take so much time?
The classic method goes through "Follow Me", which drags a flat profile along a chosen path. In theory, you just draw the molding profile, select the room’s perimeter and click. In practice, you start with the little details you must remember... The profile must be perpendicular to the start of the path, it’s worth making a copy because "Follow Me" deletes the profile face when it’s done, and it’s better to model everything inside a group so the new geometry doesn’t accidentally stick to the walls.
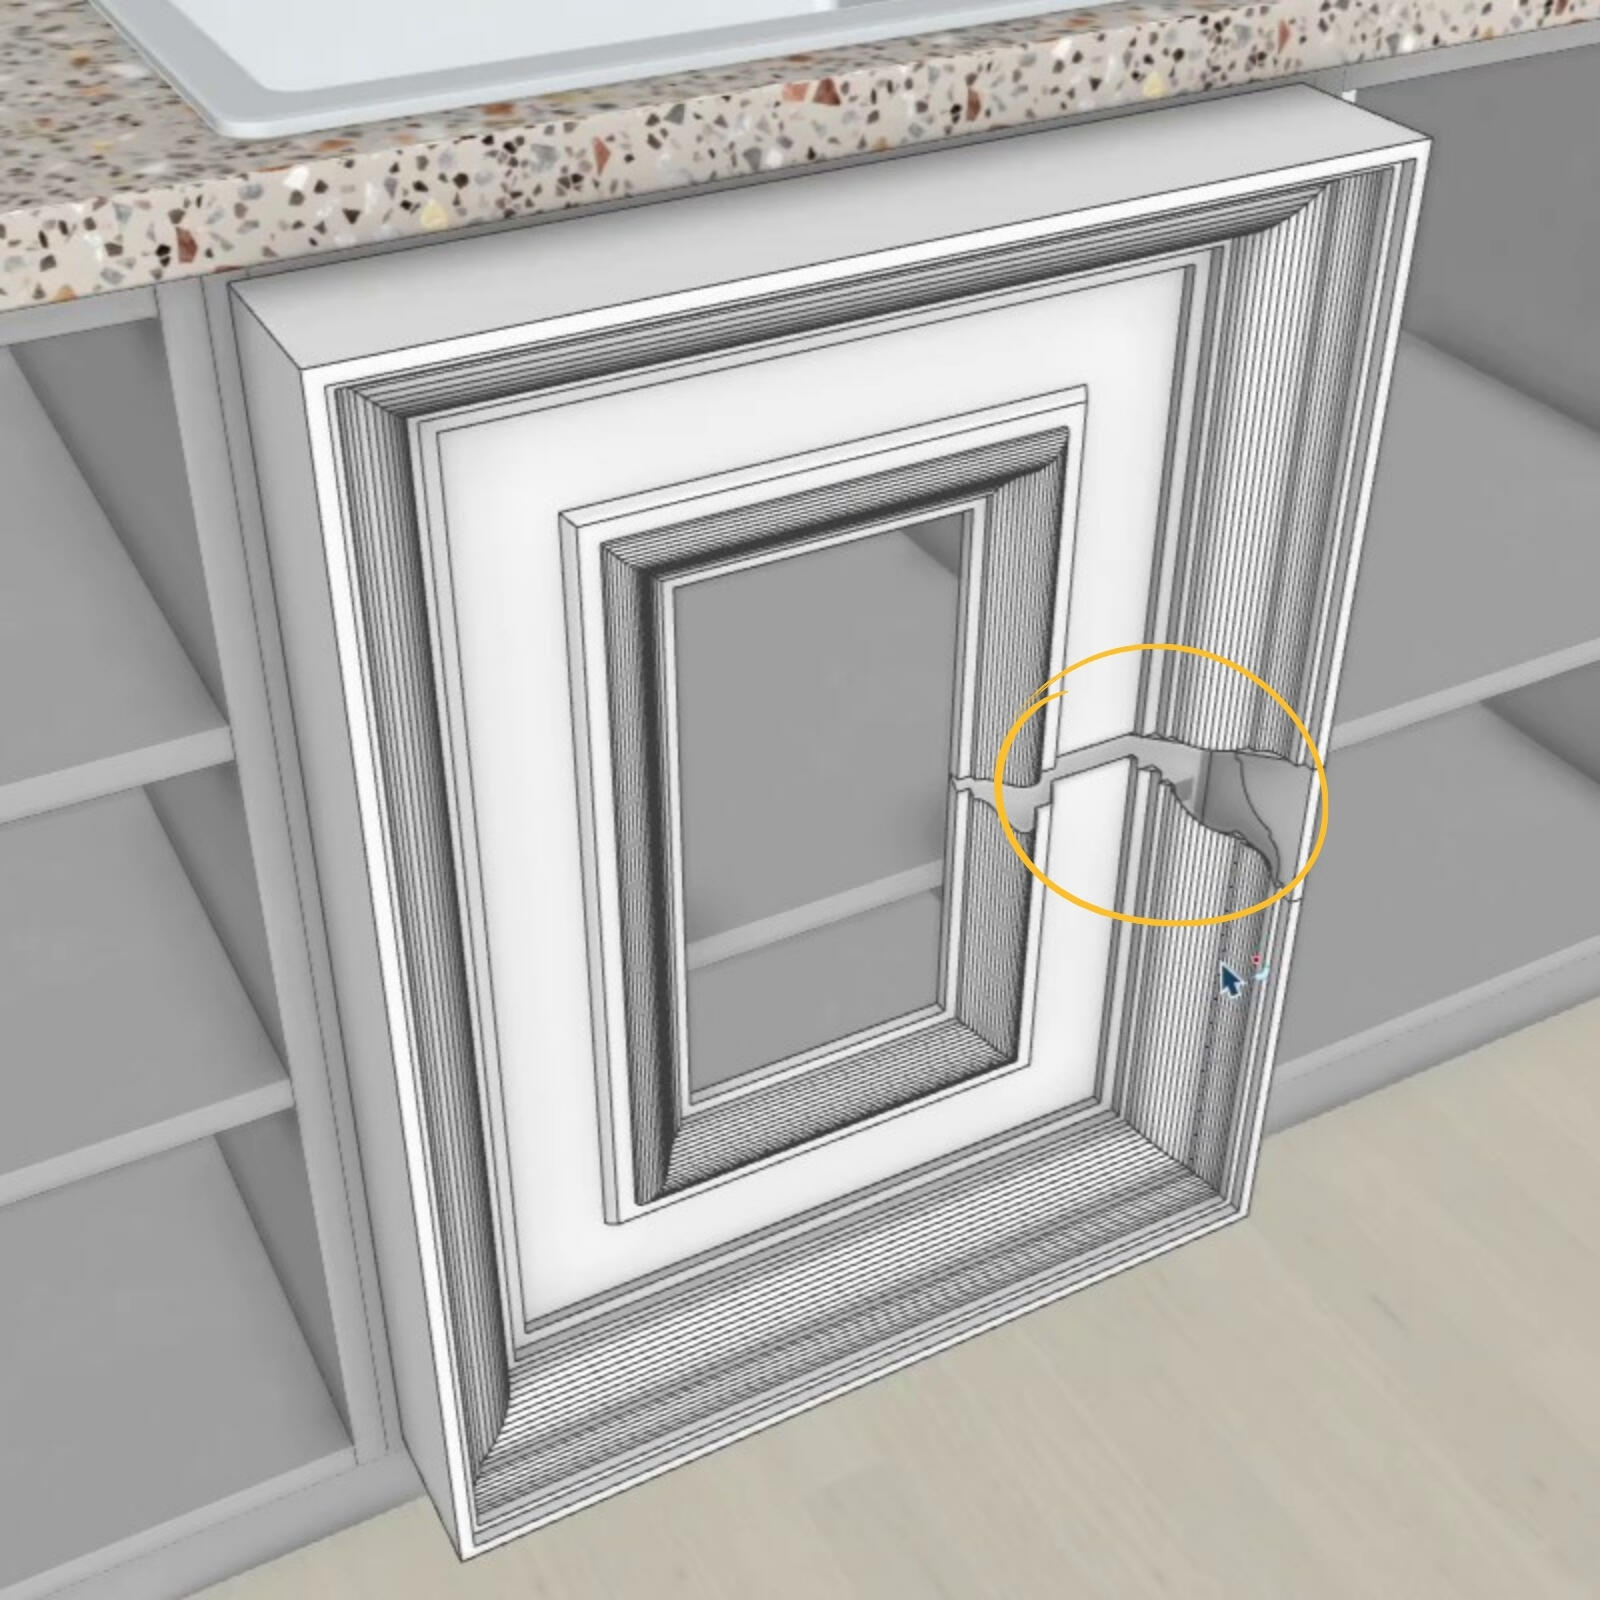
"Follow Me" works a bit like a router guided along a template. As long as the template lies perfectly flat, the result is correct. But if the profile tilts by a few degrees off the path, the molding starts twisting sideways, flipping inside out, or leaving a gap in the corner. On top of that, you get inverted faces – those blue faces that no rendering engine likes – and a dense mesh on curves or holes appearing in them.
This is not only a beginners’ problem. On the official SketchUp forum, threads about "Follow Me" usually end up the same way: someone advises using an external plugin because the built-in tool does not maintain the profile’s orientation on more complex paths. After all, we’re talking about a baseboard in a living room, not a complex solid.
What hurts the most is what happens after generation. It’s hard to control the texture, and editing the produced profile is practically impossible. If you change your mind, it’s best to simply start over.
How does Magic Molding work? See it in three simple steps
The plugin opens as a regular SketchUp window, so you can place it next to the Default Tray and forget about switching views. The entire process looks roughly like this:
- You select the edges where the molding should run.
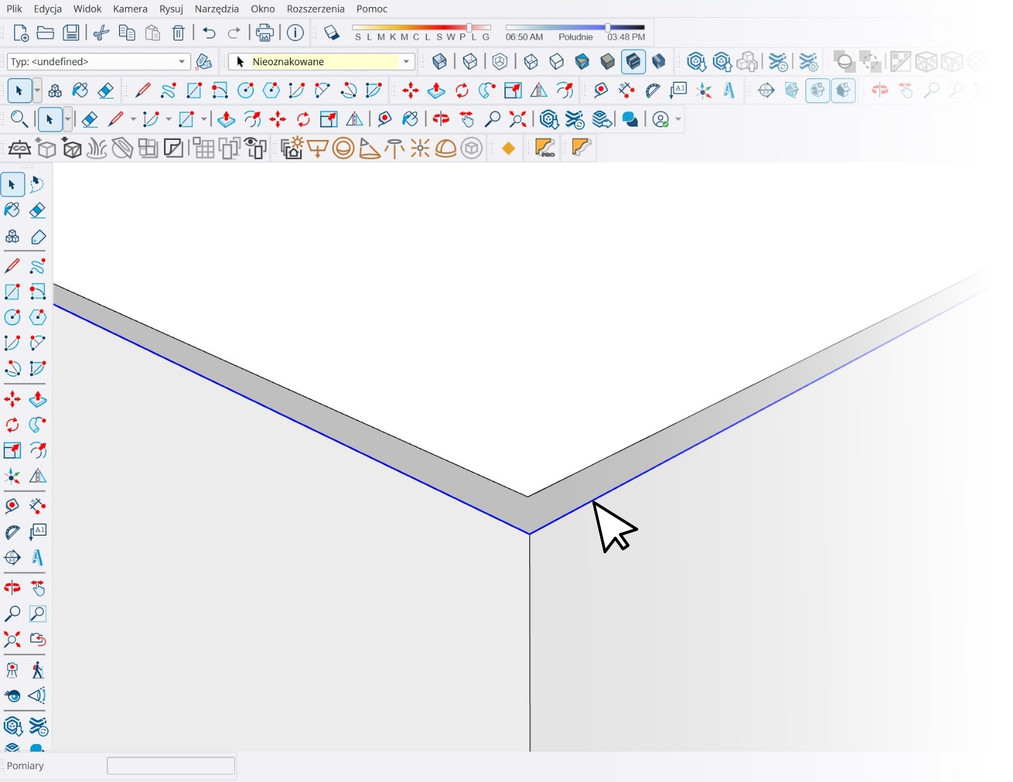
- You choose a ready-made profile from the shapes library.
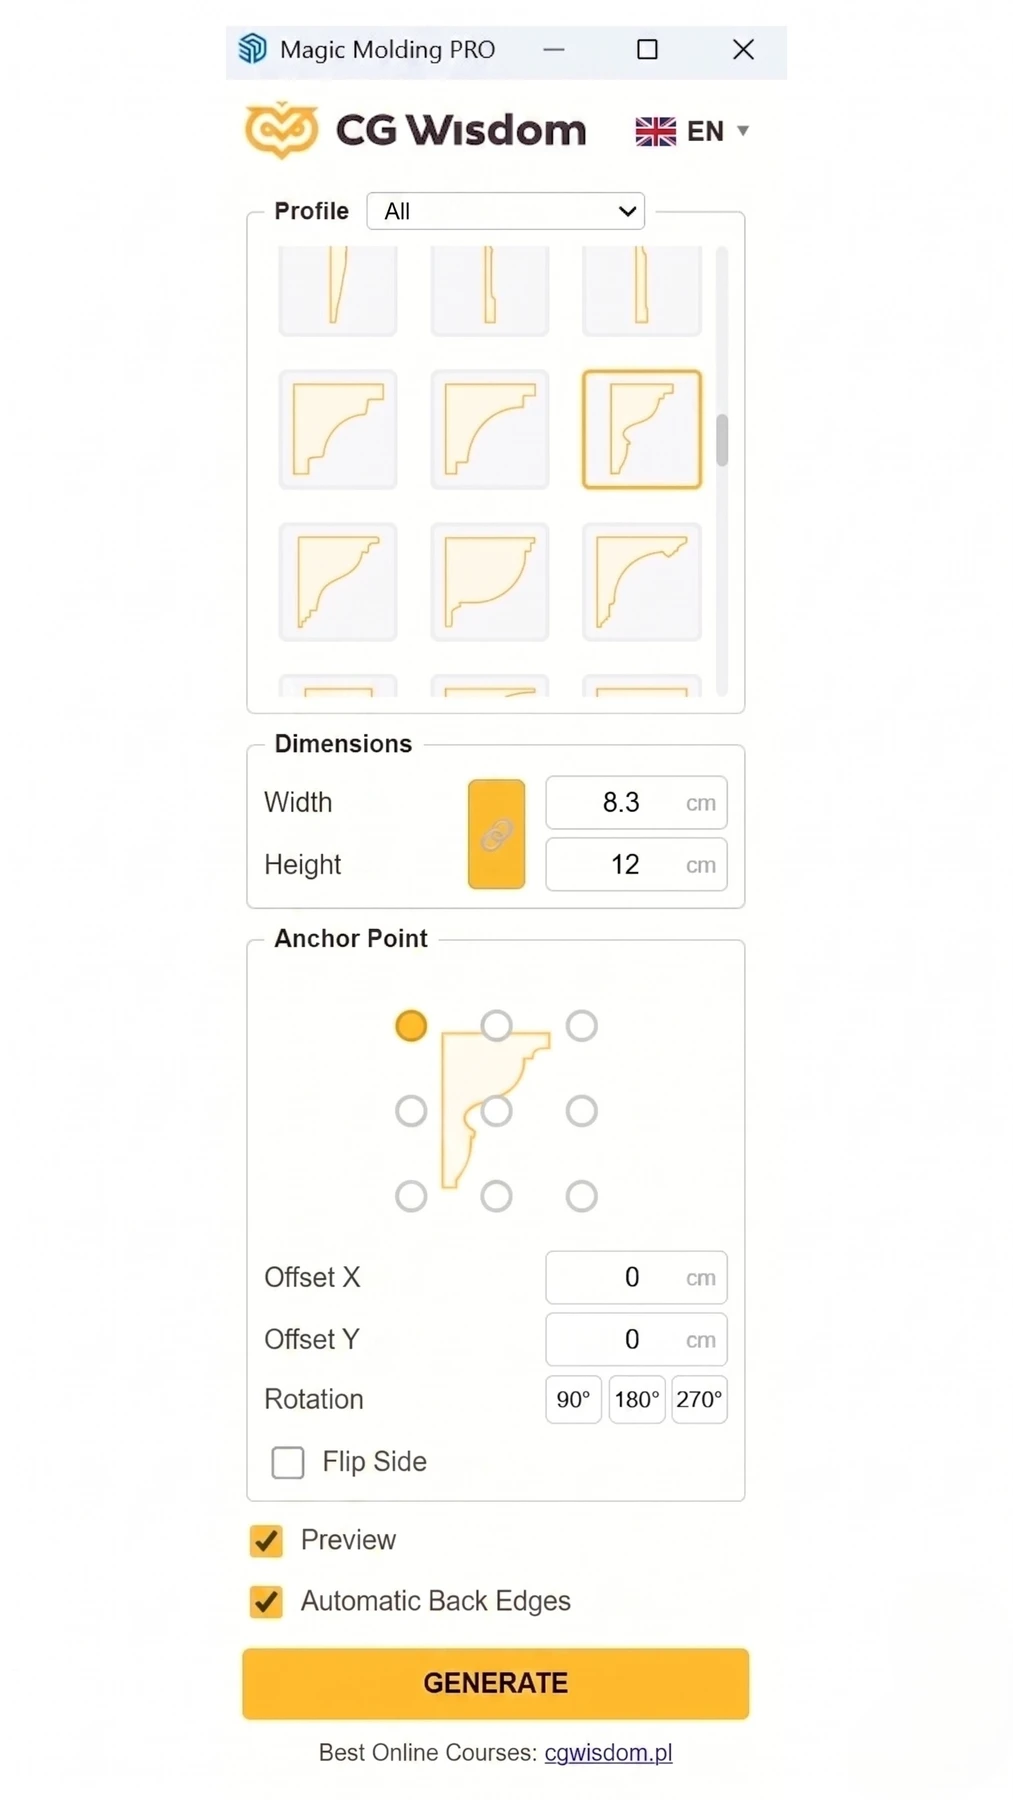
- You click GENERATE. That’s it!
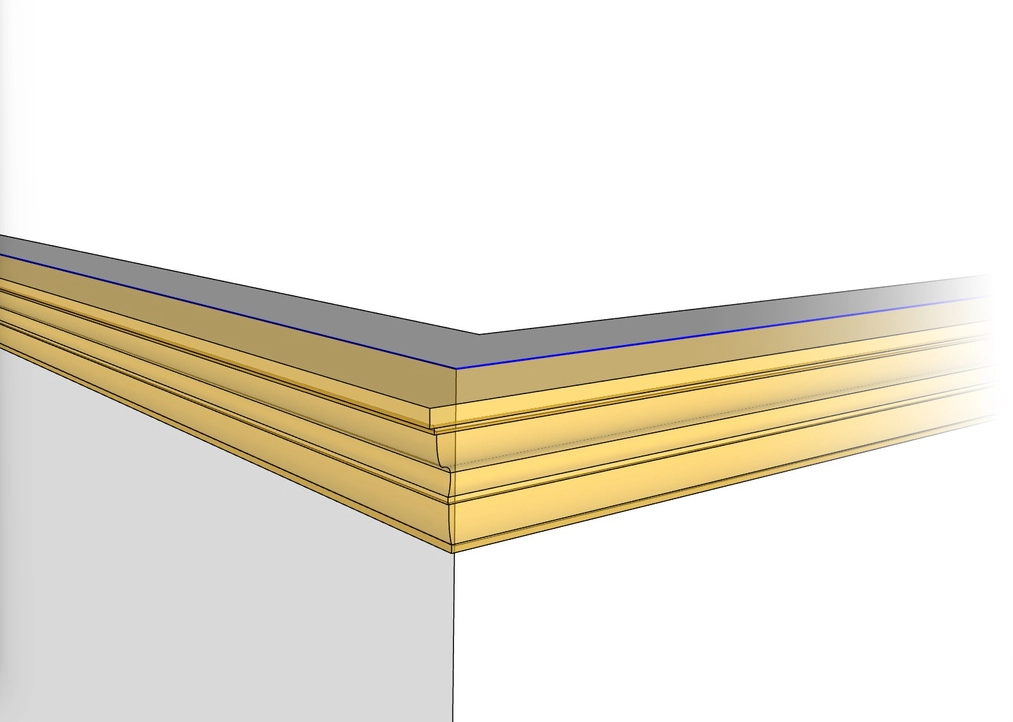
But before anything is permanently added to the model, a semi-transparent yellow live preview appears in the viewport. You see exactly the molding you’re about to generate, in its final position and dimensions. The preview is safe for the model because it disappears when the window is closed and leaves no geometry behind. So you can adjust the baseboard height on the fly and check whether it doesn’t “eat” half of your kitchen cabinet front.
This one unassuming feature changes the workflow more than it seems at first glance. With "Follow Me", the order is reversed: you generate first, then evaluate, and if the dimension doesn’t fit, you undo and start over.
Library of Ready-Made Molding Profiles and the Ability to Create Custom Cross-Sections
The library holds nearly a hundred ready-made profiles, grouped into four categories and shown as cross-section thumbnails instead of file names. So you see immediately what you’re picking.
Baseboards start with flat skirting boards 7–8 cm high, as used in minimalist interiors, and go up to tall, richly profiled stone skirting boards reaching 20 cm. Crown molding and cornices cover both small coves that gently soften the wall-to-ceiling joint and large, multi-tiered palace cornices with arches. In the wall moldings and decorative frames category, you’ll find panels, casings around doors and windows, and panel elements, such as those that make up English wainscoting. Finally, there are basic shapes: square, rectangle, triangle, circle, semicircle, and quarter-round, useful wherever you need a simple cover molding.
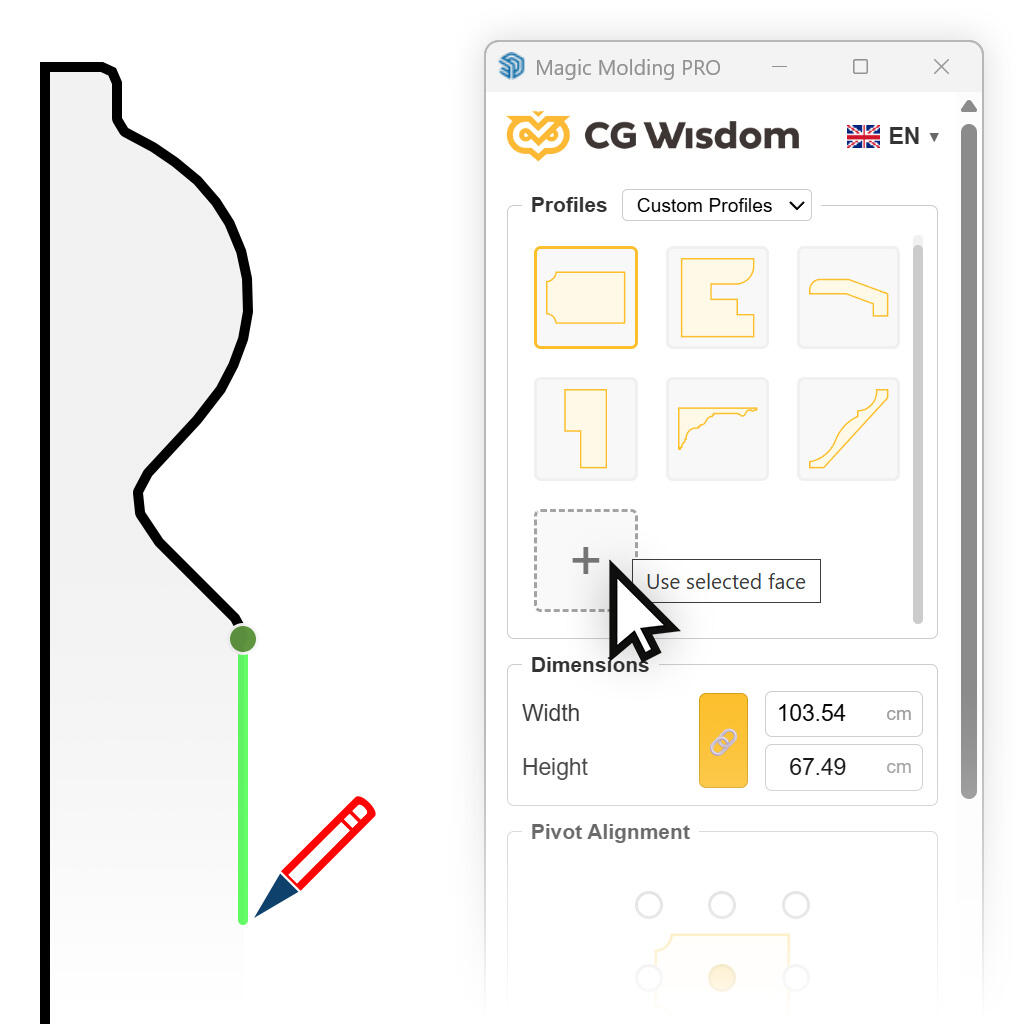
And what if the library doesn’t have exactly what you’re looking for? That’s when the [+] button comes in handy, allowing you to add your own profile. You draw a flat cross-section directly in the model, for example traced from a manufacturer’s catalog sheet, import it into the plugin, and it’s automatically saved in your library on disk. From that moment, it’s available in every subsequent project. Studios that regularly work with a single supplier’s profiles can thus build their own database and stop drawing the same sections for the tenth time.
CHECK OUT THE SketchUp plugin for creating moldings – MAGIC MOLDING
How to precisely set the anchor point of a molding in SketchUp?
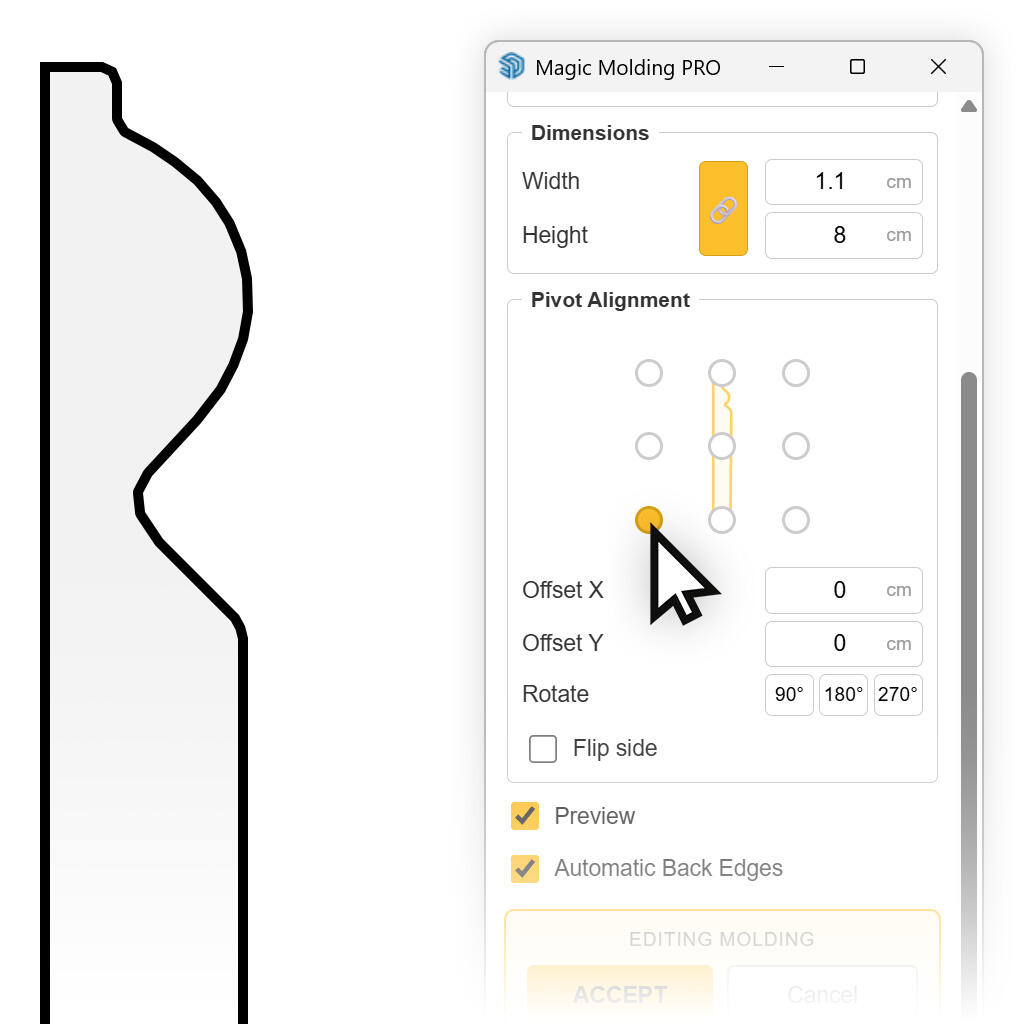
Here we arrive at a solution we’re probably most satisfied with. Each profile is placed into a grid of nine anchor points, and you decide which one attaches to the selected edge. You can anchor a crown molding at the top corner, a baseboard at the bottom, and a wall molding somewhere in between.
It sounds trivial, but this little detail determines whether the molding sinks into the wall or hangs half a centimeter away. On top of that, there are vertical and horizontal offsets, rotation options of 90, 180, and 270 degrees, and mirror flipping. The same profile, rotated and anchored differently, can serve as a cornice one time and as a casing above a door the next. There’s also a lock icon that preserves proportions, so changing the molding height won’t accidentally flatten the entire cross-section drawing; if needed, you can disable the lock to edit non-proportionally.
Moldings on curves, closed perimeters, and multiple rooms at once
Now that you know how to set the profile, let’s see what happens with geometry where "Follow Me" usually fails. The plugin supports closed room perimeters, rounded walls, and arches, and it automatically closes gaps in corners. It also smooths curves automatically.
You can also select multiple rooms at the same time and generate molding throughout the entire apartment in one go. It’s a huge time-saver!
There’s one more handy feature that’s easy to forget until you use it. Holding down Ctrl or Shift while the plugin window is open temporarily shows hidden edges in the model. This helps you snap to a molding edge even if it’s hidden behind a cupboard!
How to apply textures to moldings?
You’re probably familiar with the topic of applying textures to curved objects in SketchUp and know exactly how much manual effort it requires. Magic Molding allows you to lay texture on a finished molding completely automatically with the Re-map Texture function, which arranges the material along the entire profile length. In practice, this means the wood grain flows through corners and curves without visible seams, just like in a real molding cut from a single board.
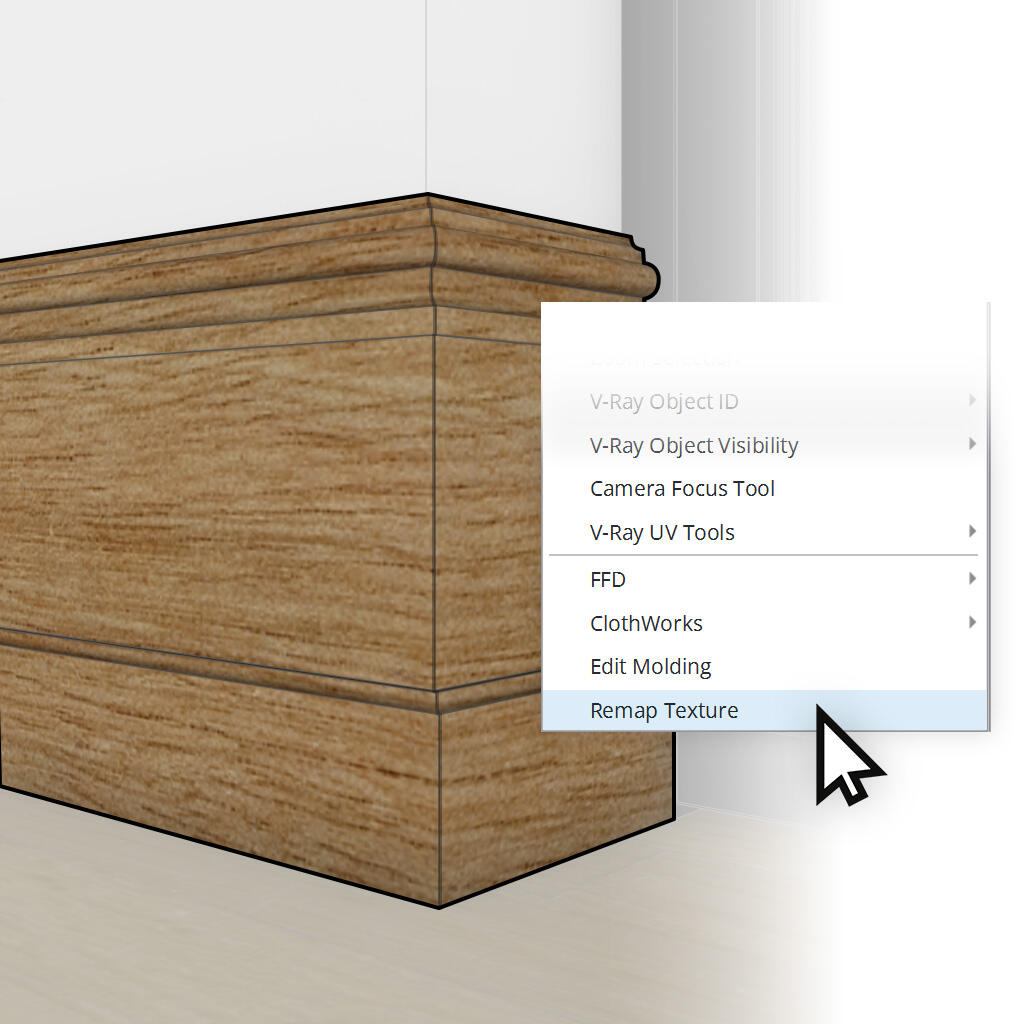
How to edit baseboards and cornices after generation?
Molding created with "Follow Me" turns into a dead solid in SketchUp. Editing it is simply impossible. With Magic Molding, right-clicking on such a solid brings up the Edit Molding option, and the plugin remembers all the parameters used to create it: the chosen profile, dimensions, and anchor point. You change what you want and then confirm or cancel.
Let’s put this into the practical scenario every designer knows. The client sees the rendering and decides the baseboard is too low and the cornice too ornate for the rest of the interior. When modeling manually, you have to delete the moldings and repeat the whole procedure in each room. Here, you enter edit mode, swap the profile, and confirm.
How to create moldings in SketchUp with Magic Molding?
Let’s take a typical 60-square-meter apartment: a living room with a kitchenette, a hallway, and two bedrooms. The baseboard should be the same everywhere; in the living room, there’s a small cove under the ceiling; in the hallway, the client wants panel fronts on one wall.
I start with the baseboard since it covers the entire apartment. I select the perimeters of all rooms at once, choose a flat 8 cm profile, anchor it at the bottom corner, and generate. The cornice in the living room is a separate operation because it uses a different profile, but the workflow is identical—only the anchor point changes to the top. The panel fronts require the most prep on my part: I draw rectangles on the hallway wall, space them evenly, then select their edges and generate a frame from the wall molding profile. Everything else, namely cutting corners at angles, happens automatically.
It’s also worth remembering one important thing.
Generated molding by the plugin is true 3D geometry, so it adds triangles to the model. For an apartment of this size you won't notice any difference in viewport rotation smoothness. However, if you are modeling an entire tenement building with moldings on every floor, that geometry can significantly load the scene. Turn off their visibility while working on other elements.
See Magic Molding in action
Below you will find a recording showing the full process: from selecting edges, through choosing a profile and setting the anchor point, to generating molding throughout the apartment and arranging the wood texture along the moldings.
After watching, there is one more thing to decide: which version of the plugin is enough for you?
Magic Molding FREE or Magic Molding PRO? Version comparison
The FREE version is not a cut-down demo with a day counter. It has the full generation engine, live preview, all nine anchor points, support for arcs and closed loops, and editing of the finished molding. You can use it commercially, with no asterisks or fine print. The difference lies in the library of ready-made profiles and in the overall user convenience of the extension.
| FREE Version | PRO Version | |
|---|---|---|
| 3D geometry generation | ✓ | ✓ |
| Commercial license | ✓ | ✓ |
| Live model preview | ✓ | ✓ |
| Nine anchor points, offset, rotation, and mirroring | ✓ | ✓ |
| Straight walls, closed loops, arcs, and multiple at once | ✓ | ✓ |
| Editing generated molding | ✓ | ✓ |
| Hidden edges preview with key | ✓ | ✓ |
| Units mm / cm / in, 3 languages | ✓ | ✓ |
| Basic shapes (square, rectangle, triangle, circle, semicircle) | ✓ | ✓ + quarter round |
| Profile library (skirting boards, cornices, wall moldings) | Selected profiles (one from each category) |
Full library |
| Custom profiles (extract section from model) | ✕ | ✓ |
| Save and load custom profile library | ✕ | ✓ |
| Lay texture along molding | ✕ | ✓ |
| Technical support | Basic | Priority |
You can purchase PRO in one of two options: an annual license for 49.90 PLN or a perpetual one for 99.99 PLN, both with a VAT invoice. The key is assigned to a single workstation, but you can deactivate and activate it elsewhere in the panel, so moving between your office computer and home laptop takes only a moment. After the one-time verification, the plugin works offline.
When is FREE enough? If molding appears in your projects sporadically and it's usually just a simple baseboard, you can stick with the free version. PRO makes sense when you work with various profiles, need to create your own, texture wooden moldings, or regularly do classic interiors.
What do you need to start creating molding in SketchUp?
The plugin works with SketchUp from version 2017 onwards, on Windows 10 and 11, and on macOS. You install it normally from an .rbz file via the Extension Manager, and if you're doing it for the first time, we've described this procedure in the guide on how to install the plugin in SketchUp step by step. The panel detects the SketchUp language and launches in Polish, English, or Spanish, and you can switch units between millimeters, centimeters, and inches. Your choice is remembered.
At the output, you get plain SketchUp geometry, i.e. edges and faces in a group. It renders exactly the same in V-Ray, Corona, Enscape, Lumion, or D5, without any additional steps. If you are just getting to know the program and want to lay out the basics before diving into interior details, make sure to check out our SketchUp courses exclusive offer!
Magic Molding is actually our second plugin built around the same principle: one tedious task boiled down to a few clicks. The first was Custom Ground Wizard, the floor generator for SketchUp. One plugin makes floors, the other moldings. Together they cover most of the details that take up the most time in an interior project with zero creative benefit.
DOWNLOAD the plugin for creating moldings in SketchUp - MAGIC MOLDING FREE
Summary
Molding is a detail that can determine the reception of an entire visualization, and at the same time it is one of the most thankless things to model in SketchUp. Magic Molding reduces it to three steps: you point the path, choose the profile, generate. The FREE version provides the full engine and a commercial license, so you can try it on your own project before you even think about buying. I hope that after reading you already know if this tool is for you, and the best test will still be the first project where the baseboard does itself :)
Author

Przeczytaj o programie Sketchup na naszym blogu
-
![Profile Builder 4 or Magic Molding? Comparison of Ornamentation Plugins in SketchUp]()
Profile Builder 4 or Magic Molding? Comparison of Ornamentation Plugins in SketchUp
How does Profile Builder 4 differ from Magic Molding? Scope, pricing, profile libraries, and learning curve. Find out which plugin fits your projects. -
![The Best Free SketchUp Plugins for Interior Designers in 2026!]()
The Best Free SketchUp Plugins for Interior Designers in 2026!
Which SketchUp plugins are really worth having? Discover 7 free extensions for interior designers and find out which ones have just stopped being free! -
![English wainscoting in SketchUp - how to design wall panels step by step]()
English wainscoting in SketchUp - how to design wall panels step by step
How to design English wainscoting in SketchUp? Learn the rules for panel division, wainscot proportions, and speed up your work with the Magic Molding plugin. -
![Reversed Faces in SketchUp – why are blue faces showing and how to fix them?]()
Reversed Faces in SketchUp – why are blue faces showing and how to fix them?
Blue faces in SketchUp are flipped faces. Learn where they come from, how to quickly locate and fix them before they mess up your render or model export.



Want to learn Sketchup? Check out our free online course!