Publication date: 09-05-2025 | Update date: 09-05-2025 | Author: Piotr Kurpiewski

-
Online courses
- All
 3ds Max
 AI - Artificial Intelligence
 Blender
 Corona renderer
 GstarCAD
 LayOut
 Photoshop
 Interior Design
 Revit
Revit Sketchup
 Stable Diffusion
 V-ray
V-ray
"Online courses" are comprehensive online training programs that will help you quickly master the software you are interested in.
- Plugins
- 3D Models
- Help
- Articles
SketchUp - How to Create an Advanced Floor? Alternatives to Floor Generator
To create a floor in SketchUp, use the program's basic tools. Use the array function to align objects in a row. First, prepare a single tile component and move it with a copy to fit the repeating pattern. Next, move the object by the desired amount in both directions. Finally, trim the objects so their outline does not extend beyond the floor edges. In the rest of the article, you'll read how to do this step by step.
Index
Floor Generator - what is it?
Floor Generator is an extension for SketchUp that helps create advanced floors by laying panels or tiles of a specified shape on any plane surface. It allows you to achieve very realistic effects thanks to additional variation and randomness parameters.
Floor Generator continues to enjoy undiminished popularity. Even though the plugin has not been developed by its developer sdmitch for over 5 years, users are still searching for the tool online. Unfortunately, it is no longer available. The author removed the plugin citing legal reasons.
There is no need to regret it, because the tool in its current form is no longer suitable for use. Floor Generator does not really cooperate with newer versions of SketchUp. It causes numerous errors and is more trouble than it's worth.

Floor Generator - how to replace it?
To date, no extension has been created that has capabilities even approaching those of Floor Generator. There are plugins that split planes into complex grids based on a chosen pattern, but their capabilities are limited. They do not create groups or add positioned textures to them. Therefore, they are not worth your attention.
You can most effectively replace Floor Generator with SketchUp's basic tools and advanced UVW Placement in V-Ray.
Advanced component distribution
Many people forget that SketchUp offers a simple array tool that helps set objects in a row. Whether you want to lay rectangular tiles in a staggered pattern, create a simple square layout, or a complex, organic arrangement, you need to start in exactly the same way.
- Start by preparing a single tile component.
- Move the component with a copy: while using the Move tool (Move), hold the Ctrl key and place the copy next to the original according to the repeating pattern.
- After completing the operation, with the Move tool still active, type x, then enter the desired multiplier, e.g. x10. Confirm with Enter.
- Repeat the move in the other direction.
You can repeat each copy move any number of times. You can also move more than one component at once. Thanks to this, you can quickly achieve a result similar to Floor Generator.
Trimming objects to the model
You still need to trim the distributed objects wherever their outline extends beyond the floor (or wall) edges. To do this, first:
- Locate the problematic components, explode them, and then group them together again.
- Enter the group and select the entire floor.
- From the right-click menu, choose Intersect with Model.
- Delete the unnecessary geometry.
In this way, you quickly create shared edges between the two geometries and easily remove their protruding parts.
Texture positioning – UVW Placement
Since distribution is already done, it's time to add randomly arranged textures. In fact, you only need to apply the material to the repeating component and to the group with its trimmed pieces—literally in two spots. You don't have to worry about positioning. V-Ray will do it for you if you meet the following conditions:
- Click on the bitmap in the Diffuse tab of your chosen material.
- Expand the Texture Placement parameter and set its type to Mapping Source.
- Add UVW Placement to an empty slot in the UV Placement Source.
- In the Randomization options, check By Node Handle.
Thanks to this operation, each component will receive unique UV coordinates. Simply put, the texture will be randomly rotated and shifted horizontally and vertically on each one.
Additionally, in the Randomization tab you can precisely define randomness. For example, if in UV Rotation you specify 0 to 360 with Steps set to 2, the texture will only rotate by 180 degrees. If you set V Offset 0 to 0, you disable the vertical shift of the texture. This panel offers many more options than Floor Generator.
Remember to apply the same UVW Placement settings to the other maps as well: Bump, Roughness, Normal, etc. After all, you wouldn't want unpositioned maps to ruin the professional appearance of your material, despite the precisely set Diffuse texture, would you?
Successor to Floor Generator – Custom Ground Wizard
Custom Ground Wizard is a new, free plugin for SketchUp that can be confidently called the successor to the legendary Floor Generator. It allows you to instantly create realistic floors from boards or tiles—in literally 3 clicks. The user can easily adjust panel lengths and widths, set margins, introduce randomness to the layout, and decide whether elements should be automatically clipped to the shape of the room. Most importantly, the plugin works flawlessly in the latest versions of SketchUp and is completely free. If you're looking for a convenient tool for laying floors, be sure to check out Custom Ground Wizard—it's currently the best available alternative!

Summary
As of now, unfortunately, there is no tool that can replace Floor Generator one-to-one. The only solution is to smartly combine SketchUp's basic capabilities with V-Ray. It is not an automatic process, but it ultimately offers many more possibilities than any plugin.
If you want to discover more clever tools and useful tricks essential for interior architects, be sure to check out my SketchUp + V-Ray 6 course - Interior visualization training from scratch.
Author

Przeczytaj o programie Sketchup na naszym blogu
-
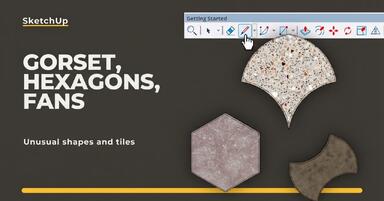
![Unusual Shapes and Tiles in SketchUp – Gores, Hexagons, and Fans]()
Unusual Shapes and Tiles in SketchUp – Gores, Hexagons, and Fans
Hexagons and gores in SketchUp in 5 seconds? Discover how to model the most challenging tile shapes. Read now! -
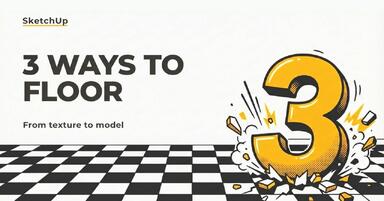
![3 ways to create a floor in SketchUp – from texture to a 3D model]()
3 ways to create a floor in SketchUp – from texture to a 3D model
From a flat texture to advanced 3D. Discover 3 methods for creating a floor in SketchUp and uncover our reliable "gamechanger". Read on! -
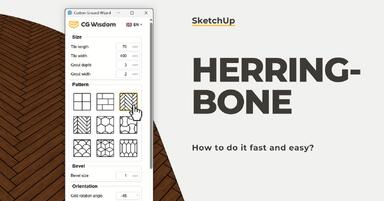
![French and Classic Herringbone in SketchUp – how to do it quickly and error-free?]()
French and Classic Herringbone in SketchUp – how to do it quickly and error-free?
Manual herringbone installation is a nightmare! See how to automate this process in SketchUp and save hours of work. Click to find out! -
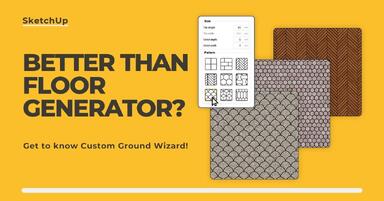
![Floor Generator for SketchUp not working? Discover the best alternative in 2026!]()
Floor Generator for SketchUp not working? Discover the best alternative in 2026!
Tired of Floor Generator errors? Discover the reliable Custom Ground Wizard plugin and create 3D floors stress-free. Read the article!