Publication date: 28-01-2026 | Update date: 28-01-2026 | Author: Piotr Kurpiewski

-
Online courses
- All
 3ds Max
 AI - Artificial Intelligence
 Blender
 Corona renderer
 GstarCAD
 LayOut
 Photoshop
 Interior Design
 Revit
Revit Sketchup
 Stable Diffusion
 V-ray
V-ray
"Online courses" are comprehensive online training programs that will help you quickly master the software you are interested in.
- Plugins
- 3D Models
- Help
- Articles
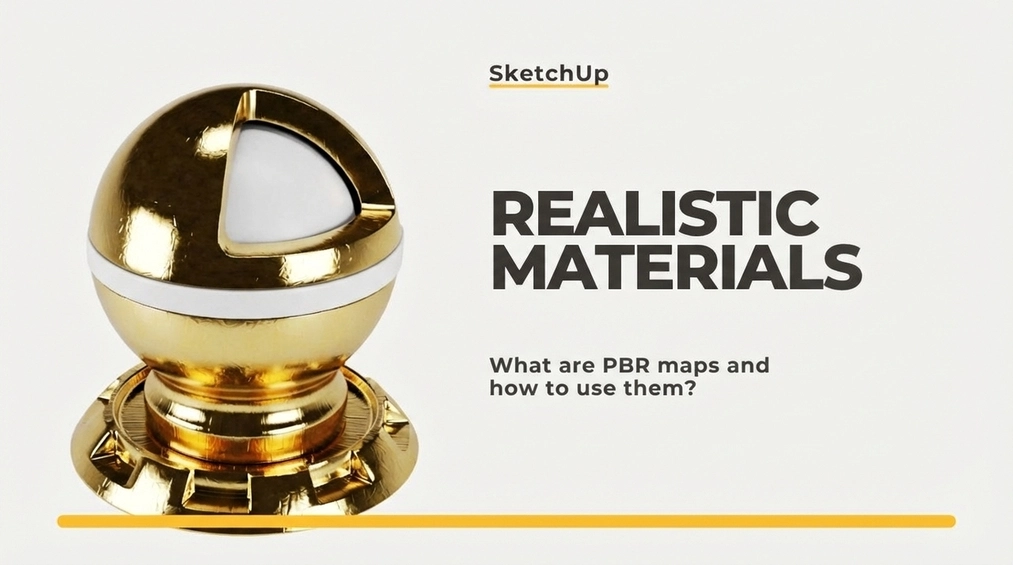
How to create realistic materials in SketchUp - what are PBR maps?
Discover the secrets of creating realistic materials in V-Ray for SketchUp using PBR maps! Learn what Diffuse, Normal, Displacement, Roughness, and Metalness maps are and how to use them in your projects to achieve photorealistic results. Take advantage of ready-made resources like AmbientCG and Polyhaven to take your visualizations to the next level!
Index
Creating realistic visualizations in SketchUp requires the right approach to materials. A key element in this process are PBR maps (Physically Based Rendering), which allow for precise reproduction of surface properties. In this article, we will explain what PBR maps are, what types of maps are available, and how to use them in SketchUp to create photorealistic materials.
What are PBR maps?
PBR maps are a set of textures that together define how light interacts with a surface. If you don’t know what a texture is, be sure to check our article titled: What is a texture in graphics and how to create it? Thanks to PBR maps you can reproduce material characteristics such as color, bumps, roughness, or reflections. They allow you to achieve realistic visual effects in 3D rendering software such as SketchUp with the V-Ray plugin or Enscape.

Where to download PBR maps?
There are many places where you can find high-quality PBR maps, both free and paid. The most popular and easily accessible sources include:
- AmbientCG: Free library with almost 2500 materials that include a complete set of PBR maps (Diffuse, Normal, Displacement, Roughness, Metalness and Ambient Occlusion). All resources are available under the CC0 license, meaning they can be used freely, even commercially, without registration.
- PolyHaven: Another great source of free textures under the CC0 license. Offers high-resolution PBR maps that are ideal for visualizations and 3D projects.
- Textures.com: The iconic portal that has been a source of textures for designers for years. Although many resources are paid, there are also free maps available for use in your projects.
Besides these, there are many other portals, such as FriendlyShade, which offers boutique, high-quality textures, or Quixel (now FAB), focusing on resources for the gaming industry. The choice is vast, and finding the right materials depends on individual needs and project specifics. It's worth experimenting with different sources to find the maps that best meet your requirements.
CHECK ONLINE COURSES FOR SKETCHUP AND V-RAY
Types of PBR maps and their uses
1. Diffuse (Albedo)
This is the basic map defining the material's color. It is also often referred to as Albedo. Unlike Diffuse, the Albedo map does not contain information about light or shadows, making it a perfect base for further editing. In SketchUp, both the Diffuse and Albedo maps can be loaded as the base texture in the Color slot, under the Diffuse tab of the basic V-Ray material.

2. Normal
The Normal map adds surface details without needing to change the model's geometry. It creates the illusion of bumps and dents, greatly enhancing realism. SketchUp uses Normal maps in the GL (OpenGL) space, which means DX (DirectX) maps are not compatible and should be ignored. The Normal GL map is added in the Mode/Map slot, in the Bump tab, after changing the mode from Bump Map to Normal Map.

3. Displacement (Height)
The Displacement map, also referred to as the Height map, alters the model's geometry, allowing for more advanced representation of bumps and indentations. Unlike the Normal map, it actually modifies the model’s mesh. In SketchUp and V-Ray, it’s worth using this map to depict irregular surfaces like bricks or stones.
Since V-Ray 6, the Displacement map cannot be added directly within the material. To see the effect applied to the model, you need to add a special geometry attribute. It’s a bit complex, but we explained the entire process in detail in the article titled: SketchUp - Displacement - Brick Wall. Check it out if you want to learn how to do it.
4. Roughness / Glossiness
The Roughness and Glossiness maps define how rough or shiny the surface is. They are opposites: the Roughness map shows where the surface is more matte, while the Glossiness map defines areas with higher gloss. In SketchUp, it is recommended to use one of these maps depending on preference and the rendering engine. However, remember to change the Surface Control parameter, which indicates the choice of space: Roughness or Glossiness.

5. Metalness (Metallic)
The Metalness map describes which areas of the material are metallic. It allows you to accurately reproduce surfaces like steel, gold, or copper. In SketchUp, it’s worth loading it in the Metalness slot, keeping in mind that it should be used only for genuinely metallic materials. Wood or plastic do not need this type of map at all.
6. Ambient Occlusion
The Ambient Occlusion (AO) map enhances shadows in areas where light reaches less frequently, such as corners or crevices. It can be used as an additional layer to enrich the material, but it is not always required. Sometimes it is used as an opacity map, for example to change the color of grout between tiles.
How to use PBR maps in SketchUp?
To use PBR maps in SketchUp, you need to have a rendering engine installed, such as V-Ray, Enscape, or Thea Render. Here are the steps you should follow:
- Download the PBR map set for your selected material from a service like AmbientCG.
- In SketchUp, load the Diffuse map as the base texture in the material settings.
- Add the Normal or Height map to the appropriate slot (e.g., “Bump” in V-Ray) and ensure you are using it in the GL space.
- If the material requires more detail, load the Displacement map, adjusting its intensity.
- Use the Roughness or Glossiness map to control the light reflection properties.
- Optionally, add the Metalness map for metallic materials.
- Find the balance in the intensities of the individual maps. They should work together to create a photorealistic surface that has the right texture and responds correctly to light.
WATCH ALL ONLINE TUTORIALS FROM CG WISDOM!
Common mistakes and how to avoid them
When creating PBR materials, you may encounter several issues. Here’s what to watch out for:
- Make sure you use Normal maps in the correct space (in OpenGL, not DirectX).
- The Transfer Function in Mode should be set to None. The standard sRGB will prevent the map from working.
- Do not mix Roughness and Glossiness maps - use one of them as needed. Remember they are opposites!
- If you leave the Reflection Color black, the map will not work. You must choose a lighter color for reflections to appear.
- Adjust the scale of the maps in SketchUp to avoid unnatural patterns on large surfaces.
- Do not overdo the intensity of the Displacement and Bump maps to avoid geometry distortions.
Summary
PBR maps are an essential element in creating realistic materials in SketchUp. Thanks to services like AmbientCG and PolyHaven, you have access to a wide range of materials with a complete set of maps that you can import into your project. Understanding the role of each map and using them correctly will allow you to improve the quality of your visualizations.
If you can’t find the right map set, maybe try generating it yourself? You can do this for free using Stable Diffusion, an AI generator. If you’re curious about how to do it, read our article titled: How to generate PBR materials with Stable Diffusion?. And if you want to see what else AI has in store for you, check out my Stable Diffusion course for architecture and interior design.
Author

Przeczytaj o programie Sketchup na naszym blogu
-
![Unusual Shapes and Tiles in SketchUp – Gores, Hexagons, and Fans]()
Unusual Shapes and Tiles in SketchUp – Gores, Hexagons, and Fans
Hexagons and gores in SketchUp in 5 seconds? Discover how to model the most challenging tile shapes. Read now! -
![3 ways to create a floor in SketchUp – from texture to a 3D model]()
3 ways to create a floor in SketchUp – from texture to a 3D model
From a flat texture to advanced 3D. Discover 3 methods for creating a floor in SketchUp and uncover our reliable "gamechanger". Read on! -
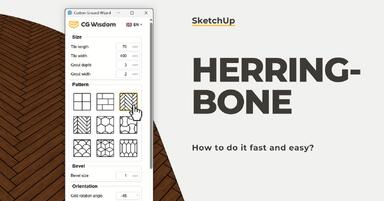
![French and Classic Herringbone in SketchUp – how to do it quickly and error-free?]()
French and Classic Herringbone in SketchUp – how to do it quickly and error-free?
Manual herringbone installation is a nightmare! See how to automate this process in SketchUp and save hours of work. Click to find out! -
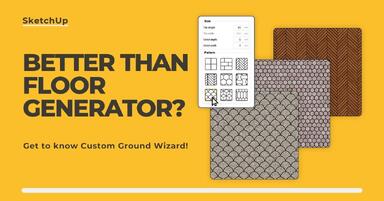
![Floor Generator for SketchUp not working? Discover the best alternative in 2026!]()
Floor Generator for SketchUp not working? Discover the best alternative in 2026!
Tired of Floor Generator errors? Discover the reliable Custom Ground Wizard plugin and create 3D floors stress-free. Read the article!
Want to learn Sketchup? Check out our free online course!