Publication date: 14-01-2026 | Update date: 14-01-2026 | Author: Piotr Kurpiewski

-
Online courses
- All
 3ds Max
 AI - Artificial Intelligence
 Blender
 Corona renderer
 GstarCAD
 LayOut
 Photoshop
 Interior Design
 Revit
Revit Sketchup
 Stable Diffusion
 V-ray
V-ray
"Online courses" are comprehensive online training programs that will help you quickly master the software you are interested in.
- Plugins
- 3D Models
- Help
- Articles
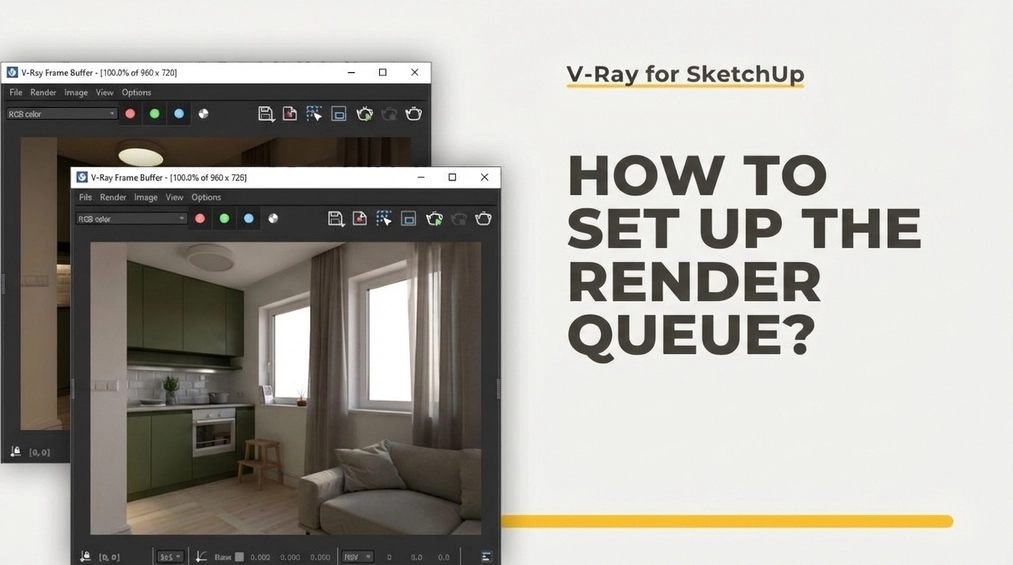
Sketchup - How to set up a render queue? Overview of the Batch Render tool
Batch render is a V-Ray feature that allows you to create a queue of renders so that you don't have to render each frame separately. To set up a render queue in SketchUp, start by creating a scene (the scene will remember selected settings, e.g. camera position, visible layers, and shadows). Add the views you want to render by using the "Add Scene" option in the "View/Animation" menu; some views, e.g. with different aspect ratios, cannot be rendered in the queue. In the next part of the article, you will learn how to exclude a scene from the queue and configure Batch render.
Presenting a project, we usually create more than one frame. Working on multiple views simultaneously can be time-consuming. Rendering one after another is simply tedious. To save time, you can delegate the rendering of multiple views in sequence to V-Ray, i.e., set up a render queue (a Batch render), leaving it, for example, overnight. In this article, I will explain exactly how to do it.
Scenes
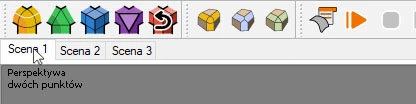
Let's start at the beginning by creating a view that you can always return to. We do this by selecting View / Animation / Add Scene from the menu bar at the top of the SketchUp window. This way, we add a tab named Scene 1. The next scene you create will be named Scene 2, and so on for all subsequent scenes. By clicking the newly created tabs, we switch to the chosen scenes, recalling their saved properties.
The transitions between scenes are controlled in the menu: Window / Model Info / Animation in the top corner of the SketchUp window. You can also access it from the View / Animation / Settings menu. Any changes made here will not affect the batch render settings, but they can help you navigate the software smoothly.
What properties does a scene remember?
A scene remembers the active Save Properties at the moment of its creation. These are:
- Camera Position - the most important feature responsible for the composition seen by both SketchUp and V-Ray;
- Hidden Geometry - irrelevant for V-Ray, but burdens the viewport in SketchUp;
- Visible Layers - the visibility of individual elements defined the same way in SketchUp and V-Ray;
- Active Section Planes - linked Sections in SketchUp and V-Ray, allowing, for example, to position the camera in a small room (learn more from our video How to render a section?);
- Styles and Fog - properties completely irrelevant to V-Ray, but affecting smooth navigation in SketchUp;
- Shadows - allow using different lighting conditions in scenes.
- Axis Location - not relevant to the topic of this article.
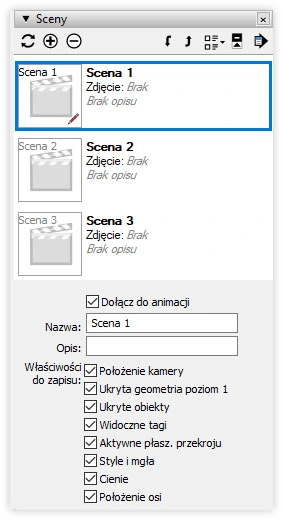
After going to the Scenes tab in the Default Tray on the right side of the SketchUp window, you can indicate which Save Properties will be “remembered” by individual scenes. Select only those that are truly important. Most often these are: Camera Position, Visible Layers, and Shadows. The other features should generally be turned off. Thanks to them, you can hide unattractive elements of the composition and create shots in the morning or at dusk.

What do scenes not remember?
Unfortunately, scenes in SketchUp cannot preserve information about V-Ray settings. Therefore, we will not be able to batch render visualizations that have different aspect ratios, use Custom Orientation with SunLight, or change the intensity of the same lights. The selected quality or engine settings, or even additional Render Elements channels, will be applied globally to all views.
You can, of course, use Layers and adjust the visibility of lights on individual Scenes (see the example above), but this does not solve all issues related to V-Ray. For now, you simply have to accept this limitation.
How to exclude a scene from the queue?
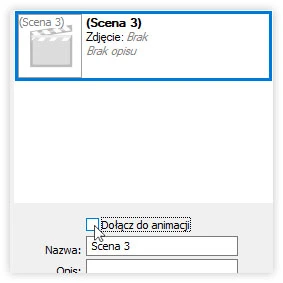
Fortunately, the solution is very simple. In the Scenes tab in the Default Tray, directly above the scene name, you can uncheck the Include in Animation checkbox. In SketchUp, these inactive scenes will have their names in brackets, but you can still switch to them and choose their Save Properties. V-Ray will skip them during rendering.
Render Output
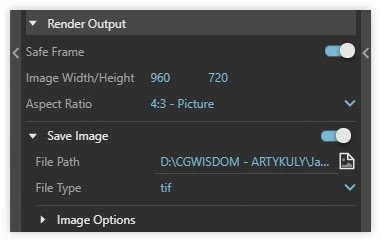
To start the rendering, you must first specify the format and path for saving the visualizations. This is done in the Render Output tab in the V-Ray Asset Editor settings. There, you choose the target format (lossless .tif or .png, or optimized .jpg) and select the appropriate folder where all the images will appear after the process is complete.
Batch render
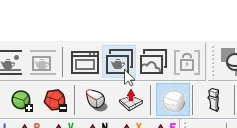
The final step is to select the Batch render icon on the V-Ray toolbar or choose Extensions / V-Ray / Rendering / Batch render in the top menu. This starts the process of rendering the selected views one after another. Depending on the chosen engine, V-Ray will first compute the Light Cache phase, and then perform the final denoising of each scene. You can stop this process at any time by clicking the Stop render icon, just like with traditional rendering.
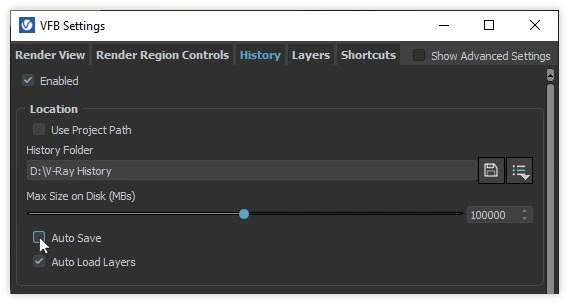
If, in addition to the raster files, we want to keep the visualizations in the V-Ray history, before starting the Batch render, you should enable automatic saving in the Frame Buffer. To do this, choose Options / History in the top menu of the V-Ray rendering window and select Save automatically.
After rendering is complete, the visualizations, along with all selected Render Elements, will be saved in the folder you specified and live (if enabled) in the V-Ray History. All that remains is post-production. If you want to do it directly in V-Ray, be sure to watch our film titled: How to change the color of an object in post-production?
Author

Przeczytaj o programie Sketchup na naszym blogu
-
![Unusual Shapes and Tiles in SketchUp – Gores, Hexagons, and Fans]()
Unusual Shapes and Tiles in SketchUp – Gores, Hexagons, and Fans
Hexagons and gores in SketchUp in 5 seconds? Discover how to model the most challenging tile shapes. Read now! -
![3 ways to create a floor in SketchUp – from texture to a 3D model]()
3 ways to create a floor in SketchUp – from texture to a 3D model
From a flat texture to advanced 3D. Discover 3 methods for creating a floor in SketchUp and uncover our reliable "gamechanger". Read on! -
![French and Classic Herringbone in SketchUp – how to do it quickly and error-free?]()
French and Classic Herringbone in SketchUp – how to do it quickly and error-free?
Manual herringbone installation is a nightmare! See how to automate this process in SketchUp and save hours of work. Click to find out! -
![Floor Generator for SketchUp not working? Discover the best alternative in 2026!]()
Floor Generator for SketchUp not working? Discover the best alternative in 2026!
Tired of Floor Generator errors? Discover the reliable Custom Ground Wizard plugin and create 3D floors stress-free. Read the article!
Want to learn Sketchup? Check out our free online course!